External Web Call
An External Web Call connects a flow to an external system, allowing you to send and receive information. An HTTP request allows you to interact with applications and code outside of SmartFlows.
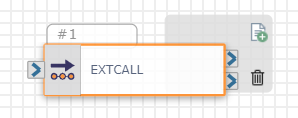
SmartFlows encrypts the External Web Call configuration at rest for additional security.
Note: This action cannot be used to initiate a new flow. If you need to launch another flow, use the Jump To action or Event Handler.
Check out the video below to learn more about using External Web Call to facilitate data persistence within your flow, or the Integration Quick Start Guide Sample Integration Flow for an example of how the action could be configured.
Available Variables
Available Variables are placeholders for information that are automatically determined based on the contents of your flow. For example, if your flow begins with an Inbound Call trigger, the caller's phone number is stored as a $ANI variable. Later on in your flow, you can send a follow up SMS to the caller by adding the $ANI variable in the Send SMS/MMS action Inputs.
Check out How to Use Variables in SmartFlows for more information.
Inputs
Headers
Use HTTP headers to pass additional information to the API endpoint with the request. Some things to know:
- Use them to add metadata to the request.
- The accepted headers are based on what is configured in the API endpoint and should be present in the API documentation.
- Authorization/key.
Authentication Type
Use the drop-down list to select basic authentication or OAuth 2.0 authentication.
Basic Auth
| Input Name | Description |
|---|---|
| Username and Password |
These fields support basic authentication in the event that it is required for access to the API endpoint. Token-based authentications can be supported by adding a customer header to the request. |
OAuth 2.0
| Input Name | Description |
|---|---|
| Grant Type* |
Currently, only "client credentials" is supported. *This field is required. |
| Scope |
Specify one or more pieces of source data the flow can access. For example, when connecting a flow to a CRM, users might need to confirm access to past purchases on their account, the contact information associated with their account, etc. |
| Client ID* |
Enter the OAuth ID provided by the source you want to connect your flow to. *This field is required. |
|
Client Secret* |
Enter the password provided by the source you want to connect your flow to. *This field is required. |
| Token Method* |
Currently, only "POST" is supported. *This field is required. |
|
Token URL* |
Enter the URL provided by the source you want to connect your flow to, in order to access the token. *This field is required. |
| Content Type* |
Currently, only "application/x-www-form-urlencoded" content is supported. *This field is required. |
Request
| Input Name | Description |
|---|---|
| Method* |
Indicates the action for the URL to perform per the API configuration. These methods are supported by SmartFlows but depend upon the specific API configuration. Note: Currently GET, POST, PATCH, PUT, and DELETE are available to support submitting information and extracting information, respectively. |
| Timeout* |
Set the timeout duration in seconds that SmartFlows should wait for the API response before failing the request. Must be a value from 1-100 seconds. The default is set to 10 seconds. Most requests are returned in less than a second. A best practice is to keep this to a short time window to prevent consuming capacity unnecessarily. |
| URL of Service* |
Enter the URL of the API endpoint here. Variables can be used inside URLs to target specific objects. |
| Content Type |
Select the format of the content being sent. Use "omit (no content type or body)" if you don't need to provide any content with your request, and the Body field will not appear. |
Body
Add the body of your request in the text box.
Note: If you are using the "omit (no content type or body)" Content Type, the Body text box will not appear.
For example, you could use the "PUT" Method to take caller information provided earlier in the flow, and send it to an internal CRM.
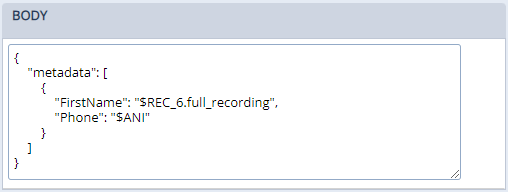
Note: Hover over the bottom right corner and click and drag your cursor to expand or shrink the text box, as needed.
Test HTTP Request
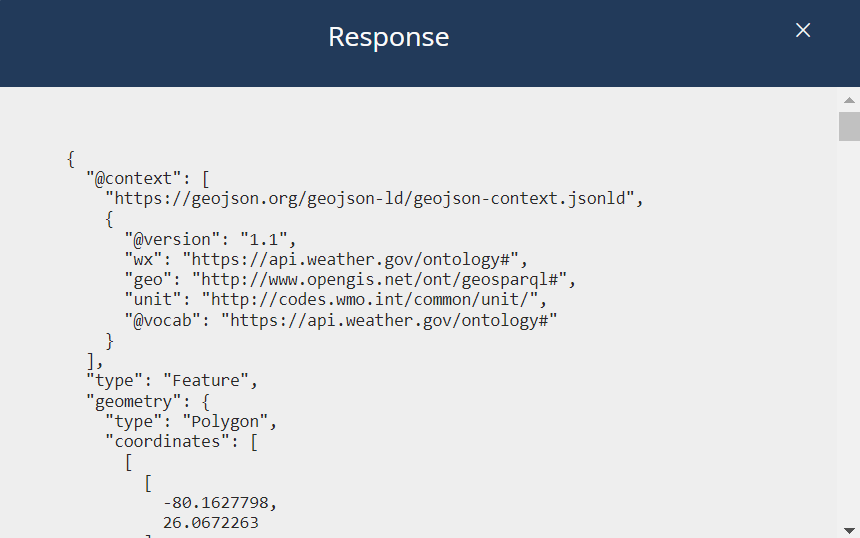
Once you have entered all of your desired web call configurations, you can test your request right in SmartFlows and preview the response using the Test HTTP Request button.
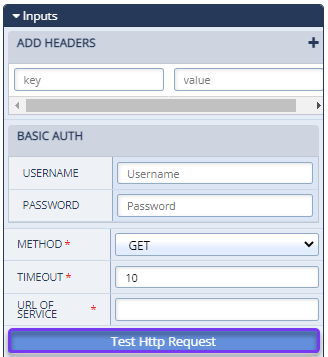
This feature will help you debug your configuration and get your integration up and running faster.
Response Variables
In this section you can extract elements from the web call response and turn them into reusable variables.
In the $ name text box, give the value you plan to pull from the response a descriptive label. In the query expression text box, type the exact property label that is returned in the response. For example, if you wanted to pull appointment date information from the web call response into your flow for use in an SMS downstream, in the name field you could label your variable "AppointmentDate" and in the query expression you would use the exact label from the response (e.g., "DateText").

This variable will appear in the Available Variables section of the action configurations panel in subsequent actions. Variables created here can be used in messages, text-to-speech, analytics, and other web calls. For example, to continue our scenario above, when you are configuring your Send SMS action later, you would use the variable $AppointmentDate to customize the message.
Note: Make sure to exactly match the case and formatting for the response label (e.g., if your web call response includes an appointment date with the label "DateText" you should use the same formatting in the query expression field. If you were to use "datetext" or just "date" in that field, the expected value would not come through). If you copy and paste the response label, make sure it does not include a line breaks or other formatting, which would also result in an error.
Play Hold Music
Click the Play hold music check box to add hold music to your External Web Call. When this check box is selected, default or custom hold music will play (on a loop) until a response is received.
The Configure Audio button appears after selecting the check box.

Audio Settings
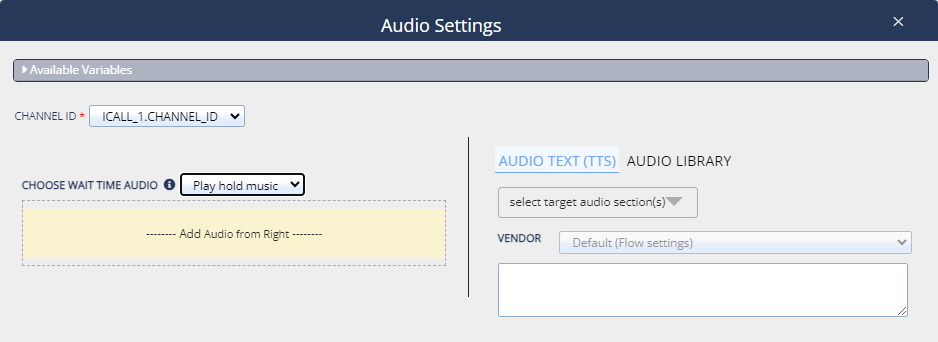
Default audio is automatically assigned in the Choose Wait Time Audio drop-down list. So if you want to use the default audio, no further action is necessary.
To add custom audio, select "Play hold music" from the Choose Wait Time Audio drop-down list and add your Text-to-Speech (TTS) or custom audio file on the right side of the pop-up.
Action
Each External Web Call action includes two exit ports corresponding to the following outcomes:
- On Success: The course of the flow if a connection was made (port 1)
-
On Failure: The course of the flow if the URL does not successfully return or has an error (port 2)
Generated Variables
A few variables are automatically created when your flow includes the External Web Call action. They are:
| Variable Name | Description |
|---|---|
| EXTCALL_#.responsebody | The entire response from the external API. |
| EXTCALL_#.statuscode | The response code generated from the API (e.g., 200 for success, 400 for bad request, 404 not found). |
| EXTCALL_#.user_naming |
User-configured response variables. This offers more granularity and allows the user to extract a subset of the response. For Example, to extract the value orderStatus from the API, add a response variable with that name to the External Web Call action. The query expression must be a literal match to the name sent by the API. |
Check out How to Use Variables in SmartFlows for more information about using variables in your flow.
Example Response
For more information about using the External Web Call action, check out: