Regional Routing
The Regional Routing action allows you to route calls based on logic about the region, time zone, specific area code, or even specific ANI (caller number).
You could place Regional Routing directly after an Inbound Call or Inbound SMS/MMS trigger in a flow to direct a customer to the correct contact center.
Note: The Regional Routing action only works on $ANI variables and only US regions are currently supported.
Build a set of logical paths based on multiple location-based criteria. In the right-side configurations panel for the action, open the Route by Type drop-down to view your options.
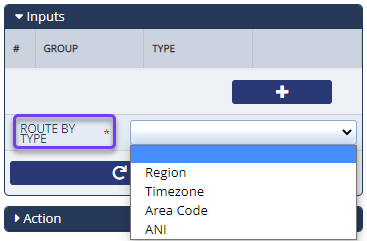
Region
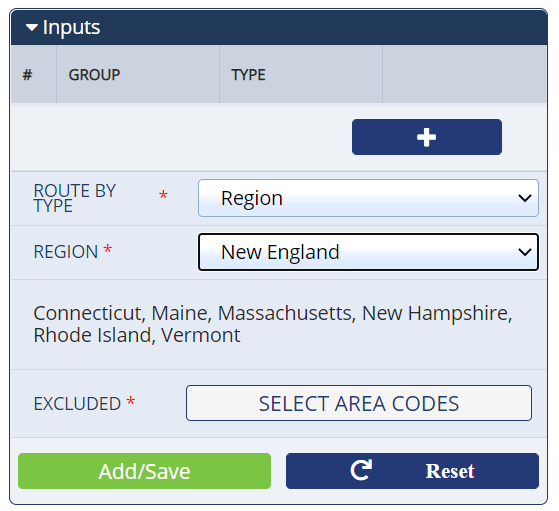
Select a Region (for example, New England) to view the states included in that area. You can also choose to customize the Region to exclude certain area codes by clicking Select Area Codes:
On this screen, you can select area codes you want to exclude from the Region. Selected area codes turn red.
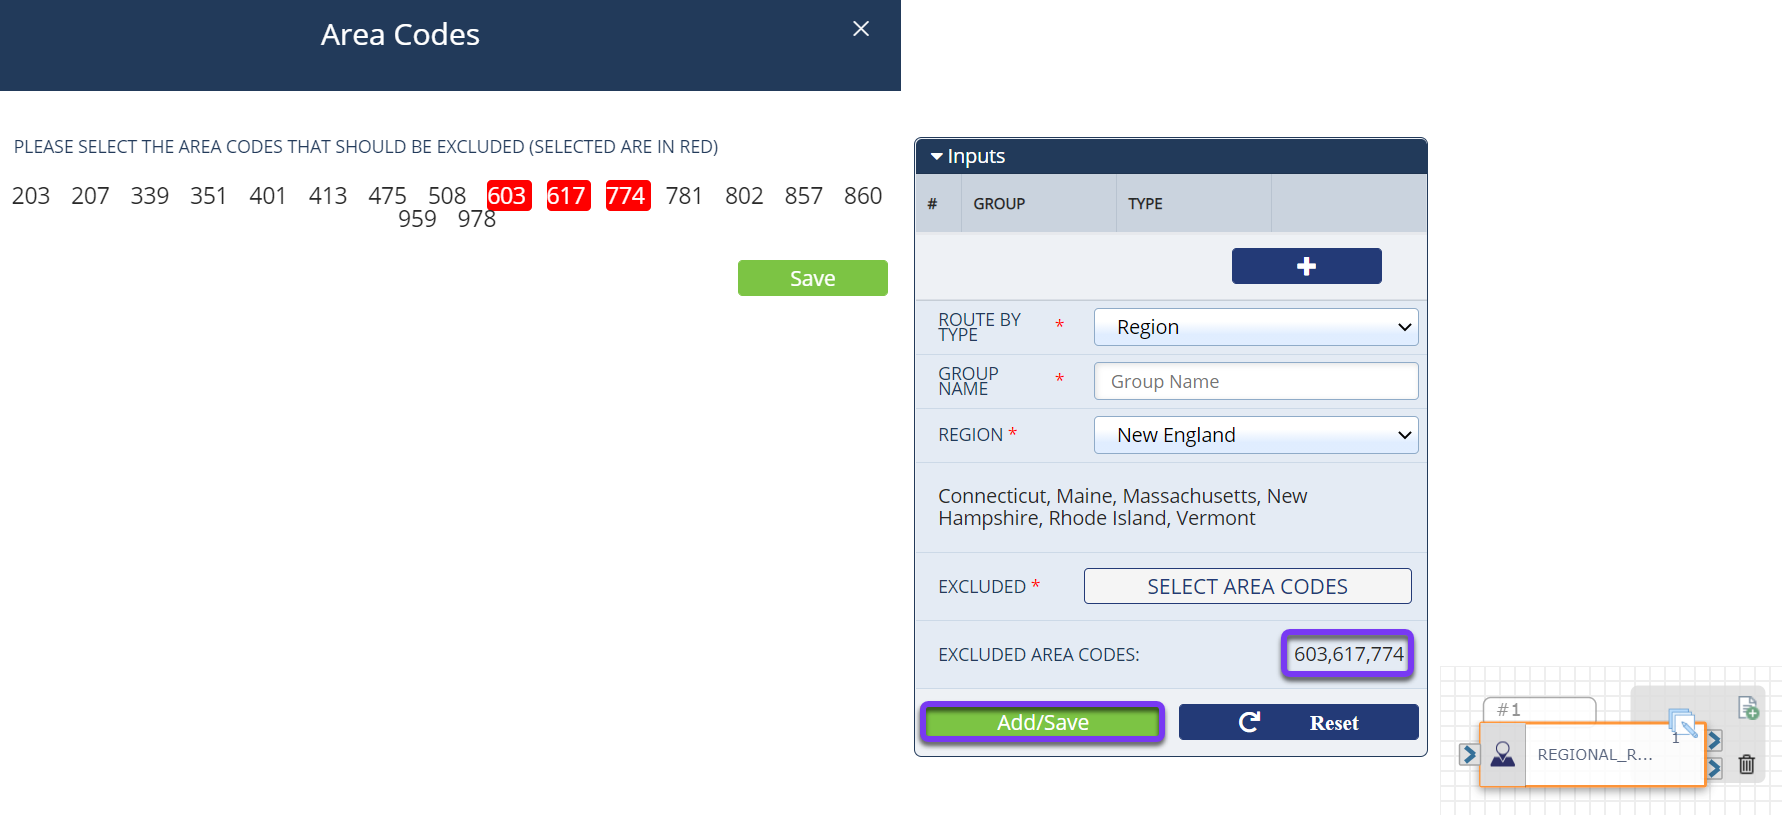
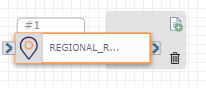
Once you’ve finished, click the Add/Save button, and there is now a new port on the left side of the Regional Routing action. Use this port to create the flow used when an inbound call from an ANI matching these criteria is received (e.g., route calls from New England to the most appropriate phone number, like a regional New England call center). You can continue to build more ports onto the Regional Routing action for any additional regions you need to support.
The last port on the action is reserved as a Default path, and it is used when other criteria are not met.
Time Zone
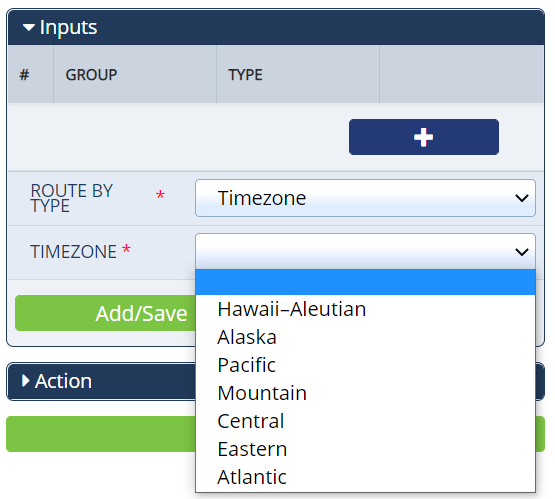
The time zone works in much the same way as the Region routing. Select Timezone in the Route by Type drop-down and select a time zone to configure routing for any call coming from an area code that falls within that time zone. As with Region routing, you also have the option to remove area codes.
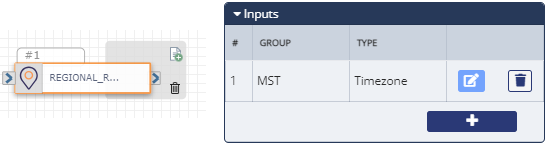
Click Add/Save to add the new port to the action so you can build the logic pertaining to the specific time zone. When you do this, you can see the new port. The number on the port aligns with the number in the # column in the Inputs section of the configurations panel.
Area Code
You can also create your own groups containing any set of area codes. This can be used to set up your own custom regions if our standard regions aren’t right for your business. To do this, select the Area Code option in the Route by Type drop-down. Then, you are given options to name your group (enter the desired name in Group Name) and define the included area codes. Add an area code by typing it into the Area Code field and clicking the Add Area Code button.

When you click the Add/Save button, the group is created and assigned to a new port on the Regional Routing action, like so:

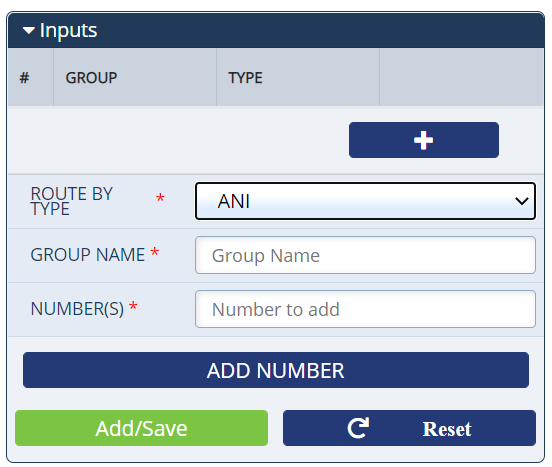
ANI
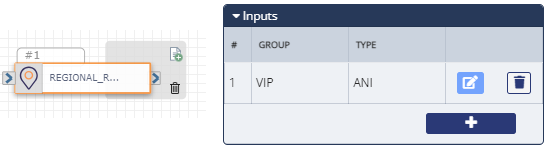
Using the ANI routing rule, you can create and name a custom rule to be used on specific incoming phone numbers. To use this, create a Group Name that is easy for you to reference, add the 10-digit phone number into the Number(s) field, and click the Add Number button. Then click Add/Save to create the new port on the Regional Routing action.
Action
Each Regional Routing action includes exit ports corresponding to each of the options added in the Inputs section. The final exit port, labeled Default, is the path the flow will take if a call doesn't fall within any of your added regions.
An action should be connected to each of the exit ports and the port order cannot be rearranged.