SmartFlows Quick Start Guide
This guide describes how to navigate and build workflows within SmartFlows. Learn more about:
Overview
SmartFlows is an intuitive platform that anyone can use to create and manage omni-channel communication workflows. Created by our team of customer experience experts, SmartFlows is flexible and powerful enough to create applications tailored to your specific business workflows and customer interactions. Whether you are in marketing, customer support, or just short on development resources, it’s easy to build, automate, and integrate communications anywhere your business needs it—no coding required!
Creating automated interactions is a breeze with SmartFlows. Simply drag and drop actions and connect them together into flows. Streamline business processes by integrating communications into your other business applications, such as CRM, marketing automation, contact center software, billing systems, and more.
Getting Started
Before you start building your first flow check out the SmartFlows 101 page for tips on planning out a flow.
Once you're ready to start building, log in to your account through the IntelePeer Customer Portal (https://customer.intelepeer.com). Our recommended browsers are the current or most recent versions of Chrome, Edge, or Safari.
Click the tile to open the SmartFlows application.
Navigating the Landscape
Terms
When using SmartFlows there are a few specific terms that you’ll need to know. We cover everything throughout this guide, but if you need to look something up quickly, you can find definitions in the SmartFlows Glossary.
SmartFlows Pages
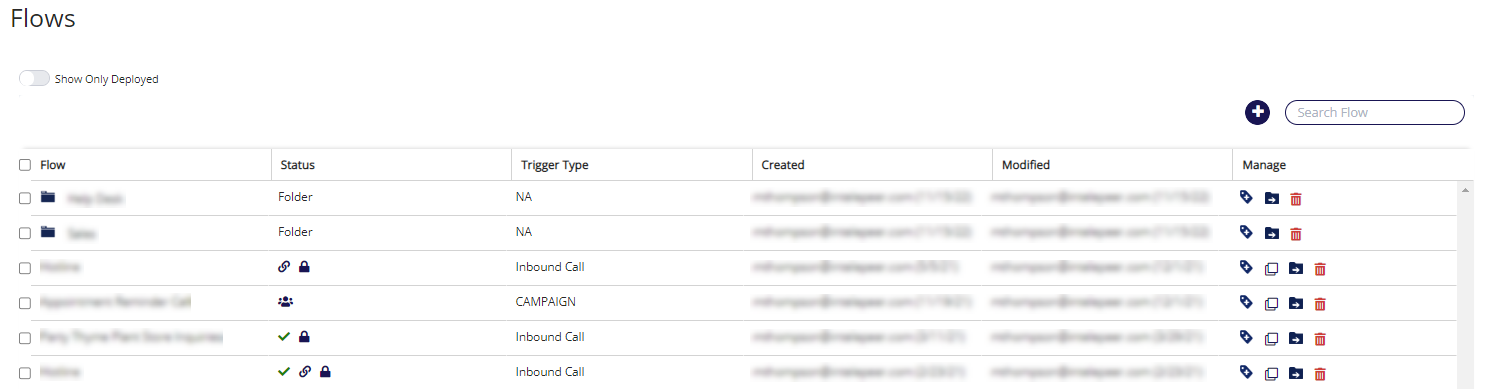
When you open SmartFlows, the Flows page displays automatically.
On the left-hand side of the screen, you will see five options:
- Portal – Return to the portal homepage.
- Flows – On this page you can manage your existing flows and create new ones.
- Audio Library – On this page you can upload and manage audio files.
- Assignment – On this page you can assign flows to phone numbers, short codes, and social messaging IDs.
- Report Metadata - On this page you can create and manage custom reporting KPIs.
This menu can be collapsed or expanded using the arrow at the top.
Building a Flow
A flow represents the overall journey that your end user experiences. Built by arranging actions on the board, flows are completely customizable.
You can create a new flow from scratch or start with a prebuilt template. Both can be tailored to your specific business needs through unique configurations.
From the Flows page, click the blue plus sign button above the flows table. Then select New Flow to build a flow from scratch, or Template to choose a prebuilt template.

Check out the How to Build a New Flow page for more details about building a new flow.
Using Templates
Templates provide a great foundation that can be customized to your specific configurations. You can add or remove actions and update Inputs to suit your needs. The SmartFlows Templates section of the documentation includes more detailed descriptions of the available Templates and the actions included in them.
Check out the How to Build a New Flow page for more information about building a flow from a template.
The Flow Editor
Whether you choose to build your flow from scratch or from a template, the Flow Editor will automatically open once your make your selection. This is where you customize your flow.

Encompassing the Actions Menu, Board, and Configurations Panel, the Flow Editor is where you control everything about your flow.
Actions Menu
On the left side of the Flow Editor, the Actions Menu is where you’ll find all available actions. Actions are organized in expandable categories and can be dragged from this menu to the Board in the middle of the screen. Check out the SmartFlows Glossary for a list and brief description of all available actions.
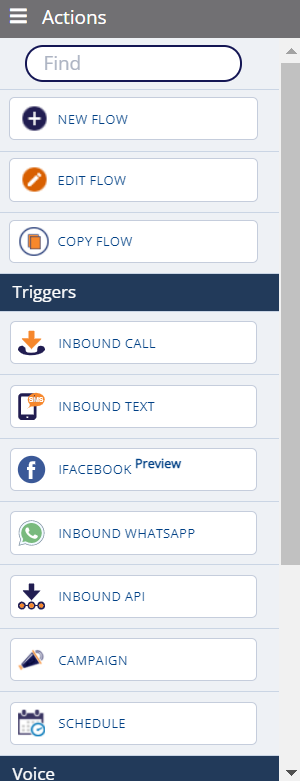
Click the three horizontal lines icon at the top of the menu to switch to the icons only view of the menu (this will also give yourself a little bit more visible space on the board).
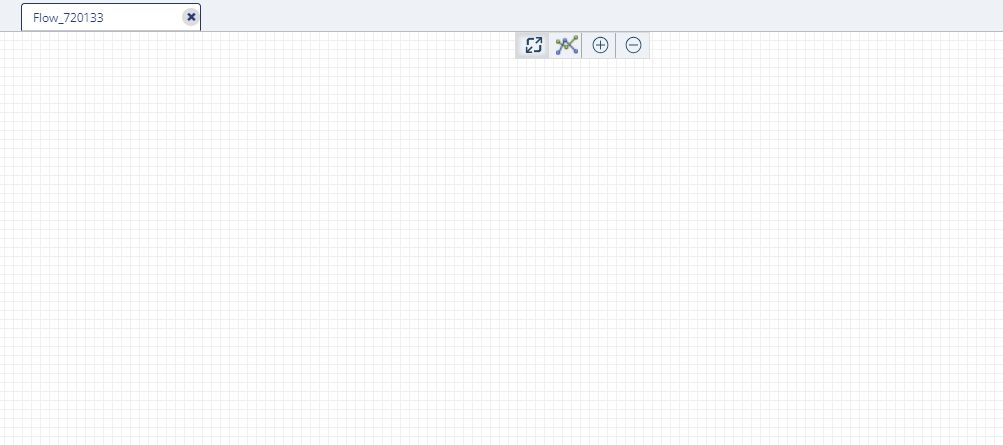
Board
In the center of the Flow Editor, the board is where you map out your actions. Drag the actions you need from the menu and drop them onto the board.
Configurations Panel
On the right side of the Flow Editor, the Configurations Panel is where you can set up overall flow or action specific settings.
Click on a blank space within the board to view and update overall flow details and settings.
Click on an action to view and update configurations specific to that action.
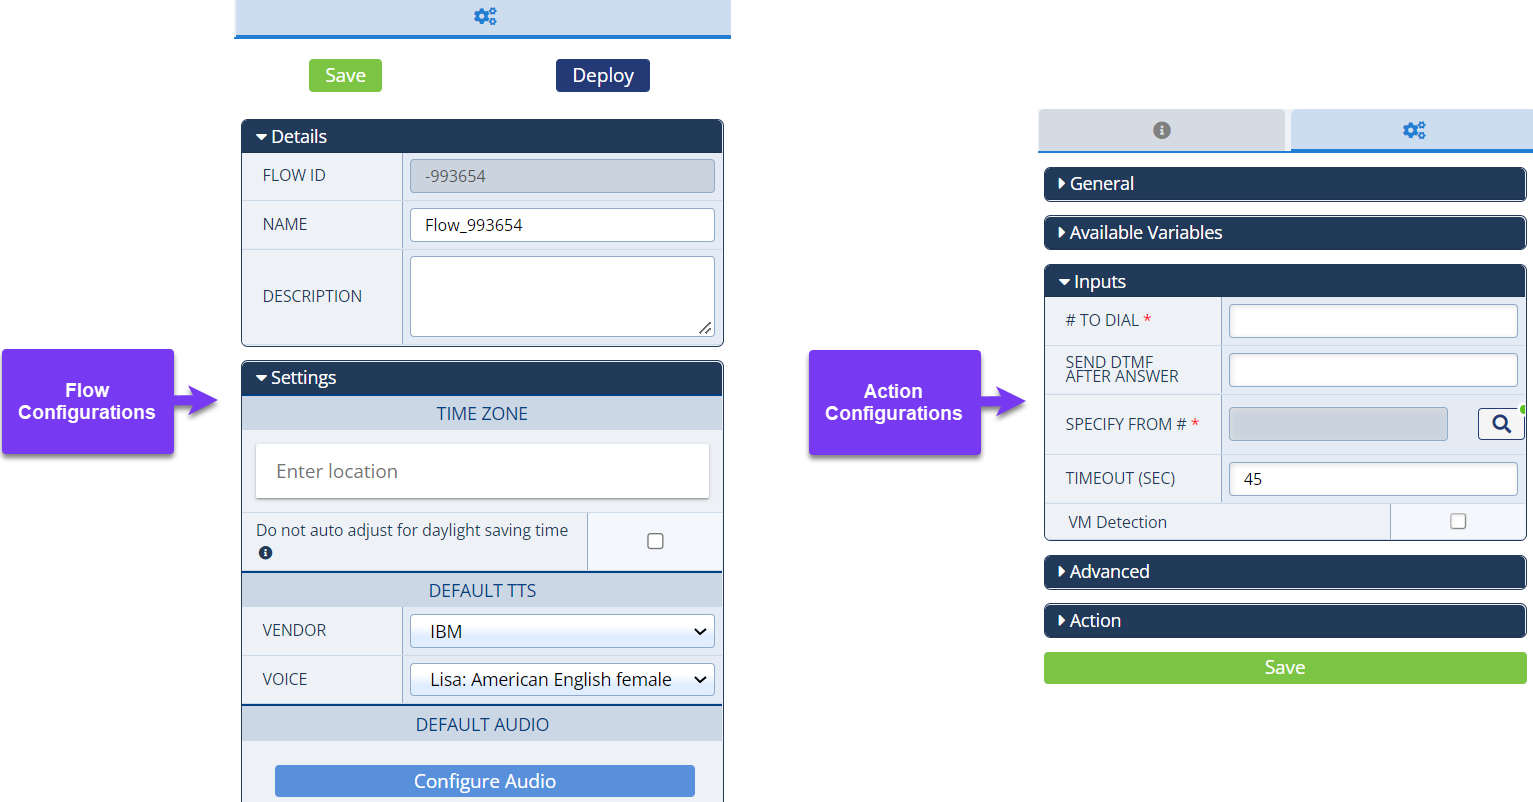
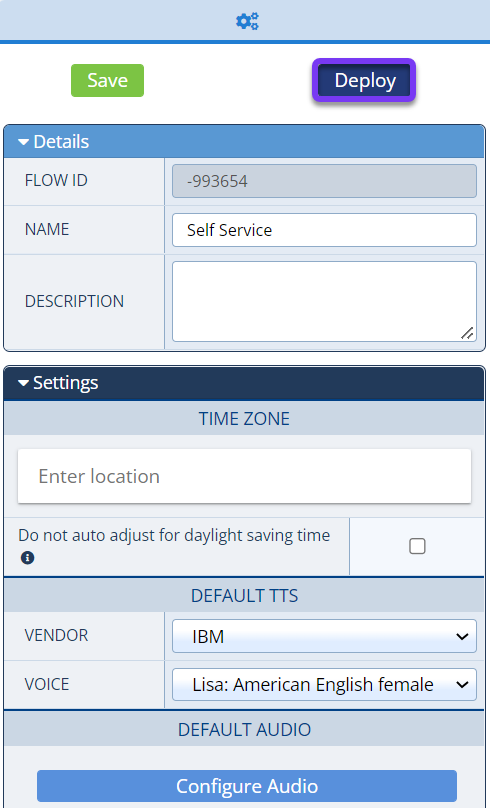
Overall Flow Configurations
Details:
- Flow ID: The specific ID for each individual flow.
- Name: Create a name for your flow.
- Description: Add a description.
Settings:
- Time Zone: Enter a location to select a time zone.
- Daylight Saving Time: Click the check box to exclude your flow from automatically adjusting for daylight saving time.
- Default TTS: Select default Text-to-Speech (TTS) settings so they do not have to be reconfigured in every action containing TTS capabilities.
- Vendor: Choose which cloud vendor you would like to use.
- Voice: Select the voice you would like your caller to hear.
- Default Audio: Configure audio settings for Timeout, Invalid, and Transfer across all actions within your flow.
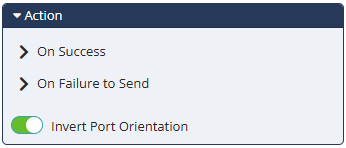
- Action Style:
- Click the Invert Port Orientation toggle to change which side the entrance/exit ports appear on for every action in your flow (by default exit ports appear on the right side of an action block, but when this toggle is on, the exit ports will appear on the left side).
- You can also change port orientation for individual actions via the action specific Configurations Panel.
- Click the Wrap Action Labels toggle to display the complete Name for every action in your flow.
- For if the toggle is off, the default Press or Say Name appears as “Press or S…”. When the toggle is on, the complete Name appears (“Press or Say”).
- Click the Invert Port Orientation toggle to change which side the entrance/exit ports appear on for every action in your flow (by default exit ports appear on the right side of an action block, but when this toggle is on, the exit ports will appear on the left side).
Event Handler
Configure any flow exit actions, such as a post call survey, API call, or notification. Learn more about custom post flow requests here.
Sharing
Select whether your flow should be public, private, or share it with specific users. For more information on collaboration within SmartFlows, check out the How to Share Your Flow page.
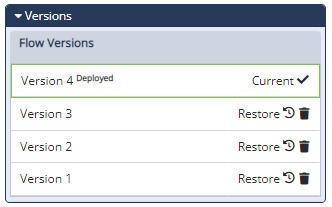
Versions
View and manage up to ten versions of your flow (i.e., one deployed version and nine saved versions). Click Save As at the top of the Configurations Panel to create new iterations of your flow. The most recent version of your flow is labeled “Current” and the most recently deployed version is labeled “Deployed” and outlined in green. You can rename, restore, or delete previous versions of your flow at any time.
History
View and revert back to past saved versions of your flow. Each time you click Save, Save As, or Deploy at the top of the Configurations Panel, a new iteration will appear in the Version History table. Once you surpass 15 iterations, the oldest non-deployed entry will disappear.
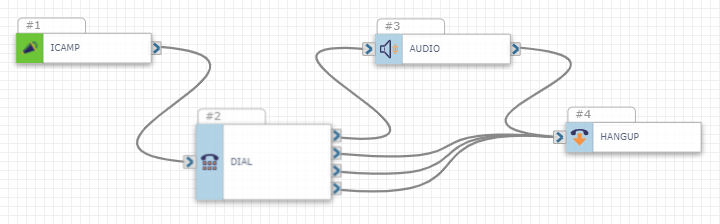
Adding, Configuring, and Linking Actions
When you’ve decided which actions you want to use, drag and drop them onto the board. Click on an action to view required and optional Inputs for that specific action in the Configurations Panel.
Have questions about an action? Click the information tab on the left side of the Configurations Panel to learn more, or check out the appropriate documentation page in the Actions section.
The order you add actions to your flow and where you drop them onto the board are a personal preference. What matters most is how you connect them. Link actions together by adding connectors. Connectors link actions through the arrows, or ports, on each side of the action.
Just click and hold on one port and drag the connector over to the other port. Once the port turns green you can let go and your actions are linked.
To change which side ports appear on, click on an action and then select the Invert Port Orientation toggle in the Action section of the Configurations Panel.
Deselect the toggle to return the port(s) to their original side.
To change which action a connector is linked to, click on the current port your connector is joined to, drag the connector to a new port, and release.
To delete a connector, just click on it and once it turns orange, hit the Delete key on your keyboard.
Note: If your action isn’t connected to anything, or orphaned, an error will appear when you save your flow.
Save and Deploy Your Flow
After all of your actions are added, configured, and connected, click Save. Your flow will automatically go through validation.
Errors
Any detected issues appear in the Errors section of the Configurations Panel and a red icon appears on the specific actions that need to be fixed.
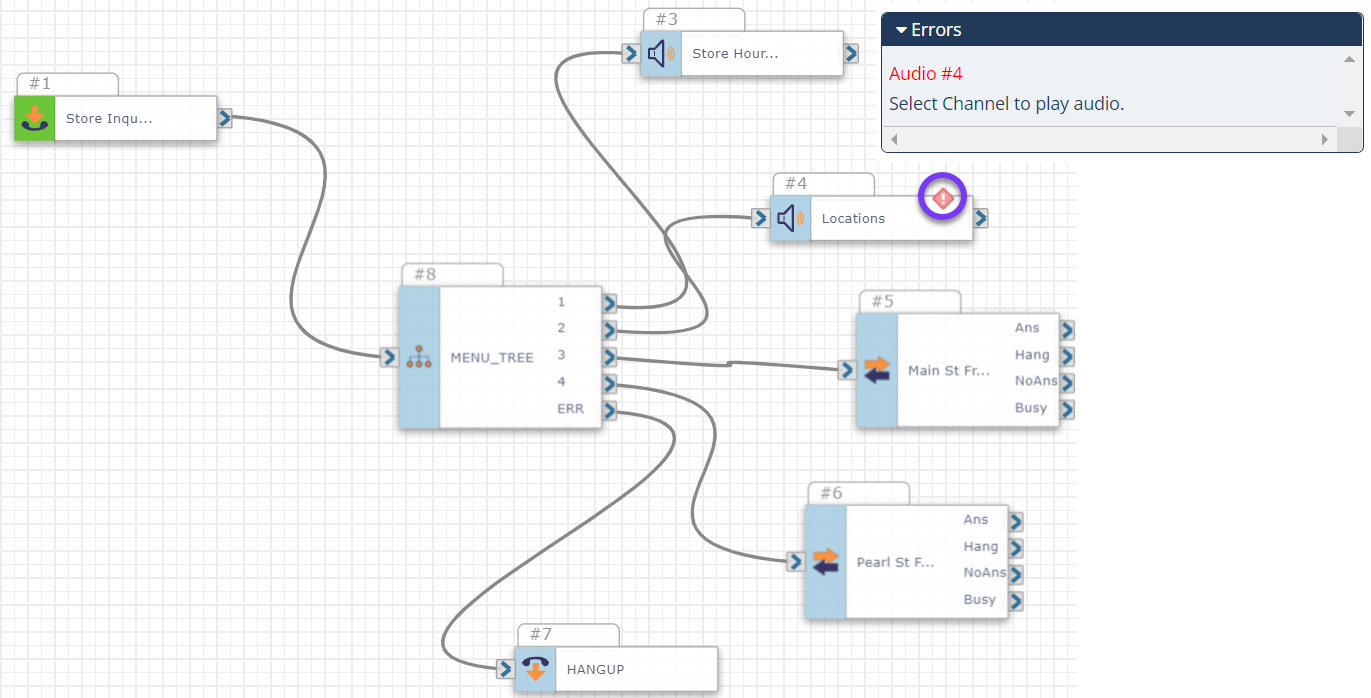
The descriptions in the Errors section list the problematic actions, in red text, along with an explanation of the error.
Most commonly, errors are caused when a required Input is skipped over or doesn’t align with downstream actions. Check out the How to Build a New Flow page for more details about common errors.
Deploy
After you have resolved any errors and are able to save without issues, Deploy your flow.
Assign a Number to Your Flow
Once your flow is successfully deployed you can assign a “number”, or method of contact, to it. This would be the inbound number, or what number a customer would dial, text, or message, to reach your flow.
A “number” could be a phone number, WhatsApp account, Facebook Messenger account, etc. connected to your account.
Note: If your flow is not deployed the Assign Number(s) button is disabled and you can’t assign a number to it yet, and not all flows require a number. For example, if your flow is triggered by the Campaign action you will not need to assign a number to it, but you will need to integrate it with a campaign.
To assign a number to your flow:
-
Click on the Trigger action.
-
From the Configurations Panel on the right, click Assign Numbers in the Inputs section.
-
On the Number Assignment pop-up window, search or scroll through the listed numbers to find the correct one.
-
Click the check box next to the number you want to use. The Assign Flow and Clear Flow(s) buttons appear at the top of the numbers table.
-
Click the Assign Flow button.
-
After the green success message appears, exit the pop-up window. The assigned number now appears in the Trigger action’s Inputs section.
-
Click Save.
Congratulations! Your flow is done!
Tips
-
Once your flow is fully configured and deployed we recommend waiting a few minutes, then trigger the flow yourself to test the experience (e.g., if your flow begins with the Inbound Call trigger action, call the assigned number and go through all of the available paths).
-
Each number can only be assigned to one Inbound Voice and one Inbound SMS flow (displayed on the Number Assignment pop-up). If the number you want to assign to your flow is already in use, you can override the current assignment by clicking the check box next to the number, then Clear Flow(s). This will break the previously assigned flow, so we recommend using a brand new number (unless you are 100% sure you no longer need the previously assigned flow).
-
If you make changes to your flow after it’s initially deployed make sure to Save and click Deploy again so the most updated version is available. Wait a few minutes after deploying your flow before retesting it to make sure the new version is live.
Integrating with SmartEngage™
While SmartFlows lets you build custom flows, SmartEngage lets you easily execute them. By creating your workflows in SmartFlows and using SmartEngage to send outbound communications, you have the ability to connect with your audience in an effective and personalized way.
Check out How to Integrate SmartFlows and SmartEngage for more details.
Integrating with Insights
Once your flow is set up and deployed, you can measure its effectiveness with Insights.
Filter your data by time (start date, end date), results, and more to uncover trends and make improvements.
Check out the Insights Quick Start Guide for more details.