The Audio Library Page
This guide describes the audio management elements found on the SmartFlows Audio Library page. From this page, you can:
Overview
Audio files added to any of the flows on your account are stored in the Audio Library.
Voice narration, sound effect, and music files added to the Audio Library can be used in your flows via actions with sound capabilities (e.g., Menu Tree, Play Audio, Transfer, etc.). For more details about how to add audio files to an action, check out the Configure Audio Settings page.
Search for an Audio File
Use the search box above the table to find a specific audio file by name.
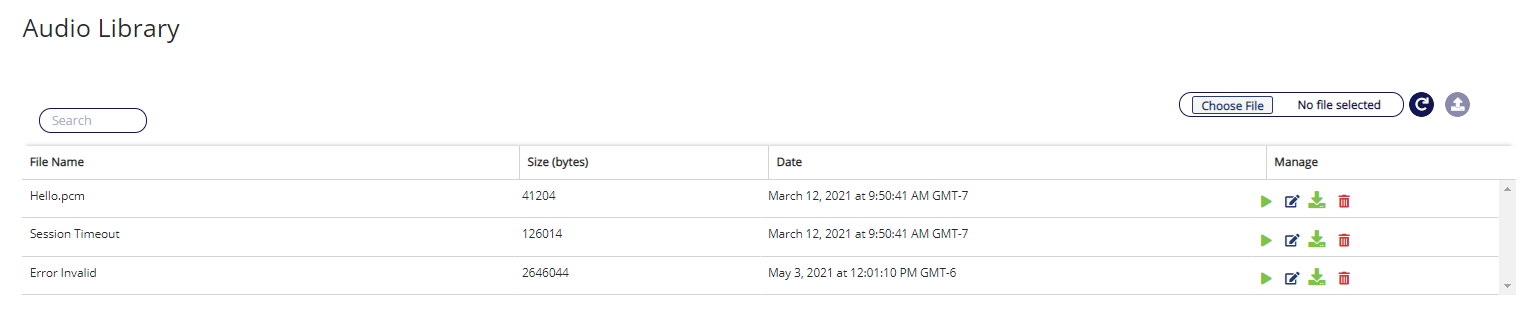
Audio Table
All audio files added by you or anyone else on your account are displayed in the audio table.
In the Manage column, you can play an audio file, edit the File Name, download the file to your computer, or delete the file.
Note: You cannot change the name of a file currently being used in a flow. If you delete an audio file it will be gone forever. Please triple check before deleting a file.
Add New Audio Files
Note: Only audio files in .WAV format can be added to the Audio Library.
To add new audio files:
-
Click the Choose File button above the audio table.
-
Select one, or multiple, .WAV audio files from your computer.
-
Click Upload to save the files to the library.
Note: If you chose a file by mistake and don’t want it to be uploaded, click the Reset button instead.
-
A green completed successfully message appears at the top of the page once all of your selected files are added.
Note: If you are adding a large number of files, the upload process will take a few minutes to complete.
Once your .WAV file is successfully added to the Audio Library it’s automatically converted to .PCM file format and a new row appears in the table.