Configure Audio Settings
Multiple actions in SmartFlows allow you to play audio during a call. You’ll find the blue Configure Audio button in the configurations panel for Menu Tree, Transfer, Play Audio, and more.

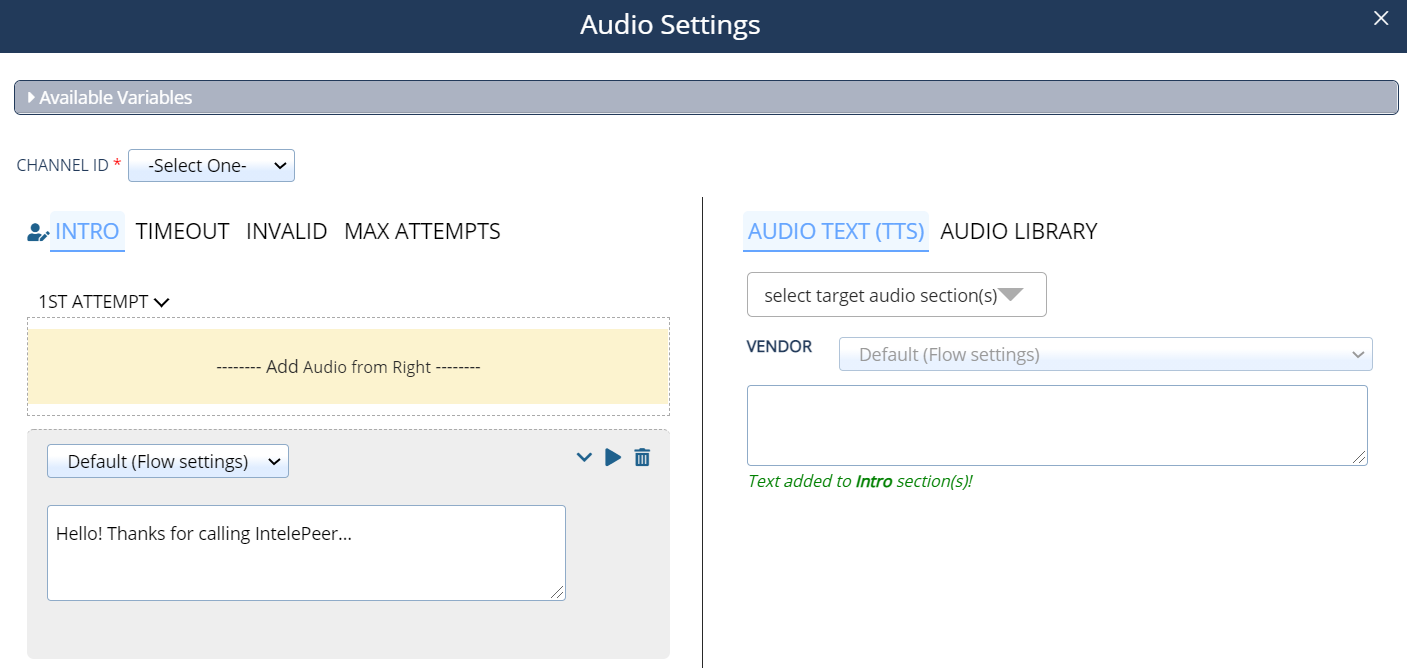
Once you click Configure Audio, you see a pop-up menu called Audio Settings.
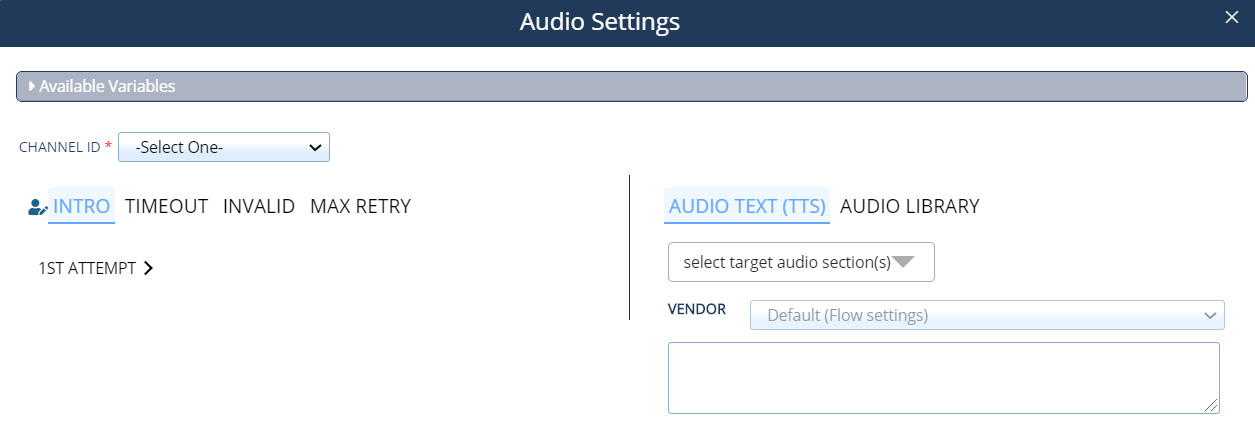
You have the option to configure two different types of audio: Text-to-Speech (via the Audio Text (TTS) option) or previously recorded audio files (via the Audio Library option).
Note: You must include audio for each available section and attempt to save your flow without errors and deploy it. You can use the same audio for multiple sections and attempts, but we recommend differentiating between them for the best possible caller experience.
Audio Text (TTS)
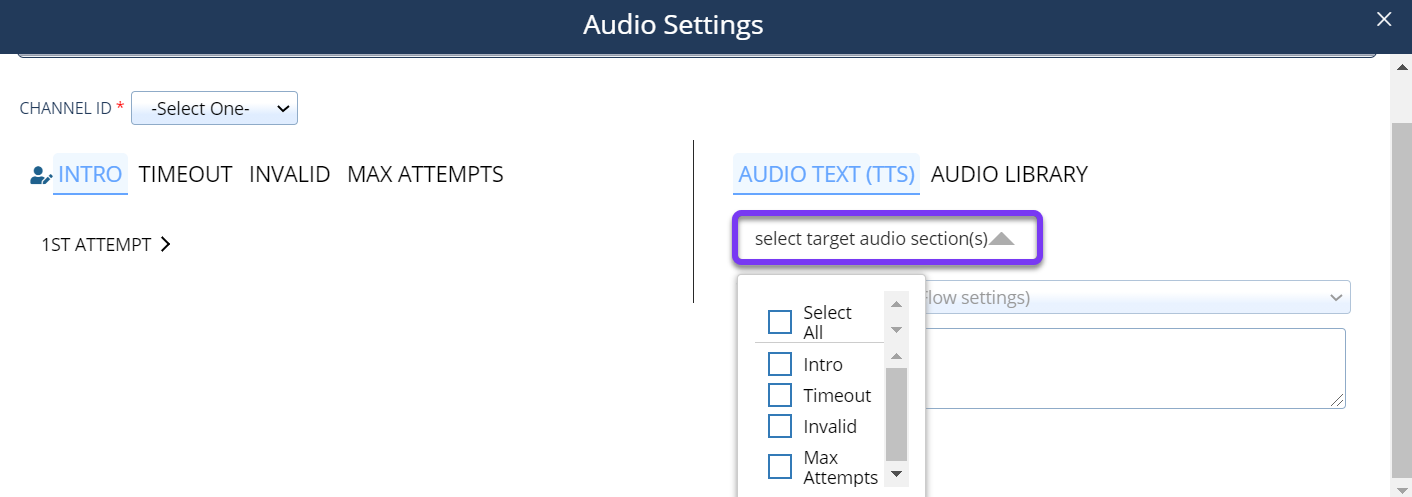
Some actions with audio capabilities include multiple sections and you can include different audio for each section (e.g., for the Menu Tree action you can include different audio for the intro message vs. invalid entry message).
Depending on the action, you may see a drop-down list to select the appropriate section(s) and configure different audio for each.
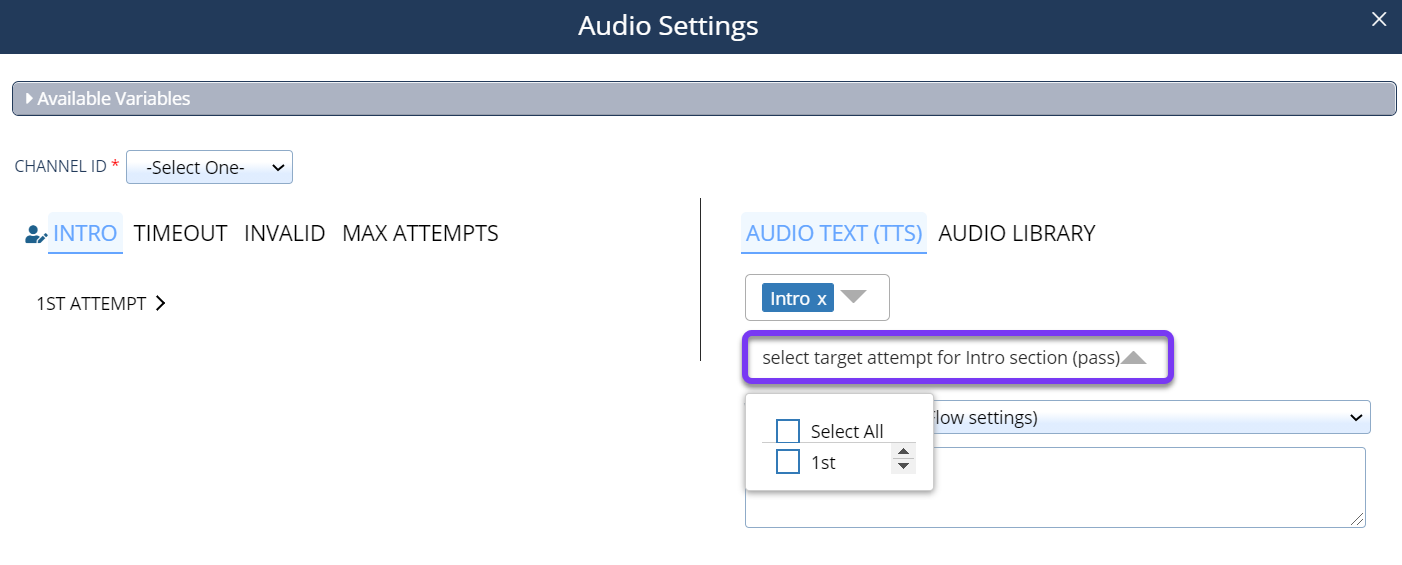
You can also add different audio to a section for each attempt.
Note: The available options in the target attempt drop-down list depend on the value in the Max Attempts field of the action Inputs section.
Next, choose default settings or your preferred Vendor and Voice:
- Vendor: AWS, Google, IBM, or Microsoft. The system default is AWS.
- Voice: Options are available for English, Spanish, Portuguese, Japanese, German, French, and Italian.
Finally, type the message you would like to be played into the text box, and click the blue plus sign to the right of the text box.
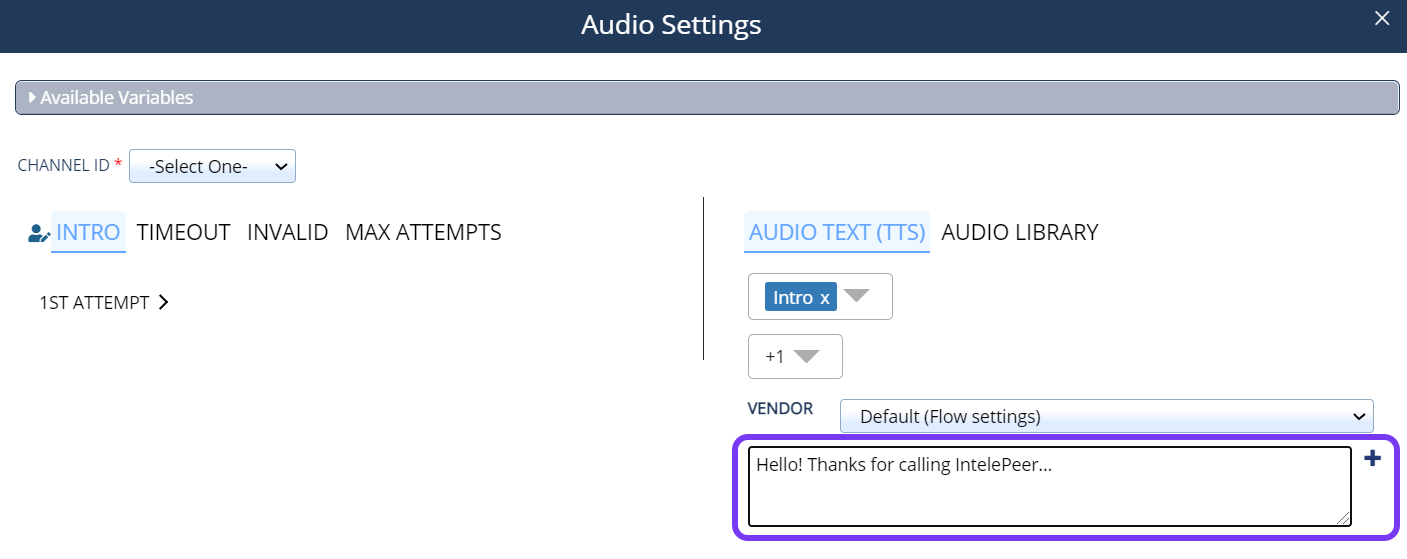
Your message is added to the flow.
Audio Library
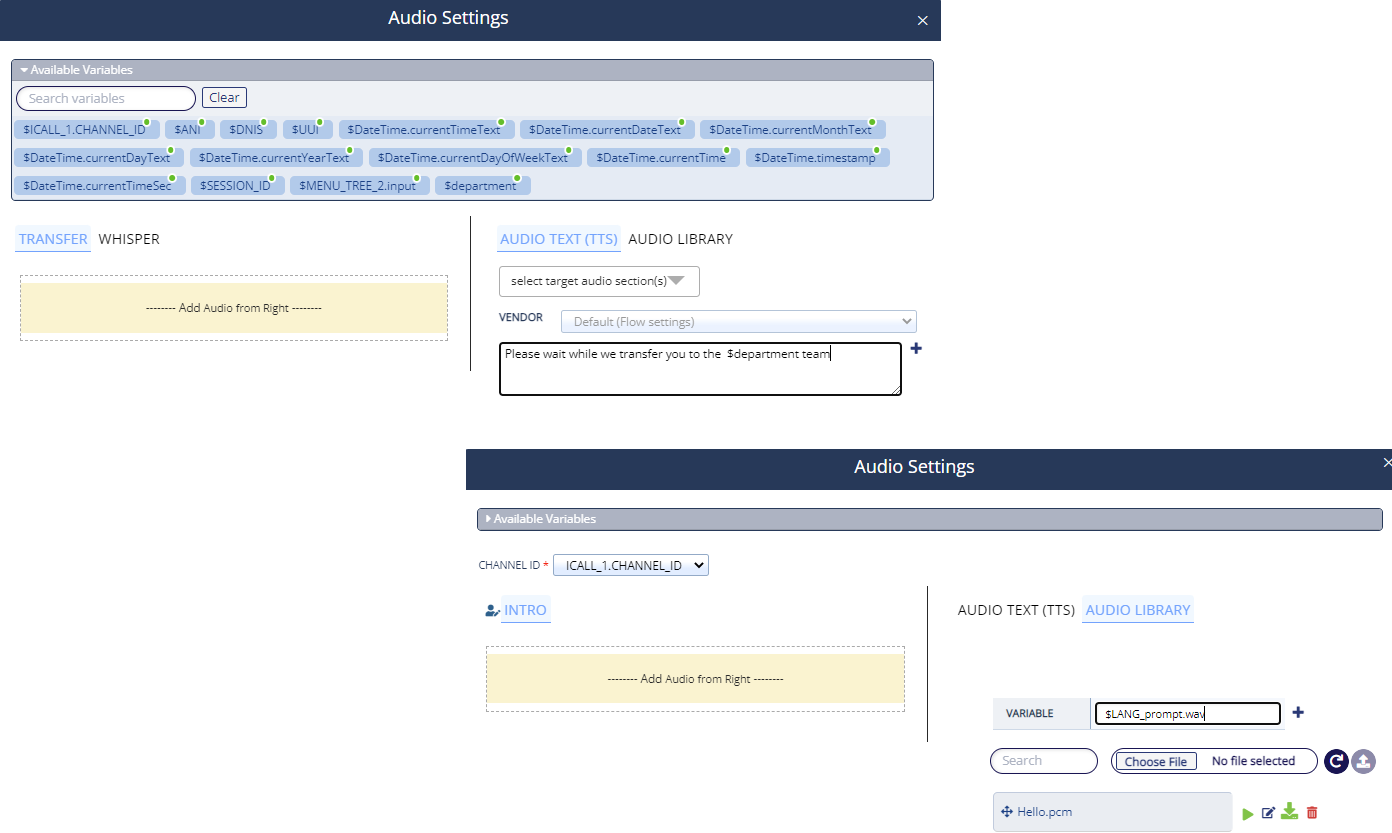
Add a new file to the audio library or choose an existing file and drag and drop it into the left side of the window to add it to your flow.
Check out the Audio Library Page for more information about managing your existing audio files and adding new ones via the Audio Library page.
Using Variables in Audio Settings
You can also include variables as a dynamic placeholder in audio messages. For Audio Text (TTS), add variables in your TTS message via the text box. For Audio Library, use the Variable field to add a file name with a variables inside. Check out How to Use Variables in SmartFlows for more information.
Once you’ve added the audio you would like to play, close the Audio Settings pop-up and continue building your flow!