SMS / MMS Messaging Quick Start Guide
Note: Multimedia Messaging Service (MMS) is currently available for SmartCommunicator and will soon be available for SmartFlows, Engage, and APIs.
Overview
You can get started with the Messaging APIs in just a few steps.
This guide walks you through the process of:
- Logging in and accessing the SMS/MMS Application in the IntelePeer Customer Portal
- Enabling numbers for sending and receiving SMS/MMS messages through the Messaging API
- Viewing message statistics through reports
Once you have enabled one or more numbers for SMS/MMS, you can use the Messaging API to quickly send an SMS/MMS message.
Be sure to check out the following:
-
API Basics to learn about basic requirements for using the Messaging API
-
SMS/MMS Message Management to discover the features of the Messaging API
-
Understanding MMS Messaging to learn about the unique qualities of MMS messages
Logging In and Accessing the SMS/MMS Application in the IntelePeer Customer Portal
Note: For information on the Multimedia Messaging Service (MMS), check out Understanding MMS Messaging.
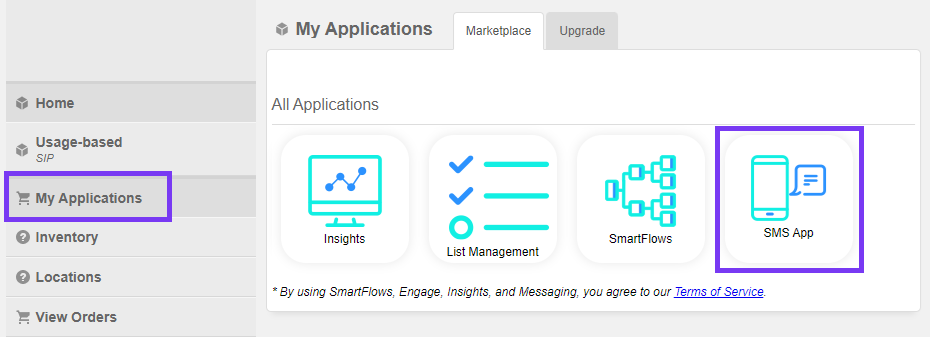
Log into your IntelePeer account through the IntelePeer Customer Portal. Once you receive the Welcome email for SMS/MMS, you see the SMS API Managment tile. You can access the SMS app by:
-
Clicking the SMS API Management tile on the main page, or
-
In the left side bar, click My Applications and click SMS App. Once you receive the Welcome email for SMS/MMS, you see the SMS API Managment button.
The first time you open the SMS/MMS Application, the IntelePeer Customer Portal asks you to authorize the application to access and make changes to numbers in your account. Click Authorize to continue.
Enabling Numbers for SMS/MMS
Click the SMS API Managment button to launch the SMS Management application.
To get your Customer API Key, click the gear icon at the top right, then the Get Key button. Your API Key then populates for use in your own code. Be sure to save your API Key in a safe place as it is hidden after it is generated.

You can set the expiry date (1 month, 6 months, or 1 year) by clicking the drop-down arrow next to the Get Key button.
Secret Input lets you set a password for enhanced security on incoming messages from IntelePeer. Be sure to click the Save button after you have set your Secret Input.
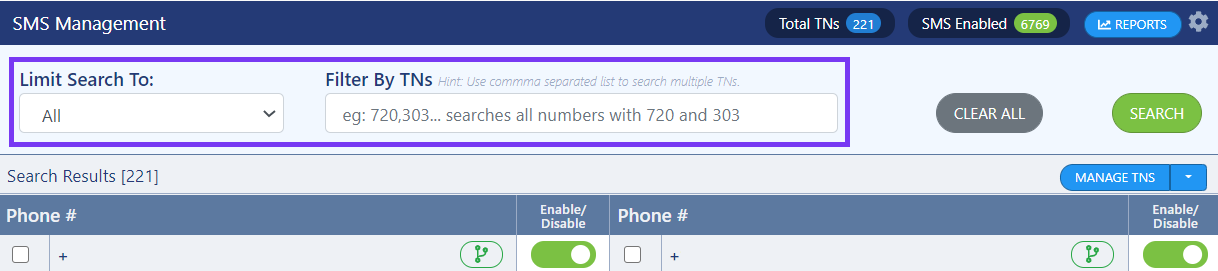
On this screen, you also see the current inventory of your IntelePeer numbers which may be enabled for SMS/MMS. You can search for numbers by using the Limit Search To drop down menu or typing in to the Filter By TNs search box.
To enable/disable numbers for SMS/MMS using the SMS Management Application, simply click the Enable/Disable slider next to the number. A blue spinner wheel with text indicates the system is enabling/disabling your number(s)—you are able to continue to work on other numbers while the system is processing. Icon turns green once number is enabled.
If the number was unable to be enabled/disabled in the provisioning process, the slider turns red and a pop-up instructs you to contact our NOC for support – don’t worry, we have experts available 24x7x365!

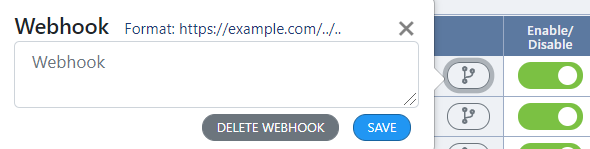
Once the number is SMS/MMS-enabled, a gray webhook icon appears.
To set the webhook, click the icon, enter the URL endpoint, and click Save. The webhook icon turns green after it has been set. You can also delete webhooks in this screen by clicking Delete Webhook.
You can enable all numbers or set all webhooks by clicking the Manage TNs drop down and clicking Enable All or Set All Webhooks.

You can also enable numbers set webhooks for specific numbers by clicking the check box next to the number(s) you want and then clicking the Manage TNs drop down and clicking Enable Selected or Set Selected Webhooks. Click TN Reports to view reports for selected numbers.

Check out the SMS/MMS Message Management page, Securing Inbound SMS/MMS Webhooks section for details.
Reporting
Insights
Explore your Messaging data and improve customer communications with the Insights Messaging dashboard.
For more information about using Insights, check out the Insights Quick Start Guide.
Customer Portal Reports
You can also view reporting for all numbers in your inventory through the Customer Portal by clicking the blue Reports button in the top right corner of the screen.

You can filter by Report Period (1 day, 7 days, or 7 days summary) or Date (select using calendar).
Example Report
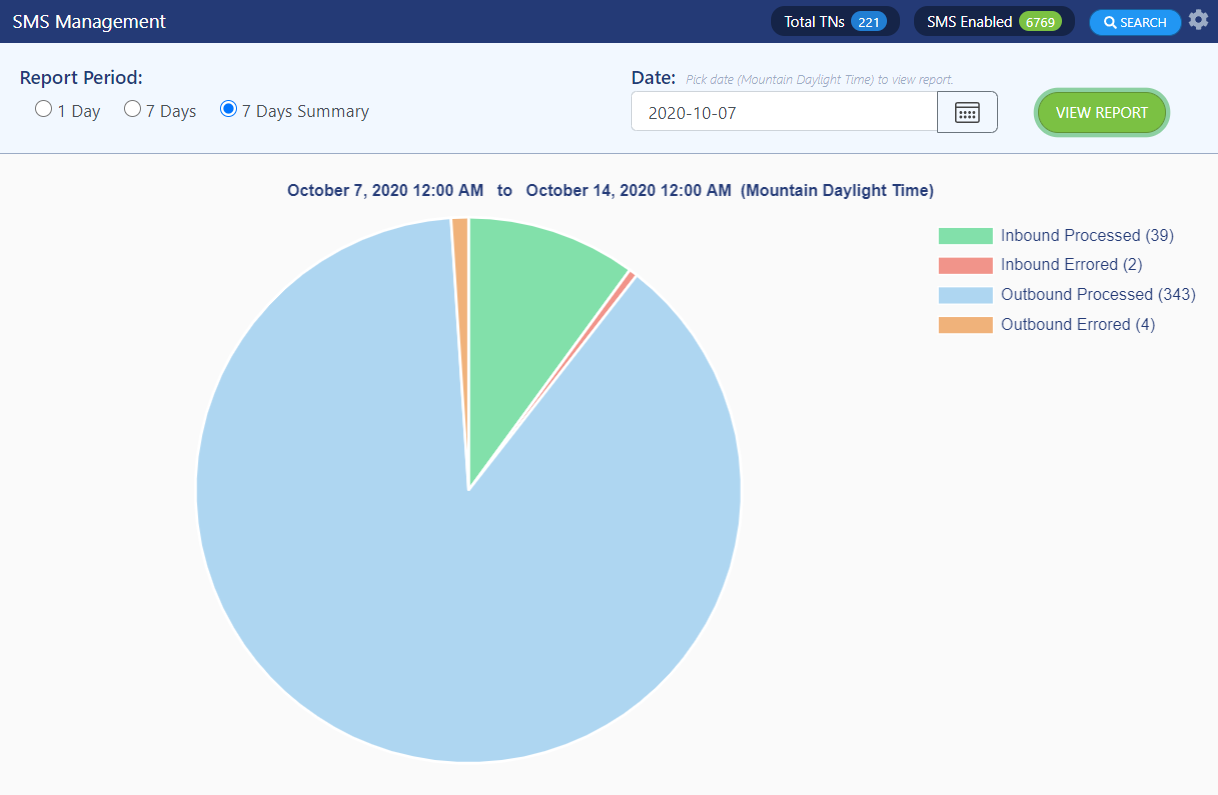
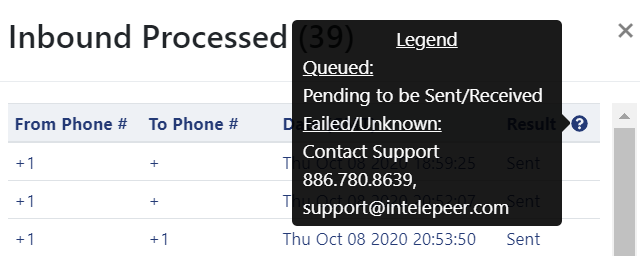
To view details, select Report Period (1 day, 7 days, 7 days summary), then click a bar/line/pie chart slice. A pop-up with details appears on the screen.
There is also a ? help button with a legend to explain the table results and next steps.