SmartEngage™ Quick Start Guide
This guide describes how to navigate and build a campaign within SmartEngage. Learn more about:
Overview
SmartEngage is a simple and effective way to run omni-channel campaigns powered by SmartFlows. This ready-to-use application allows you to focus less on the technical side of building campaigns and more on engaging with your target audience. Teams across the enterprise can build campaigns and manage the process of communicating with audiences all in one place.
It’s becoming more and more difficult to attract the attention of your prospects and contacts. So, it’s important your outreach is timely and precise. Using SmartEngage you can keep your focus on your messaging and scheduling rather than spending time or resources on coding.
Getting Started
Log in to your IntelePeer account through the IntelePeer Customer Portal (https://customer.intelepeer.com).
Click the tile to open the SmartEngage application.
Learning the Landscape
Homepage
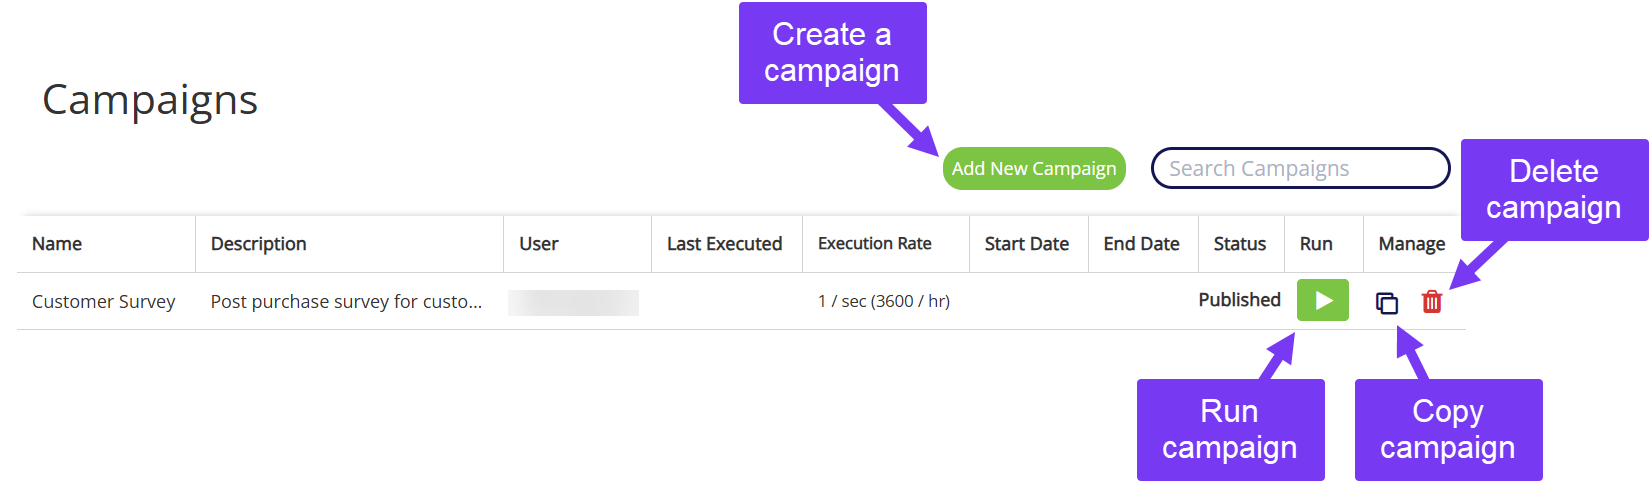
When opening SmartEngage, you're automatically brought to the Campaigns homepage.
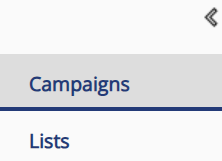
At the top left-hand side of the screen a collapsible menu allows you to navigate between a few pages.
|
|
Create a Campaign
To create a new campaign, click the Add New Campaign button above the table on the Campaigns page. The New Campaign form opens.
Note: The first time you open the New Campaign screen, a dismissible welcome message appears at the top of the page.
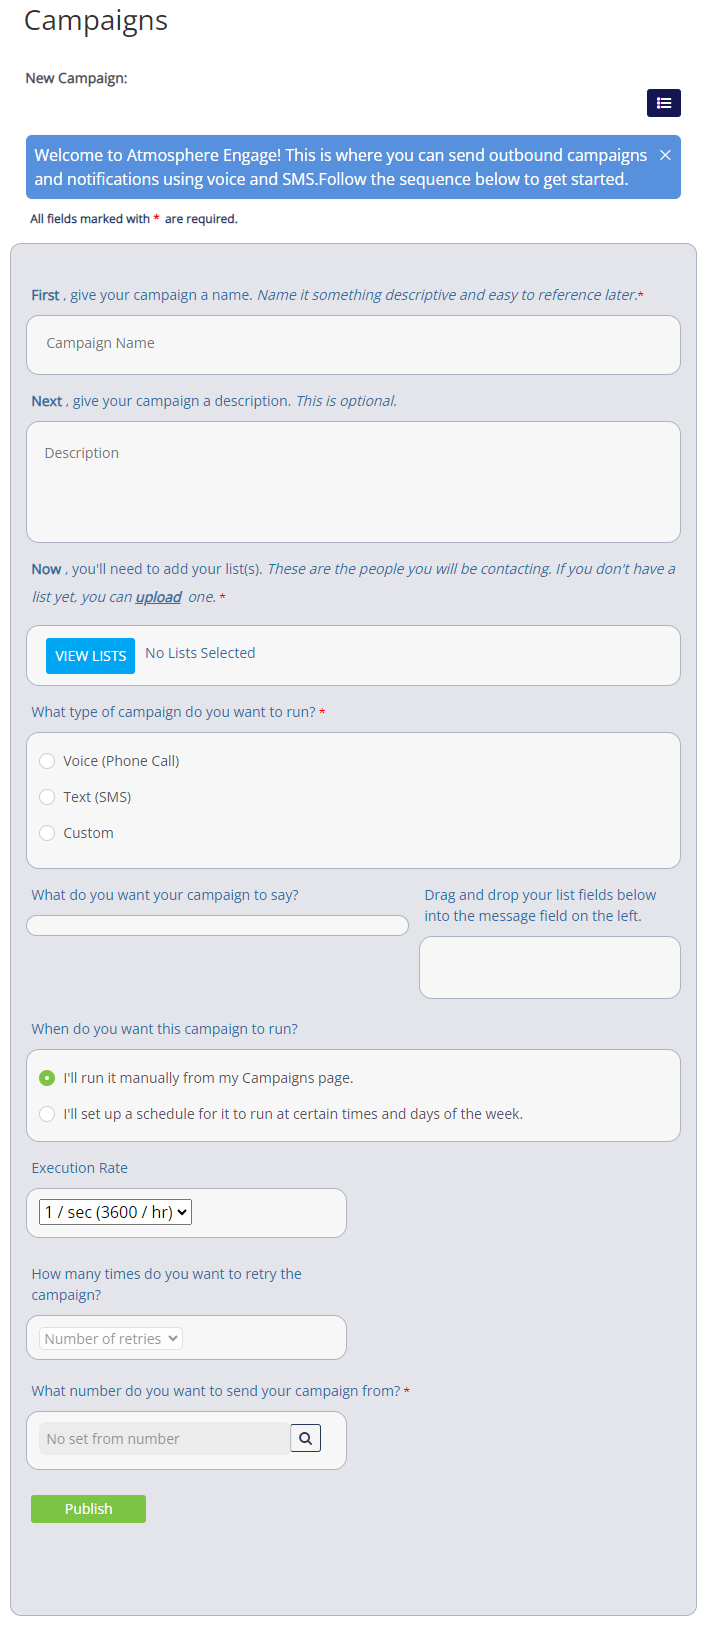
Fill out the form. Fields with an * are required and your campaign can only be published if they are filled out. However, you can click the Save Draft button at the bottom of the form at any time to save your progress.
- Name your campaign.
- The name appears in the table on the homepage and on the top of the form (New Campaign:).
- Provide a campaign description.
- This field is optional. If you choose to provide a description, it appears in the table on the homepage once the campaign is saved.
- Add your list(s).
- The list determines the campaign recipients.
- Click View Lists to choose one or multiple previously uploaded lists from the Campaign List Table pop-up.
- Or click upload to create and upload a new list.
- See the Campaign Lists section below for more information.
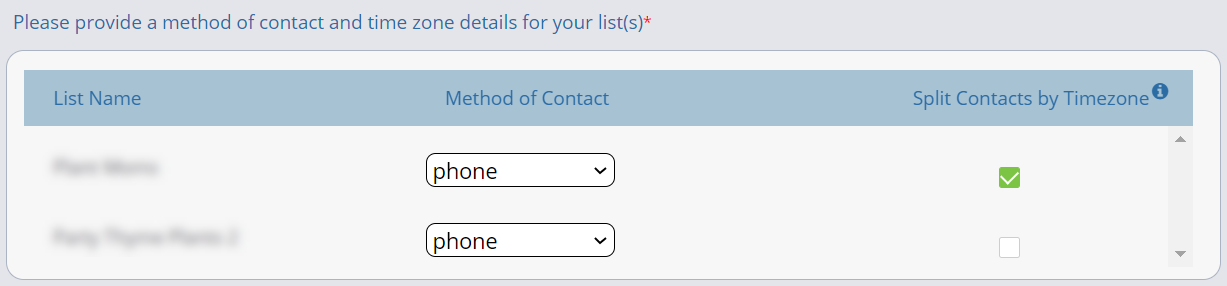
- Choose a Method of Contact and timezone details for your list(s).
- After you upload or select your lists, a table appears with a row for each list.
- Select the appropriate Method of Contact from the drop-down for each of your lists.
- Click the Split Contacts by Timezone check box for each list that you want recipients to be contacted at the appropriate local time (based on area code).
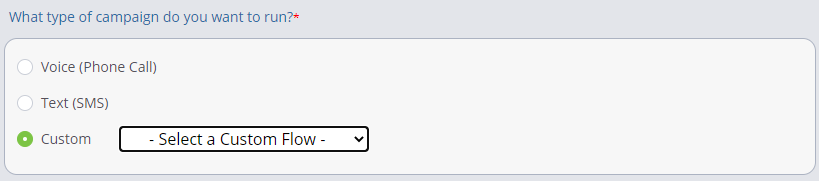
- Select the type of campaign.
- You can send your campaign out via Voice (Phone Call), Text (SMS), or Custom (via a customized SmartFlow).
- For a Voice campaign, select Outbound Call.
- For a Text campaign, select Outbound SMS.
- For a Custom campaign, select a previously created SmartFlow from the drop-down list. See the Integrating with SmartFlows section below for more information.
Note: If you select a SmartFlow for your campaign and later edit the flow, you must update your campaign to reflect any changes. Simply select the campaign from the homepage and reselect the SmartFlow from the drop-down list.
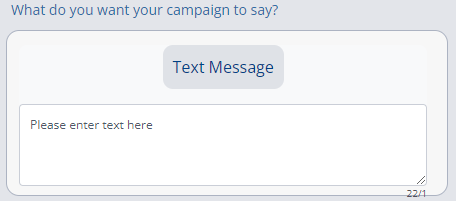
- Create or edit the content of your campaign.
- This section automatically updates based on the type of campaign you selected. The content can be edited within this field, if needed.
- In the example below an Outbound SMS Text campaign was selected and you can enter your campaign copy in the text box.
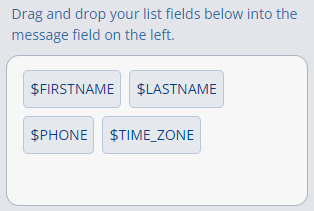
- View your list(s) headers and add them to your campaign message as needed.
- This section is automatically filled based on the list(s) you selected. The headers can be added to your campaign content by dragging them into the message on the left.
- In the example below four headers were included in the selected list and can be used in the campaign.
- Decide when you want to run the campaign.
- You can choose to run the campaign manually from the homepage or set up an automatic schedule for future deployment.
- Use the Schedule Builder to select the campaign start and end dates and time windows.
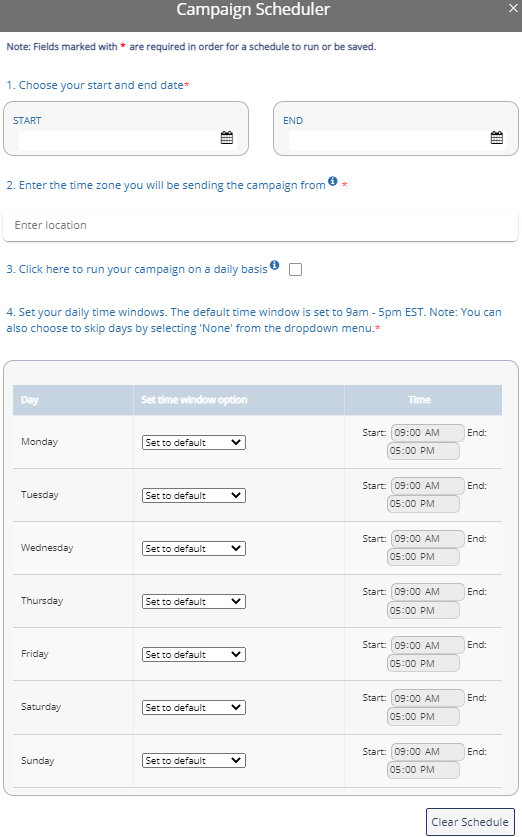
For any day of the week you don't want to run the campaign, select "None" from the Set Time Window Options drop-down.
The Clear Schedule and Save Schedule buttons appear at the bottom of the Campaign Schedule window:
Click Save Schedule then Publish to set your campaign to run on the day(s) and time(s) selected. The campaign status is then set to Scheduled and automatically runs according to your specifications.
Click Clear Schedule to erase any previously selected day and time specifications.
- Update the campaign Execution Rate if needed.
- By default, campaigns have an Execution Rate of one call or SMS per second (which works out to 3600 per hour).
- If your campaign requires a different Execution Rate, select the appropriate value from the drop-down list.
- Administrator users see additional Execution Rate options that aren’t available for all users. If an Administrator assigns one of these restricted options to your campaign, it will appear grayed out when non-administrators view the campaign form.
- Changing the Execution Rate:
- If the Execution Rate was initially assigned to a restricted option by an Administrator, a non-administrator can’t update it. An Administrator would have to reassign a non-restricted Execution Rate first, and then any user can update the Execution Rate as needed.
- To change the Execution Rate for a campaign that is currently running, select a new value and publish your changes.
- Navigate to the Campaigns page.
- Optional: If you want to pause your campaign before making an update, click the blue Pause button in the Run column.
- Click on your campaign to open it.
- Select a new value from the Execution Rate drop-down list.
- Click the Publish button at the bottom of the form.
- Do NOT click Save as Draft. This will not successfully set the Execution Rate to the new value for a running campaign.
- Navigate back to the Campaigns page.
- Optional: If you chose to pause your campaign previously, click the green Resume button in the Run column.
- Navigate to the Campaigns page.
- System response time for Execution Rate changes:
- If your campaign Execution Rate is "2000 / hr" or slower and you change the rate while the campaign is running, the new Execution Rate will generally be in effect in less than 60 seconds (i.e., up to 60 seconds worth of contacts may have been queued for execution and will continue to be executed at the previous rate before it was changed).
- If your campaign Execution Rate is "1 / sec (3600 / hr)" or faster and you change the rate while the campaign is running, there may be up to 60 seconds worth of contacts queued for execution at the previous rate, which will continue to be executed. Additionally, the campaign may start being sent out at the new Execution Rate immediately after the 60 second queue at the original rate is completed, or there may be an additional wait time to queue up contacts at the new Execution Rate. This is dependent on real-time network conditions.

Note: The Execution Rate dictates the first attempt to reach your campaign contacts. If a contact can't be reached in the first attempt, retries are executed at a rate of 1/second regardless of your campaign's Execution Rate. Retries are queued independently based on the Retry Interval field, described below.
Note: Depending on the number of contacts, the specified time window (per the Campaign Scheduler), and the selected Execution Rate, your campaign may require more time to complete than can be accommodated by the first scheduled date/time, and the remaining contacts will spillover to the next scheduled day/time. To avoid spillover, adjust the Execution Rate and time windows to align with the number of contacts in your campaign.
There are a few things to keep in mind if you have to change your campaign Execution Rate after it's initially set.
- Select how many times you want to retry your campaign.
- After you select a number of retry attempts greater than 0, the Retry Interval field appears to specify the time between attempts.
Note: This field is not editable if you have elected to manually run your campaign, described above. Different retry values are available depending on your account. If an admin sets this field to a value greater than 5, it will be read-only for non-admin users.
- Assign the number that you want to send your campaign from.
- Click the magnifying glass icon to choose a number from your inventory.
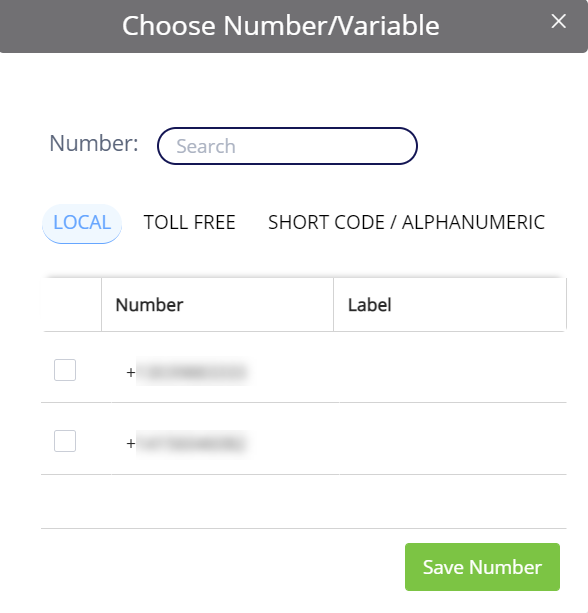
- From the Choose Number/Variable pop–up you can search for a number or view your available Local, Toll Free, or Short Code/Alphanumeric numbers by category.
Note: Only CPaaS-enabled numbers will appear in the pop-up. Enable a number for CPaaS use through the CPaaS Portal or the IntelePeer Customer Portal.
- Click Save Draft or Publish.
- Save Draft:
Your campaign now appears on the homepage in Draft status and can be completed or edited at any time.
- Publish:
Your campaign is validated to ensure all required fields have been completed. Once it passes validation your campaign is ready to run!
If you elected to manually run your campaign: Click the Run Campaign button to immediately run the campaign or click the green arrow button on the homepage at any time to run the campaign. The campaign status is Published.
If you scheduled your campaign: Your campaign automatically runs according to your day and time specifications. The campaign status is Scheduled.
- Save Draft:
Run a Campaign
Navigate to the Campaigns homepage. All existing campaigns are listed on this page. Campaigns in Published status have a green ‘Run’ arrow button on the right. Click this button to execute the campaign. The status is automatically updated to Active while it's running.
Note: Scheduled campaigns don't have a Run button because they are already scheduled to deploy at a specified time. Their status is Scheduled, automatically updating to Active while running.

Pause a Campaign
To immediately stop running a campaign in Active status or prevent a Scheduled campaign from deploying on the start date/time, click the Pause button on the Campaigns page.

Note: If you Pause or Stop your campaign while it's running, some contacts may have already been queued for execution and your campaign may continue to run for up to 60 seconds after clicking Pause or Stop.
Once you are ready to continue with a paused campaign, click the Resume Campaign button.
Campaign Lists
Lists determine who receives your campaign. You can find your lists on the Lists page within SmartEngage, or on the List Management page on the Portal level. Any lists you previously created on your account appear in both places. On either page you can view all existing lists, create and upload a new list, add contacts to an existing list, or delete a list.
Create and Upload a New List
Note: These steps are only applicable for creating a new list via the Lists page within SmartEngage. Check out Managing Lists in the CPaaS Portal for more information about creating a new list on the Portal List Management page.
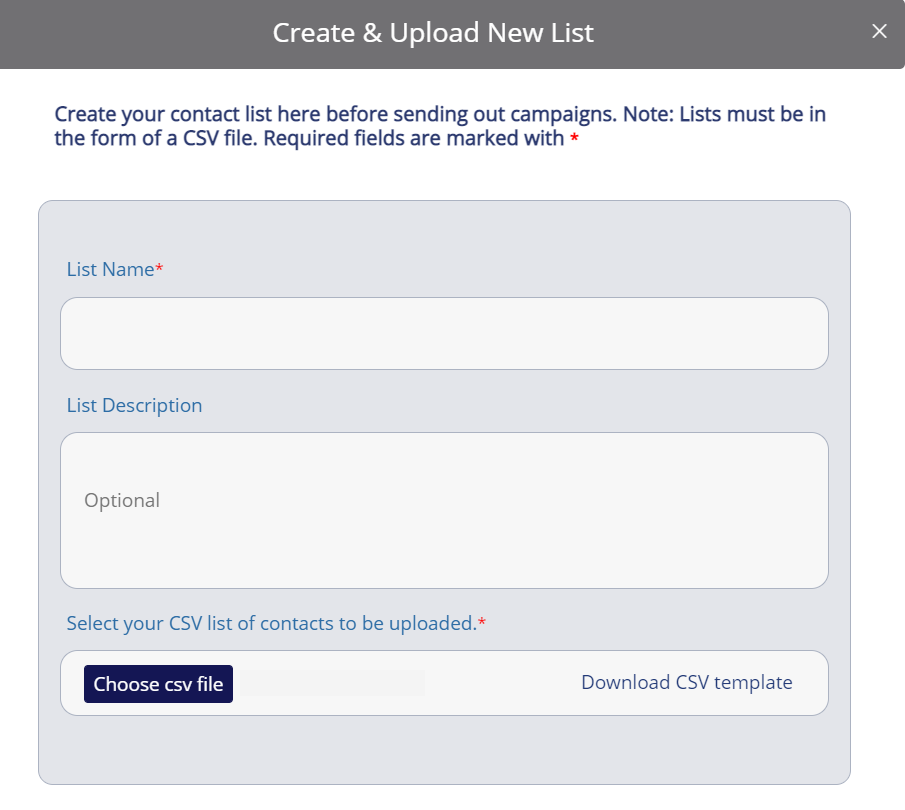
To create and upload a new list, click Add New List above the table. The New List form opens.
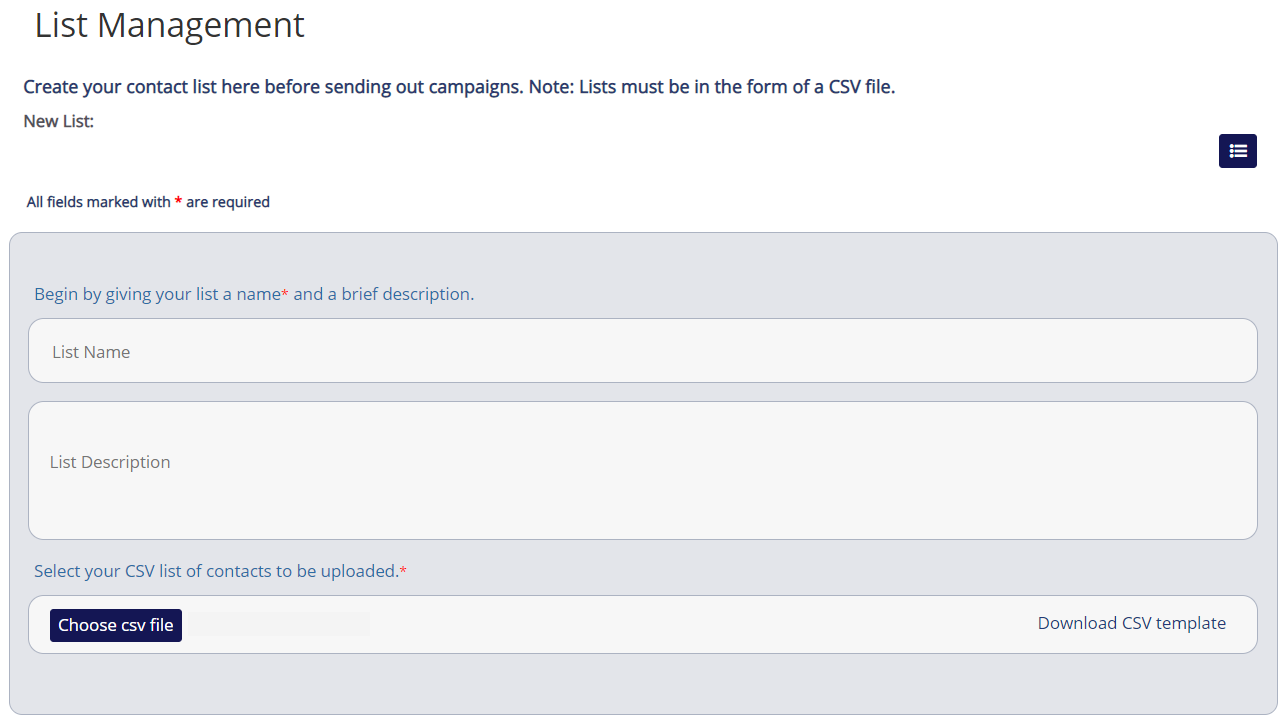
Fill out the form. Fields with an * are mandatory in order to save your list.
- Name your list (less than 50 characters). The name appears in the table on the Lists page and at the top of the form (New List:).
- Provide a list description. This appears in the table on the Lists page once your list is saved.
- Contact lists must be in the form of a CSV file.
- If you already have a CSV file ready, you can select it using the Choose CSV File button at the bottom left.
- If you do not have a CSV file, click Download CSV Template on the bottom right to open a blank file template. Insert your contacts into the spreadsheet and save the file to your desktop for easy access. After saving the file, click Choose CSV File and in the pop-up window select your spreadsheet and click Open.
- Header values are automatically extracted from the file and a new field appears where you can select existing headers or create new ones.
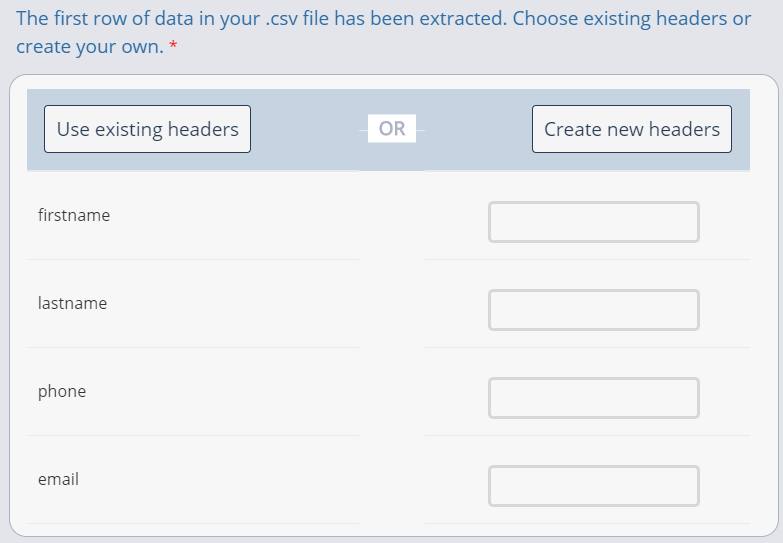
- Select Use Existing Headers and move to the next step, or select Create New Headers and manually add them in the provided text boxes.
- Click Submit. Your list is now available for use in a campaign. Your new list will appear in the table on the Lists page within SmartEngage and the List Management page on the Portal level.
Add Contacts to an Existing List
You can easily add contacts to an existing list without having to reupload the entire list.
Note: These steps are only applicable for adding contacts via the Lists page within SmartEngage. Check out Managing Lists in the CPaaS Portal for more information about adding contacts (a.k.a., records) to a list on the Portal List Management page.
From the Lists page, select the list you wish to add contacts to from the table. The Update List page opens and all existing contacts are displayed.
Click Add New Contact above the table. The New Contact pop-up opens.
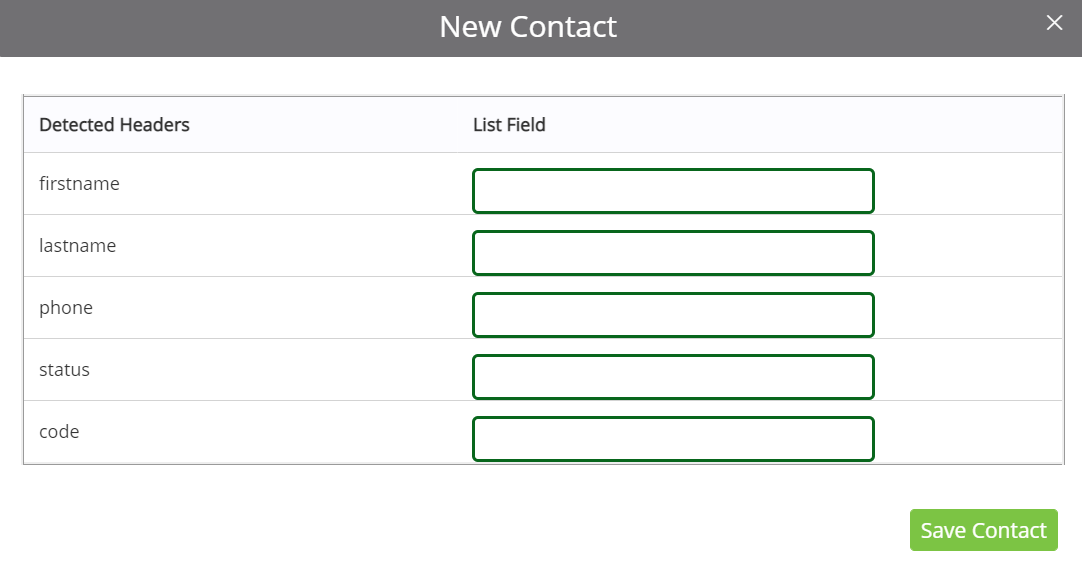
Enter the values for each Detected Header in the provided List Field text box (in the example above: firstname, lastname, phone, status, and code) and then click the green Save Contact button.
Integrating with SmartFlows
SmartEngage works seamlessly with SmartFlows to help create an end-to-end customer journey. With SmartFlows, you can build workflows that are integrated with your business processes, giving you control over the customer communications experience across voice and messaging channels and third-party business applications. Being able to build your own workflows in SmartFlows and manage your campaigns through SmartEngage leads to a fully customized customer experience.
SmartFlows are added and configured through the Custom campaign type option.
SmartFlows users can create their own custom flow templates and use them in SmartEngage by following a few simple steps:
- Build the flow in SmartFlows by using the Campaign trigger.
- No additional configuration is required for the trigger, but data elements from records in SmartEngage (such as first name) can be specified as variables to be used in the course of the flow.
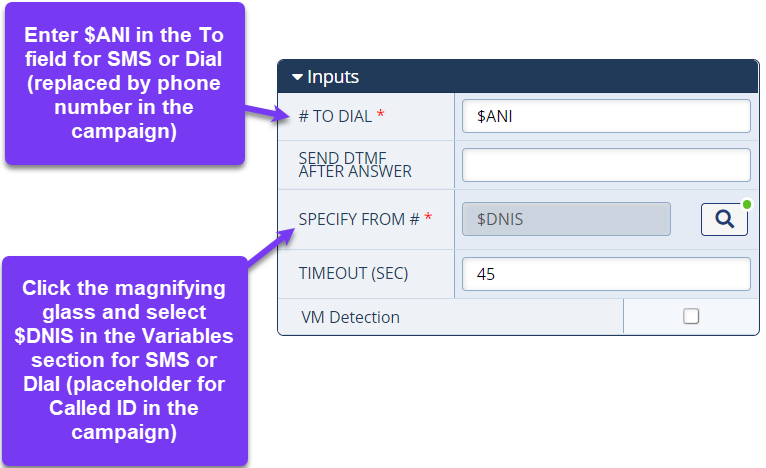
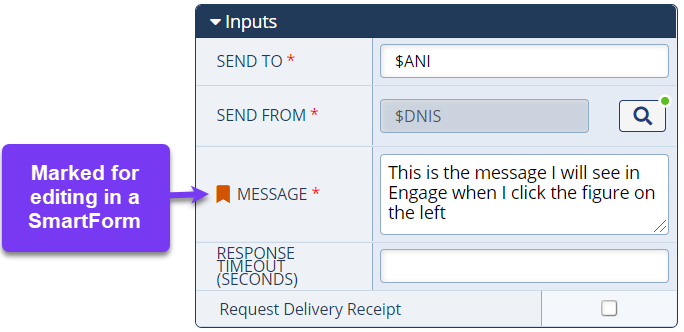
- Depending on the design of the communications flow, the Campaign trigger is followed by either a Dial action (for outbound calling campaigns) or an Send SMS/MMS action (for outbound SMS notifications). Design these elements in the configurations panel on the right side of the screen. The $ANI represents the phone number of the contact in a campaign and is replaced by specific phone numbers in the selected list. The $DNIS represents the caller ID configured on the campaign.
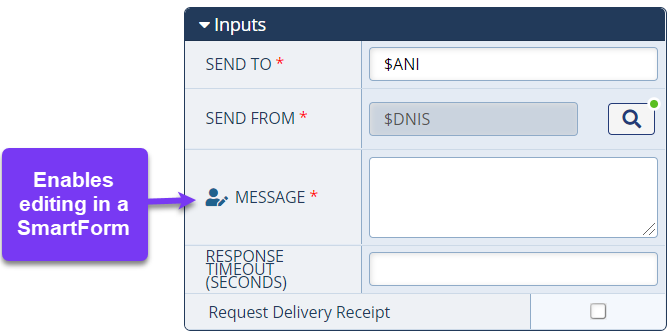
- SmartFlow fields can be configured to appear in a SmartForm. When selected for editing within a SmartForm, it changes as shown below.
- Once the flow is complete, assign the flow an identifiable name, and Save and Deploy it in SmartFlows.
- Once the flow has been deployed in SmartFlows, it appears in the drop–down menu of Custom flows in SmartEngage and can then be used in an outbound campaign.
Check out How to Integrate SmartFlows and SmartEngage for more details.