Managing and Using Numbers in the IntelePeer Customer Portal
This guide describes how to manage and enable numbers within the Customer Portal. Learn more about:
Managing Numbers
When you log into the IntelePeer Customer Portal, the Home page appears.
From the top of the page (or the three vertical lines in the top left corner of the page, depending on the size of your screen) select My Numbers> Packages to select the appropriate package and manage your numbers.
To manage numbers, in the appropriate section (for example, US Domestic Numbers or Toll-Free Numbers), click Manage. In the following example, a usage-based package was clicked, displaying the section for US Domestic Numbers.
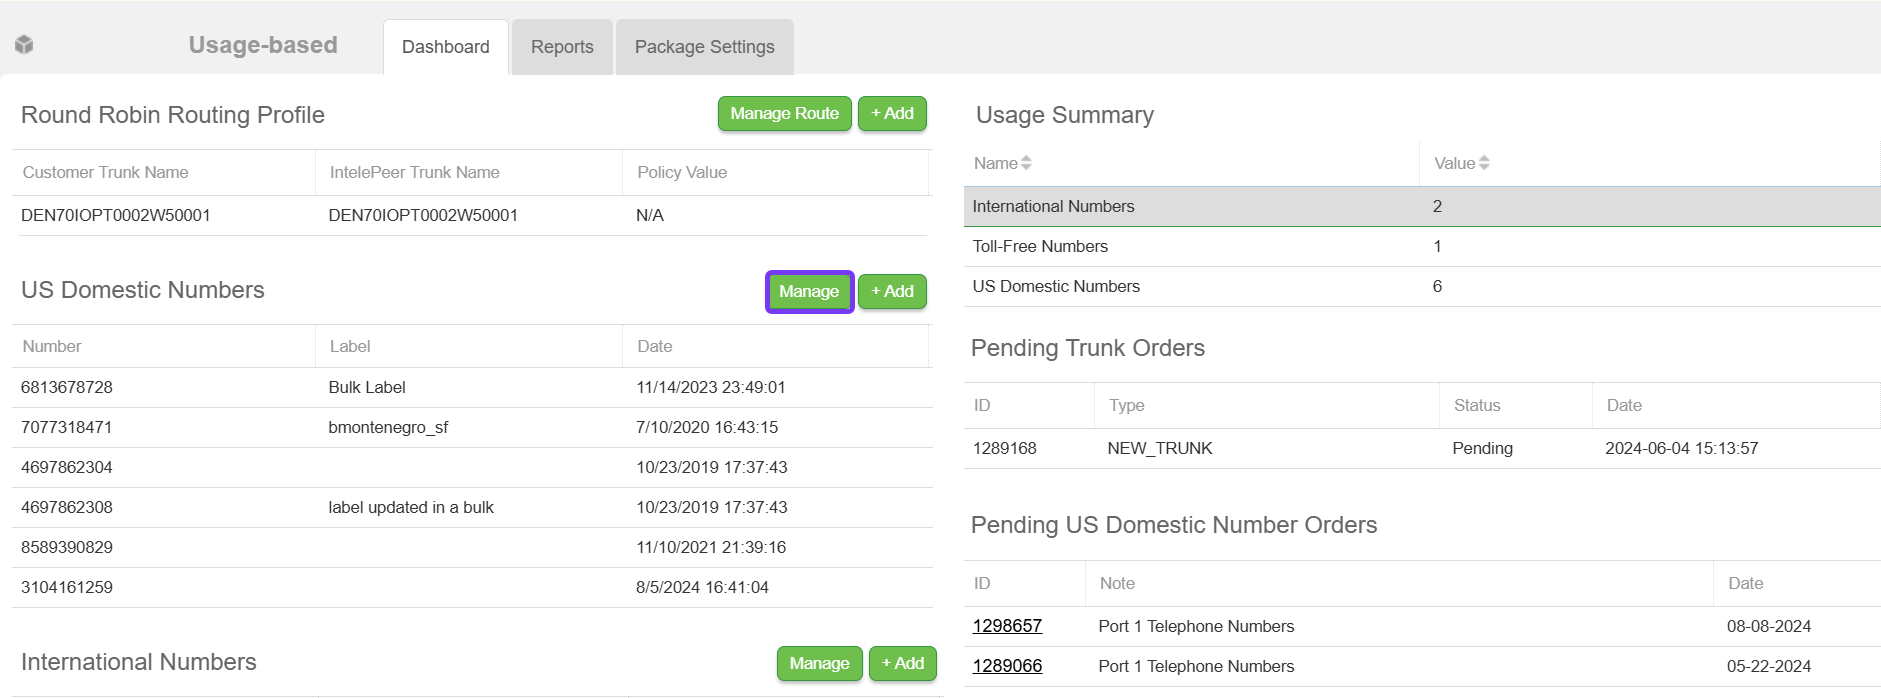
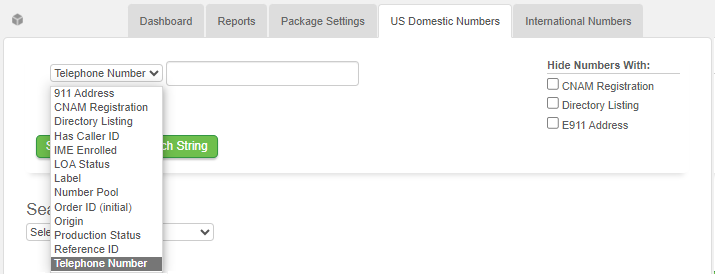
At the top of the Manage page, you can use the filter menu to locate the numbers you want to make changes to. The number list in the table provides the numbers that meet your criteria.
Select the check boxes for the numbers you want to manage. From the Select an Action menu, choose the action you want to apply to all the numbers you've selected.
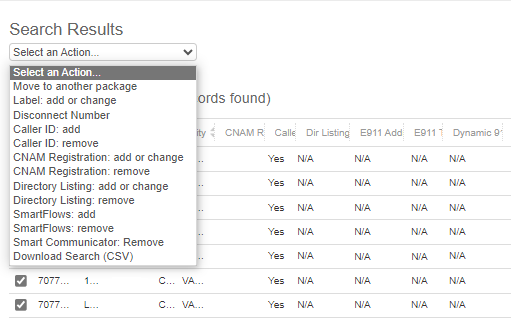
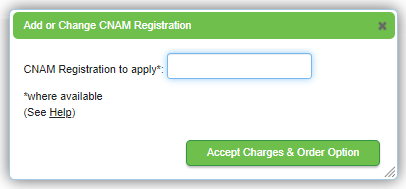
Follow the prompts to complete the action, for example, to add or change CNAM registration.
Using Number Inventory
On the number Inventory page you can browse and manage all numbers associated with your IntelePeer account. Trunks, US Domestic Numbers, International Numbers, and Toll-Free numbers all appear on this screen, organized by tabs.
From the Inventory page you can:
-
Search for individual or types of numbers (e.g., by Package Type or Caller ID enablement)
-
View and manage number attributes (e.g., CPaaS Enabled or E911 Service)
-
Add US Domestic Numbers via .csv or .txt file
Navigate to the Number Inventory
-
Log in to your IntelePeer account through the IntelePeer Customer Portal.
-
From the top of the page (or the three vertical lines in the top left corner of the page, depending on the size of your screen) select My Numbers then Inventory.
-
The Inventory opens on the Trunks tab.

Note: For information on using the bulk actions capabilities on the Inventory page, check out Managing Bulk Actions in the IntelePeer Customer Portal.
Moving Numbers Between Packages
There may be cases where you may need to move telephone numbers from one package to another. Some examples include:
-
Moving from SIP to a dedicated circuit
-
A Home package reserve number or numbers to active on a SIP trunk
-
From SIP to Home for CPaaS
-
A location move
-
Put numbers on new IPs
If you have several packages, it can be challenging to find the package a number belongs in. To make it easier to find the number or numbers you want to move, start by filtering to identify the numbers. Then you can move them to a new target package:
-
From the top of the page (or the three vertical lines in the top left corner of the page, depending on the size of your screen) select My Numbers then Inventory.
-
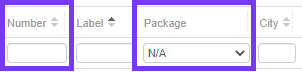
At the top of the columns, use the Number field to filter by the specific number. The Package column then shows you the package the number can be found in.
-
You can also filter by package name to identify all the numbers that are in that specific package.
-
Once you find the numbers you want to move, click the left-column tile associated with the package or packages they belong in.
-
Find the numbers in US Domestic, International, or Toll-Free Numbers sections, and click Manage.

-
If you need to, use the Search field to find the numbers you want to move.
-
Select the check box for each number you want to move.
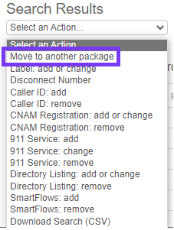
-
In the Select an Action menu, click Move to Another Package.
-
On the Move to Another Package popup, select the target package from the menu, and click GO. Read through the information on the Confirm Change popup.
Important: Moving numbers can affect whether they are enabled in other applications, for example, E911, CPaaS, and SmartFlows. When moving CPaaS-enabled numbers to a new package, a popup window informs you that once the move is completed, you must re-add SmartFlows to the affected numbers. The window shows you which numbers are affected.
-
To confirm the move, click OK.
Note: Numbers take approximately 15 minutes to appear in the new package if the packages share the same account. If you are moving a toll-free number, an international number, or are moving from one account to another, contact IntelePeer Number Admin. Also, if the API takes more than 15 minutes, contact Number Admin.
-
Check your Inventory page to ensure the move is complete. In the Package column, the package name should correspond with the target package. If there are any issues, contact IntelePeer Number Admin.
Inventory Buttons
The following buttons appear at the top of each Inventory tab:
-
Configure Columns: Displayed columns can be configured based on your preferences. A check mark indicates displayed column headers while circles indicate hidden columns.
-
Expand: Use this button to display your numbers in an expanded view.
Note: Depending on the number of columns displayed, you may need to scroll to the right to view all of your number details.
-
Download CSV:You can download the number data for each tab via CSV file.
Note: The CSV output includes all available columns, even those that are hidden.
E911 Information
To assist you in searching for static and dynamic 911 service numbers, the Inventory page includes columns for E911 Address, E911 Type, and Dynamic 911 Taxation Location.
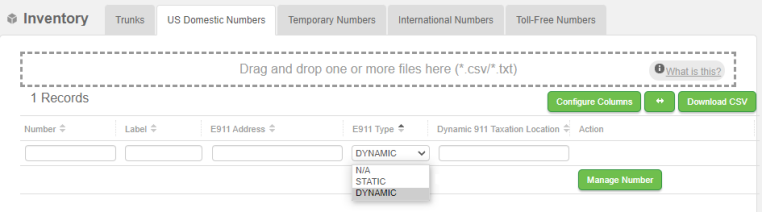
Use the menu option under E911 Type to select Static or Dynamic. The table is filtered to provide the associated information. For Dynamic E911 types, the Dynamic 911 Taxation Location is provided in the field.
Note: There is no taxation location associated with static E911 numbers.
Enable a Number for CPaaS
US Domestic and Toll-Free numbers within your number Inventory can be CPaaS enabled for use with SmartEngage and SmartFlows. If a number is not CPaaS enabled, it will not be available to assign to a SmartEngage campaign or SmartFlow (e.g., it won’t appear as an option on the SmartEngage Choose Number/Variable pop up or SmartFlows Number Assignment page).
Note: If a number is enabled for CPaaS and not assigned to a SmartEngage campaign or SmartFlow, calls to that number will fail.
To Enable a Number for CPaaS
-
Locate the US Domestic or Toll-Free number in your Inventory.

-
Click Manage Number.
-
Click the check box to the far left of the number.
-
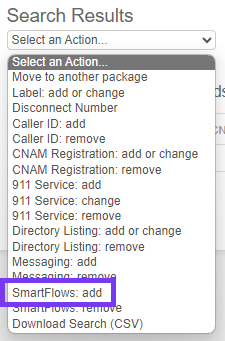
From the Select an Action menu, click SmartFlows: Add.
-
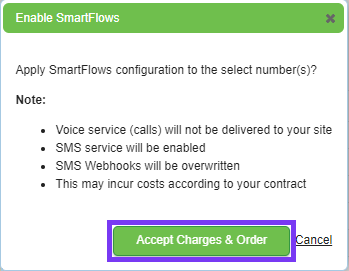
The Enable SmartFlows pop-up opens noting the effects of this change. Click Accept Charges & Order.
-
The Confirm Change pop-up opens. Click OK.
Note: CPaaS enablement usually takes a few minutes to go into effect but can potentially take up to 24 hours.
Your number can now be used with SmartEngage and SmartFlows.
Disable a Number for CPaaS
If you no longer want a number to be available for use with SmartEngage and SmartFlows, you can remove CPaaS enablement.
Note: Before disabling a number for CPaaS, reassign any SmartEngage campaigns or SmartFlows using that number to another CPaaS enabled number.
To Disable a Number for CPaaS
-
Locate the number in your Inventory.
-
Click Manage Number.
-
Click the check box to the far left of the number.
-
From the Select an Action drop-down list, click SmartFlows: Remove.
-
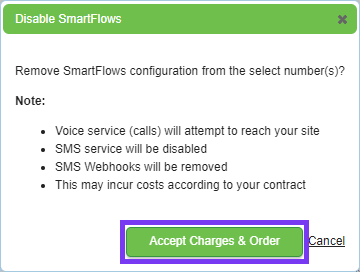
The Disable SmartFlows pop-up opens noting the effects of this change. Click Accept Charges & Order.
-
The Confirm Change pop-up opens. Click OK.
Note: CPaaS disablement usually takes a few minutes to go into effect but can potentially take up to 24 hours.
Your number can no longer be used with SmartEngage or SmartFlows.