IntelePeer Customer Portal Quick Start Guide
Overview
The IntelePeer Customer Portal is home to phone number and trunk ordering and management, number services, account management, and access to our range of applications.
The Portal provides you with the following capabilities:
|
|
For more information, check out the Customer Portal FAQs.
Note: The Customer Portal doesn't support the Microsoft Internet Explorer browser. We recommend you use another current browser version instead.
Getting Started
Note: If you are a SmartProducts subscriber, check out Setting Up SmartProducts in the Customer Portal.
As a customer, you may have different roles assigned to you. Roles provide different permissions, whether, for example, you are an administrator, an API user, or a general user. Your role determines what you can see and do when you log into the Customer Portal.
Open the log in page here. At the top of the page, click the Documentation link to open the IntelePeer Product Documentation site.

In addition to the login section, the page includes sections on:
-
Platform Information
-
Exploring Our Documentation, providing links to topics to help you work successfully with IntelePeer features
-
Learn More About the Platform, with links to information about IntelePeer AI automation

-
In the page footer, you can find links to the IntelePeer Privacy Policy and Trust and Security and copyright information.
When you log in, the dashboard looks similar to this:
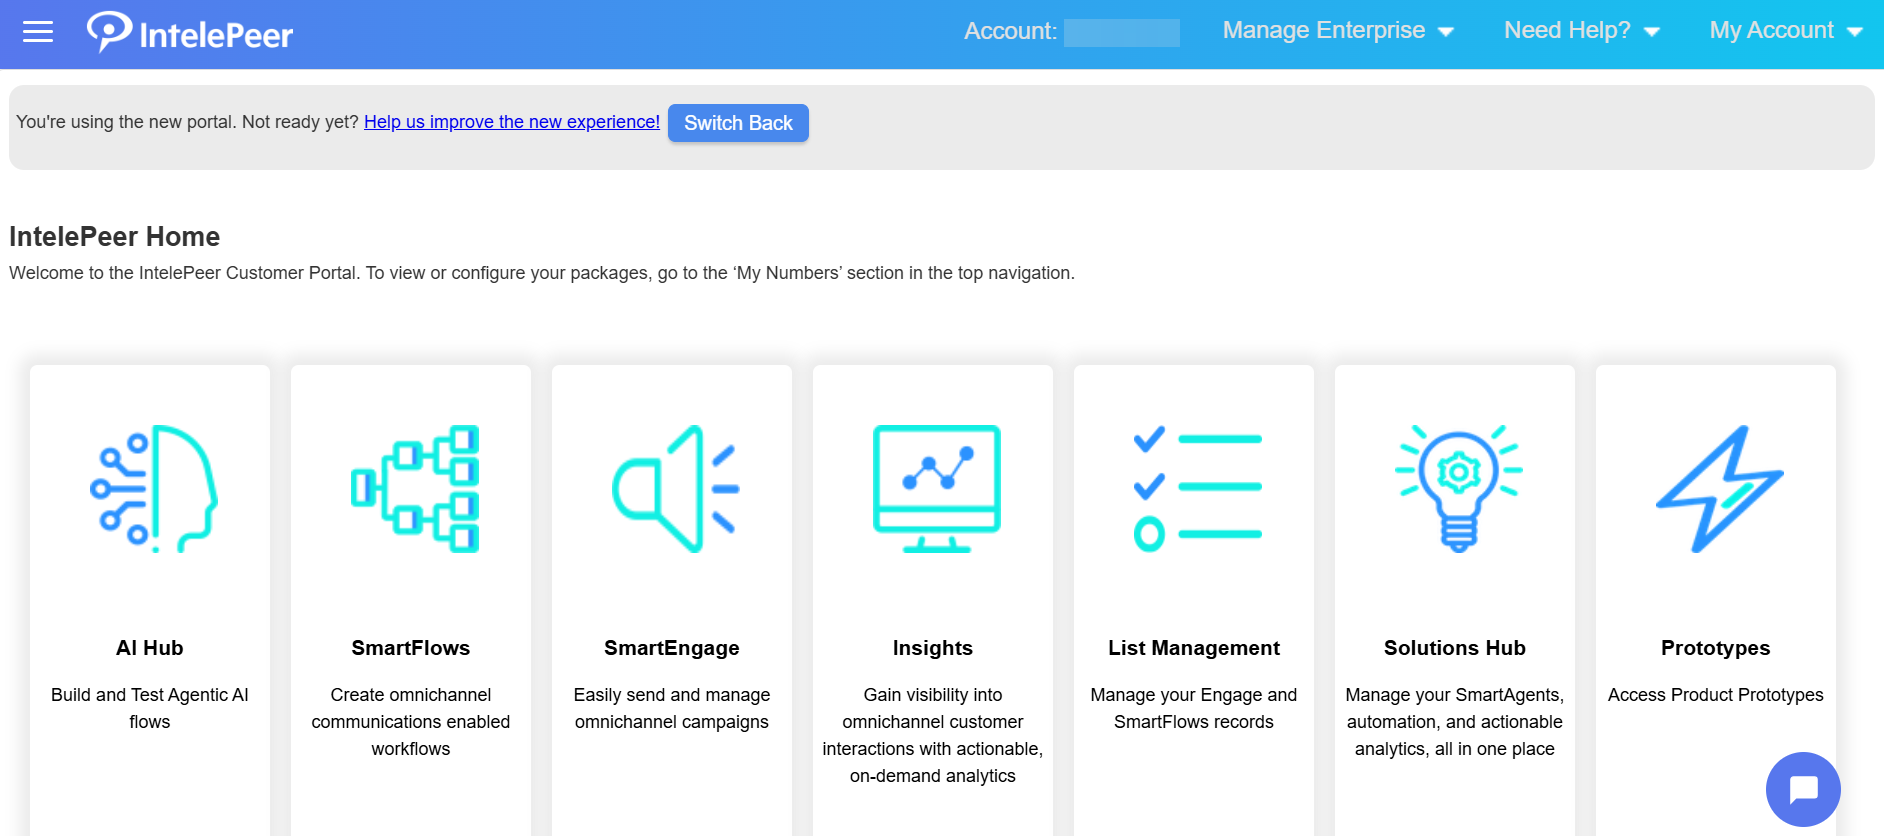
Dashboard Tour
From the dashboard, you can access all the features you need to accomplish your voice services tasks.
-
In the top right corner, click My Account to view and edit your user settings (such as password).
-
Under the Manage Enterprise menu option at the top of the page, you can access your orders, billing, and many include administrative actions like user management and enterprise settings.
-
Under the My Numbers menu option (displayed at the top of the page or under the three vertical lines on the far left of the page) you can access your packages and bundles, and number inventory.
-
In the center of the homepage, you can click on a tile to open applications available for your account.
-
Select the Home Package option under My Numbers to view and manage your numbers. Sections are set up to identify Local Numbers, Toll-Free Numbers, and Short Codes.
Types of Access
Your administrator can provide different access types so you can perform tasks required by your position. These include:
-
Portal
-
API
-
SMS
In addition to access types, users can also be assigned a Landing Page. For example, if a user is only going to be using the SmartFlows application, their Landing Page could be set to "SmartFlows" so they are automatically brought to that page when they sign in.
Note: If a Landing Page other than "Homepage" is assigned, Administrators can also select a check box to restrict a user's access so they can only access their assigned Landing Page.
Users are also assigned a role. A role is a pre-defined set of permissions assigned to users (for example, Administrator). If permissions for a role are changed, all users assigned to that role are affected.
Note: For more information, contact your company’s administrator.
Setting Up Application Data Record File Delivery
To assist you in analyzing your data, you can have a daily .csv file generated for download.
-
Log into the Customer Portal.
-
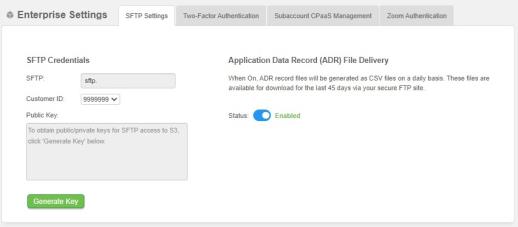
From the menu at the top of the page, click Manage Enterprise > Enterprise Settings.
-
Under Application Data Record File Delivery, turn the toggle switch to Enabled. When enabled, ADR record files are generated daily as .csv files. The files are available for download for the last 45 days via your secure FTP site.
Ordering Trunks
The first action when putting together your phone numbers is to order the trunk from the package where the numbers will be contained:
-
From the top of the page (or the three vertical lines in the top left corner of the page, depending on the size of your screen) select My Numbers > Packages, hover over the appropriate type of package, and then select Create New Package (at the bottom of the list of previously created ones).
-
On the Create Package pop-up, enter information about your package.
-
Click Create Package.
-
The Manage Routing Profile page opens. Here you can save your routing profile, create a new trunk, or drag available trunks into your trunk configuration.
Special Instructions
If you are a Bundle customer:
-
You can have one primary trunk and an optional redundant trunk per package.
-
If you haven't ordered your redundant trunk, click Add Redundant Trunk to do so.
If you are a Usage customer:
-
All trunk orders are generated from the Routing Policy Manager.
-
Click Create New Trunk to order a new trunk.
If you are an Outbound Only customer:
-
If you have a package and want to add trunks, identify your Outbound Only package, and click +Add to order a new Outbound Only trunk.
-
If you do not yet have a package, click Create New Package. Complete the form per the procedure and submit the trunk order.
Ordering Numbers
Once your trunks order (primary and/or redundant) is completed, you can add numbers to your account.
-
Hover overMy Numbers from the top of the page (or the three vertical lines in the top left corner of the page, depending on the size of your screen), and select Home Package. Click the +Add button for the appropriate type of number section.
-
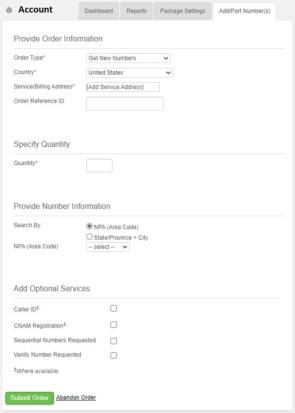
From the Order Type menu, select Get New Number.
-
Complete the following required fields:
-
Country
-
Service/Billing Address
-
Quantity (of numbers)
-
-
You can include optional number information and services to help specify the numbers and options you want.
-
Click Submit Order. You receive an email notification that your order has been placed.
Note: Keep this email so you can provide a reference should you need assistance.
When the order is submitted, you are notified about order status. You can also view order status by clicking the View Orders tile in the left-side menu. Click the appropriate tab at the top of the page to view your order.
Once the order is completed, you receive an email, and your new numbers appears on your dashboard in the appropriate locations.
Transferring and Porting Numbers
IntelePeer provides you with the ability to transfer/port numbers from your current carrier to us.
-
Select the package where you want to assign the number(s).
-
Click +Add for the type of number you are porting: US Domestic, Toll-Free, or International.

-
For Order Type, select Move/Port Current Numbers.
-
Add the service/billing address and optional Order Reference ID.
Important: The addresses must match the current carrier’s information.
-
Under Provide Port Information, include the following:
-
Current Carrier/Provider
-
Billing Telephone Number (BTN)
-
-
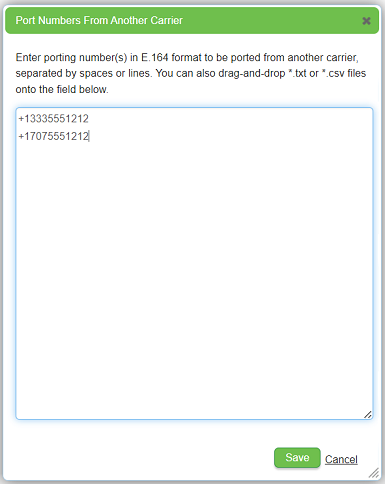
Click the Port Numbers field. The Port Numbers From Another Carrier popup appears.
-
Type the numbers you want to port in the field. Separate multiple numbers by spaces or line breaks. You can also drag-and-drop a .txt or .csv file into the field with your list. Click Save.
Note: BTNs and numbers must be in E.164 format (for example, +13075551212)
-
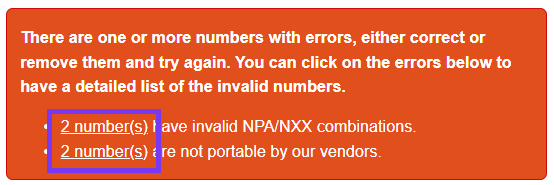
If there are any errors with the numbers you've entered, a field appears to explain the reason for the errors.
-
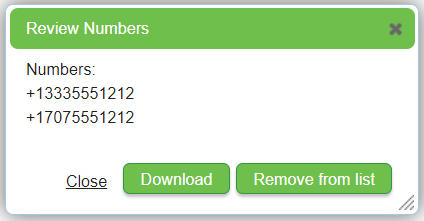
Click the a link to view the numbers causing the errors. The Review Numbers popup appears.
Note: Errors could include, for example, numbers not in E.164 format, invalid NPA/NXX combinations, and numbers not portable by our vendors.
-
In the popup, you can download the list of numbers to a .txt file, and you can remove the numbers from the Port Numbers From Another Carrier popup list.
Note: Only numbers identified as errors are removed from the list. All other numbers remain.
-
Once you have made any changes to the list of numbers you want to port, click Save to return to the Add/Port Numbers page.
-
Complete the remaining information for your port order:
Requested Port Date/Time
Standing porting hours are Monday through Friday, 9:00 AM to 5:30 PM ET
Indicate whether this is a Partial or Full Port
Note: A partial port indicates only some services are moving; a full port means you are moving all services to IntelePeer. The Partial Port check box is selected by default. Only clear this check box if you are leaving no other services with your existing carriers.
Under Add Optional Services, you can include Caller ID, CNAM, and E911 Service.
Add Notes or Special Instructions.
-
Click Submit Order. You receive a notification your order has been placed.
Note: Keep this email so you can reference the Order and Batch ID should you need assistance.
-
After placing your port order, you must sign and upload a Letter of Agency (LOA) to your order. You are presented with the ability to produce the LOA. From the View Orders page, click GO next to upload documents. Follow the link to produce the LOA and then upload from the same pop-up. You can upload your invoice here as well.
Important: Without the LOA and invoice uploaded, order batches are not submitted to your existing carrier.
Checking the Status of a Pending Port Order
You can check any of your port order statuses--including pending orders--using the View Orders page.
-
From the Manage Enterprise menu at the top of the page, click View Orders. The Order Types page appears.
-
At the top of the page, click the tab associated with your order.

-
If necessary, use the filters to narrow your choices: Order ID, Batch ID, or Order Status.

-
To view additional information on the order, find your order on the page. From the Actions column menu, select View Batch and click GO.

The order appears on its own Order Batch Details tab.

-
At the top of the Order tab, if available, status notes appear to provide additional information.

Additional Porting Information
Most port orders containing no errors are completed within 15 business days. However, if any of the below common errors occur, the losing carrier may reject the order on their side requiring IntelePeer to start the order over from the beginning again:
-
Incorrect account information, such as Address, Customer Name, Billing Telephone Number (BTN).
-
Issues that remain with your current carrier; for example, provide a new BTN for any remaining numbers. If these rejections aren’t cleared with updated information, it can delay or cancel the port.
-
Not providing the account number and PIN for cellphone numbers can also cause rejections.
Moving Numbers Between Packages
There may be circumstances when you need to move telephone numbers from one package to another. Use the following procedure to do that:
-
From the My Numbers menu, hover over the packages option and navigate to the appropriate package type and package. Click on the package where the telephone numbers are contained. The telephone numbers in the package are displayed.
-
Locate the numbers in either their appropriate section.
-
Above that section, click Manage.
-
Select the check boxes for the numbers you want to move to another package.
-
From the Select an Action menu, click Move to Another Package.
-
From the pop-up menu, select the target package you want to move the numbers to, and click GO. Click OK to confirm the change. You can click the Show Affected Numbers link to view the numbers you are planning to move.
Note: As soon as the move is processed, the telephone number appears in the My Numbers list for the target package.
Checking Your Inventory
At any time, you can review and manage your number inventory. From the My Numbers menu, click Inventory. The Inventory page appears with the Trunks tab displayed.
You can do the following on this page:
-
Click other tabs located across the top of the page to view your US Domestic, Temporary, International, and Toll-Free numbers.
-
Configure the columns to your preferences.
-
On each tab, you can click Manage to make changes to your trunks and numbers.
-
On the US Domestic Numbers tab, you can bulk upload numbers by dragging and dropping a .csv or .txt file into the field. For more information, check out Managing Bulk Actions.
Getting Help
If you require assistance from IntelePeer, click Need Help? at the top of the page to view our documentation, submit a support ticket, or Contact Us.