How to Build a SAM Agent Workflow
This guide describes how to configure a SAM Agent and associated Knowledge Collection. Learn more about:
Overview
SAM Agents combine OpenAI compatible Large Language Models (LLMs) with the Retrieval Augmented Generation (RAG) pattern to answer user messages. RAG queries a vector database to find documents semantically similar to the user message. When a match is found that meets your agent’s thresholds, that context is pulled out and gives the LLM greater context for the agent’s response.
For example, if a user asks about what insurance your office accepts, RAG enables the agent to find matches in your Knowledge Collection documentation and uses that up-to-date information to accurately respond with the accepted insurance providers for this calendar year.
Important SAM Agent Components
To facilitate the LLM + RAG model for SAM Agents, you have to build two components in the AI Hub:
-
A Knowledge Collection: Built via the Knowledge Collection page, this is the documentation database the RAG pattern queries.
-
A SAM Agent: Built via the AI Workflows page, this is where you link your documentation to the agent and set your query thresholds.
Build a Knowledge Collection
Before you configure your SAM Agent, we recommend creating and adding documentation to your Knowledge Collection to the AI Hub.
Create a Collection
-
Log into your account through the Customer Portal.
-
Click the AI Hub tile to open the app.
-
Select Knowledge Collections from the menu on the left.
-
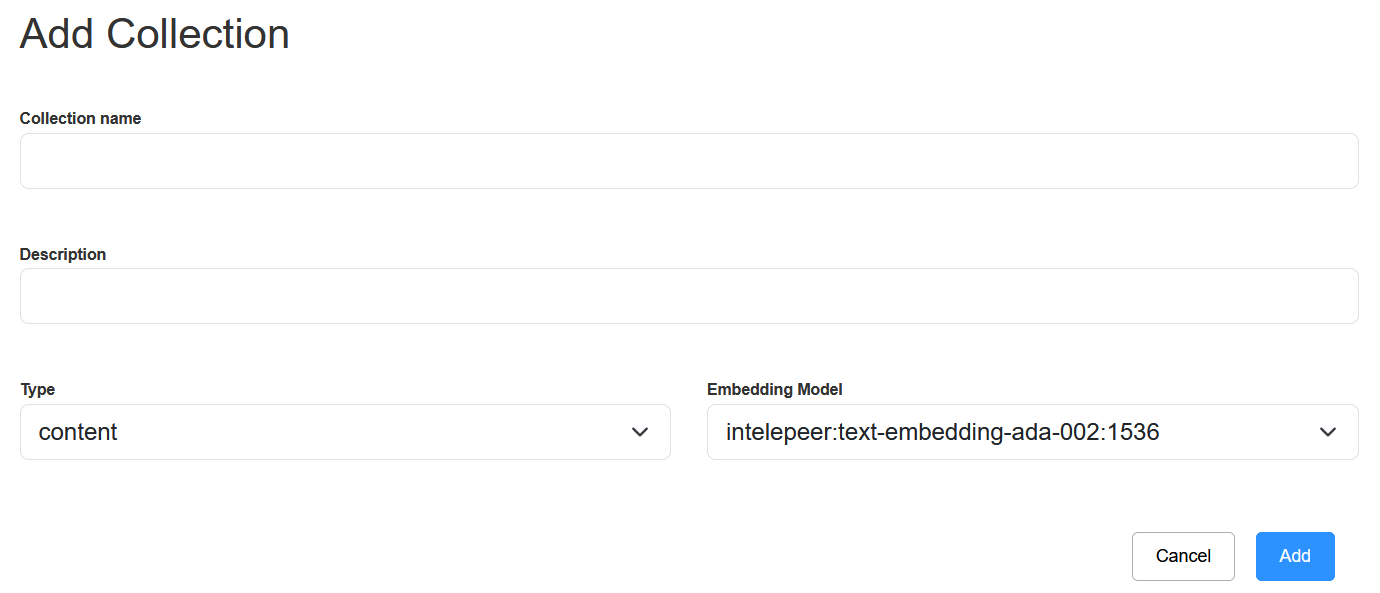
Click the Add Collection button above the table (on the far right). The Add Collection pop-up appears.
-
Fill in all of the details about your collection.
-
Collection Name: Give your Knowledge Collection a unique and descriptive name. For example, “Appointment Services FAQs”.
-
Description: Give your collection a helpful, descriptive blurb. For example, “Dr. Teeth and Associates Dentistry appointment services Q&As”.
-
Type: Always use “content”.
-
Embedding Model: Always use “intelepeer: text-embedding-ada-002:1536”.
-
-
Click Add. Your new collection automatically appears in the Knowledge Collections table. You can now add documentation to the collection.
Add Documentation to Your Collection
-
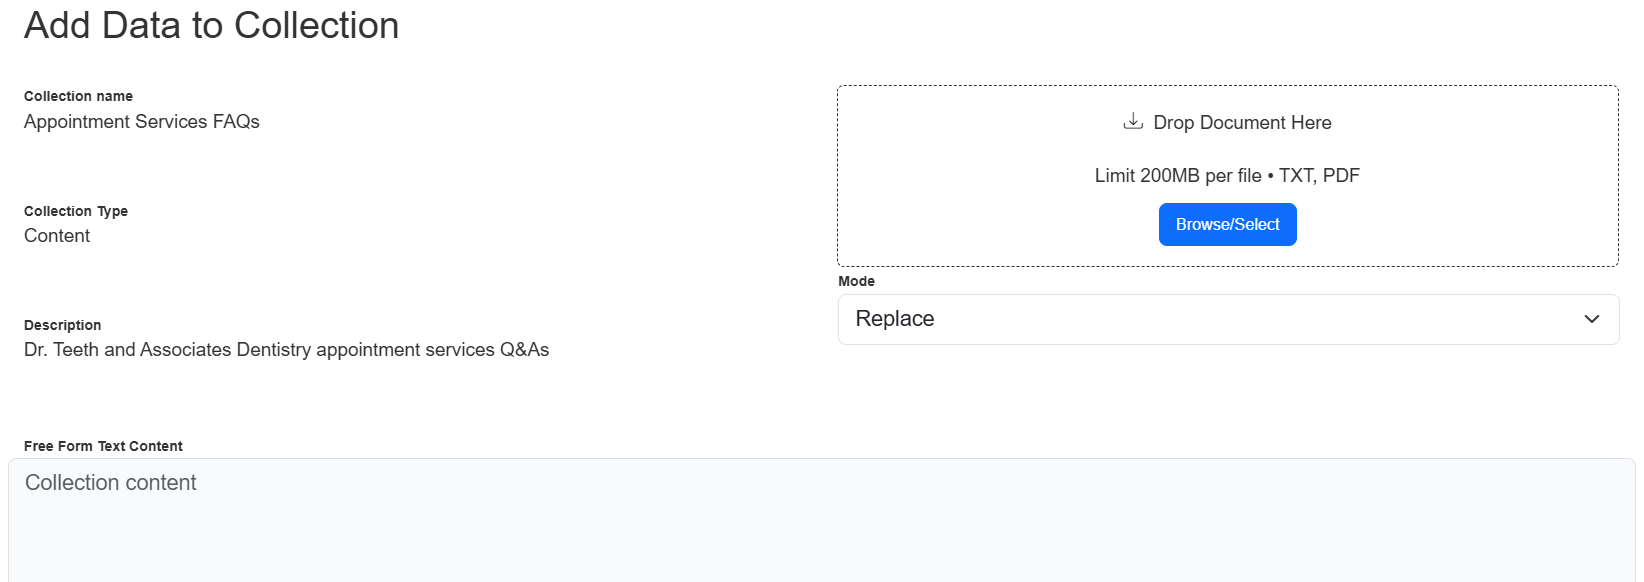
From the AI Hub Knowledge Collections page, find your collection in the table and click the Add Data icon in the Actions column.

-
The Add Data to Collection pop-up appears.
-
Here you can:
-
Add new documents via the Browse/Select button on the right.
-
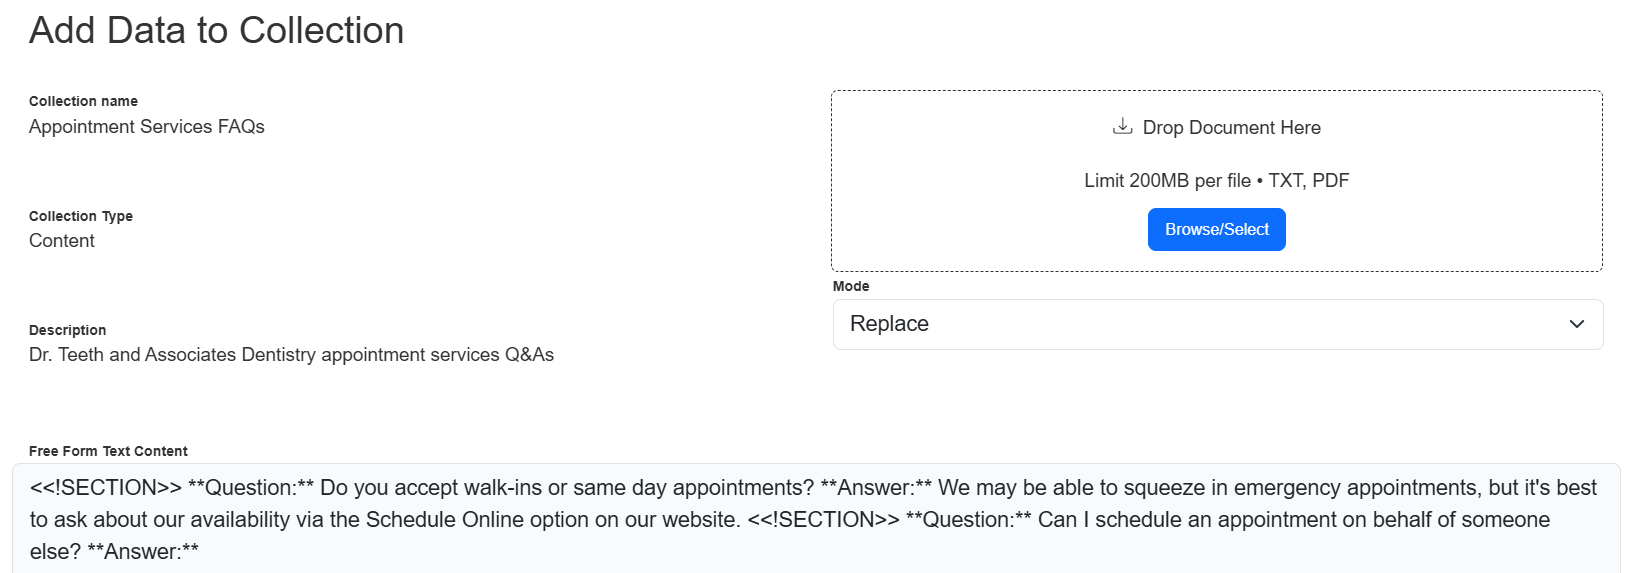
Type in content via the Free Form Text Content text box.
-
Choose to “Replace” or “Append” your collection documentation via the Mode field.
-
When the Mode field is set to “Replace” any previously existing content will be deleted from your collection and new documentation will be uploaded.
-
When the Mode field is set to “Append” the new document will be added to your collection, in addition to any previously existing content.
Note: Make sure you don’t upload duplicate documents. The “Append” Mode will not automatically check your collection for duplication or remove any duplicates.
-
-
-
Keep in mind the following when adding documentation to your collection:
-
Your documentation must be “chunked” aka broken up into logical sections. This ensures the information retrieval is as effective as possible.
-
You can chunk between questions and answers (e.g., every FAQ question and its answer is one chunk), or within a knowledge base document (e.g., each section of your employee handbook is it’s own chunk).
-
Chunk size should be large enough to fully answer a specific question, but not extended to multiple pages of content.
-
We recommend including dividers and formatting to make your sections clear. For example:
-
-
Once you’ve selected or typed in the data you want to include, click the Add button. The piece(s) of data are now associated with your collection.
You can continue to add more documentation to your collection, or update it (re-chunk, add more, remove, etc.) as needed to refine your SAM Agent’s performance.
Test Your Knowledge Collection
After you've added your documentation to your collection, we recommend testing it out to confirm your chunking is efficient and your agent will be able to answer expected user questions.
-
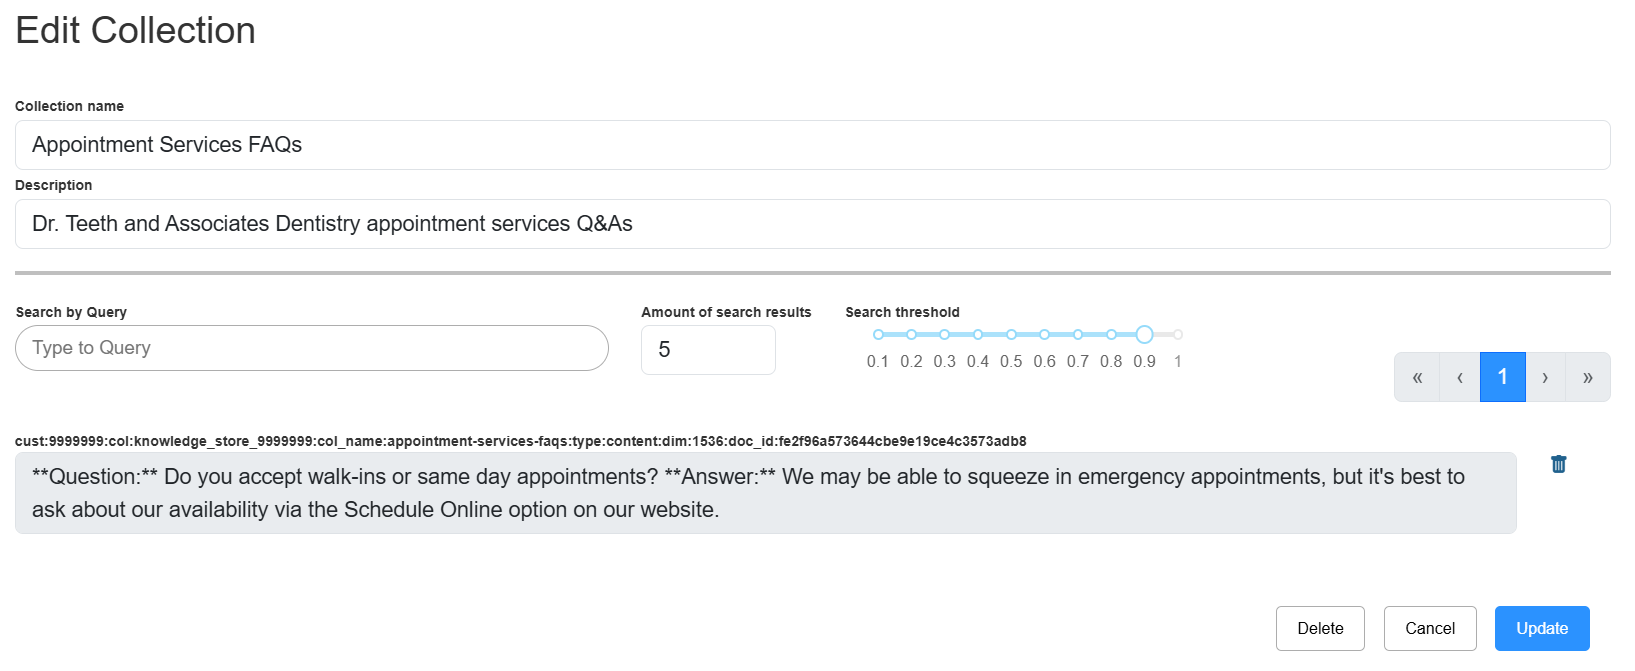
From the AI Hub Knowledge Collections page, find your collection in the table and click the Edit icon in the Actions column.
-
The Edit Collection pop-up appears.
-
Here you can:
-
Add expected user questions or key words to the Search by Query text box and see if the appropriate results are found.
-
Change the Amount of search results.
-
This is the number of results to be retrieved from the Knowledge Collection (i.e., the top-k document chunks based on embedding vector similarity).
-
The SAM Agent will use the most semantically similar result to augment its response. So if a chunk is ranked as the most similar but contains irrelevant information (and a chunk that contains the correct answer is ranked less similar), the agent is not likely to produce a response that correctly answers the question.
Note: This configuration is independent from the configuration of your agent (below).
-
Set to 5 by default.
-
-
Experiment with raising or lowering the Search threshold.
-
This slider configures Cosine Similarity (decimals from 0 to 1).
-
Set to .9 by default.
-
To determine the best setting, test out some different versions of user messages in the Search by Query text box with different thresholds. Make sure the top result returned is the one that contains the correct answer.
Note: Changing the Amount of search results and Search threshold value on the Edit Collection pop-up will not automatically change or impact the Context Threshold or Answer Count Threshold fields in the Knowledge section when you build your SAM Agent (or vice versa).
-
-
Depending on the results of your testing, you might need to re-chunk or add more documentation to your Knowledge Collection.
Build a SAM Agent Workflow
After your Knowledge Collection is in place, you’re ready to create a new SAM Agent:
-
From the AI Hub, select AI Workflows from the menu on the left.
-
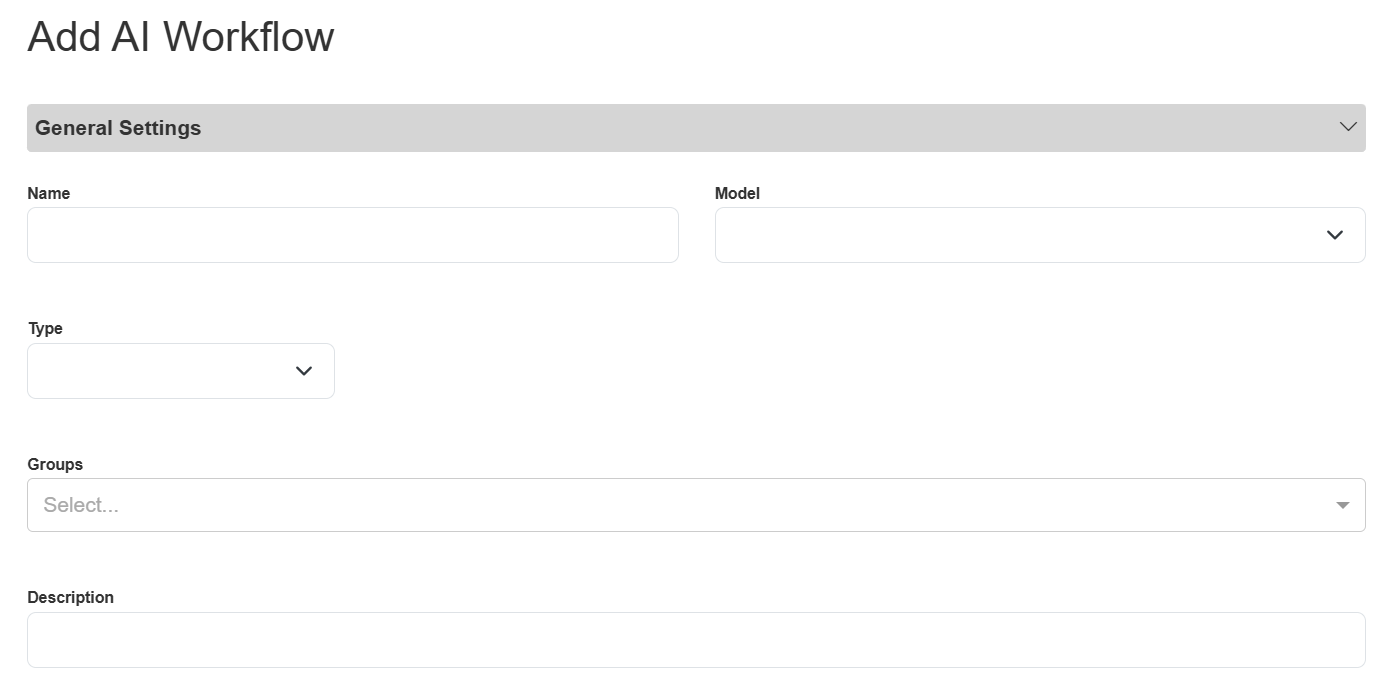
Click the Add button above the table (on the far right). The Add AI Workflow pop-up appears.
-
Fill in all of the details about your agent.
-
Name: Give your agent a unique and descriptive name. For example, “Appointment Services FAQs Agent”.
-
Model: Select the AI model you want to use with your agent from the drop-down list. We recommend using “intelepeer:gpt-4o-mini-intelepeer”.
-
Type: Select “SAM_AGENT” from the drop-down list.
-
Groups: If you previously defined AI Workflow Groups they will appear in the drop-down list, and you can select the group(s) you want to associate this agent with. Otherwise, you can leave this field blank.
-
Description: Provide a helpful, descriptive blurb about your agent. For example, “Dr. Teeth and Associates Dentistry customer appointments FAQs agent.”
-
Click the Configuration section to view the Template Library, System Prompt, User Prompt, Special Instructions, Tools, Knowledge, and Parameters subsections.
-
Template Library: Account specific prompt templates previously saved can be selected here.
-
System Prompt: Instructions for your agent to guide responses. Include the context for what the agent is doing, instructions for the agent, style or personality for responses, etc.
-
User Prompt: The message the agent is responding to.
-
Special Instructions: Instructions that the agent should follow for every response (e.g., you might include things the agent should not respond to or comment on here to prevent nefarious actions).
-
Tools: Include a function to enable your agent to perform a subsequent action based on a user’s response (e.g., if the caller says “pay my bill”, the function fires to collect that intent and directs the agent to the next appropriate step to process a payment).
-
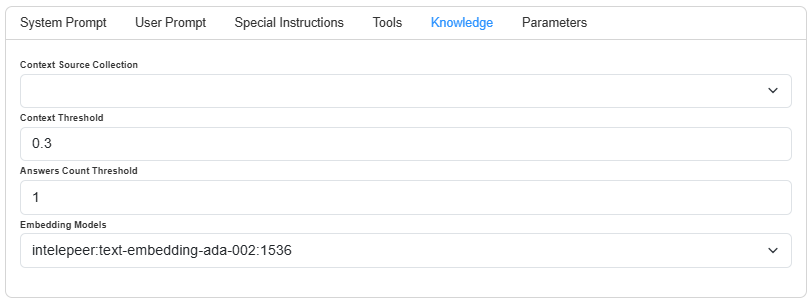
Knowledge: Links your Knowledge Collection to the agent and sets some thresholds.
-
Context Source Collection: Select the Knowledge Collection you created from the drop-down list. To continue our example above, we would select “Appointment Services FAQs” here.
-
Set to 0.3 by default.
-
Test out different thresholds to confirm the best results for your use case.
-
Context Threshold: How closely aligned a match should be for the agent to identify it as the right answer to the user message.
-
Answer Count Threshold: How many similar documents the agent should find (matching the Context Threshold) before providing an answer.
-
Set to 1 by default. We recommend leaving the default value.
-
-
Embedding Models: Always use “intelepeer: text-embedding-ada-002:1536”, to match your Knowledge Collection Embedding Model.
-
Parameters: LLM and workflow settings.
-
We recommend keeping the default values in this section.
-
-
-
Click Save. The pop-up is now titled “Edit AI Workflow”.
-
Click Publish.
We recommend reviewing all of your settings again to make sure everything is correctly saved and captured. Any formatting or spelling errors, especially in the Configuration section, should be updated before you continue.
Test Your Agent
Once your Knowledge Collection is in place and your agent is saved and published, we recommend testing them both to confirm they’re working as expected.
-
From the AI Workflows page, click the edit icon in the Actions column for your SAM agent. The Edit AI Workflow pop-up appears.
-
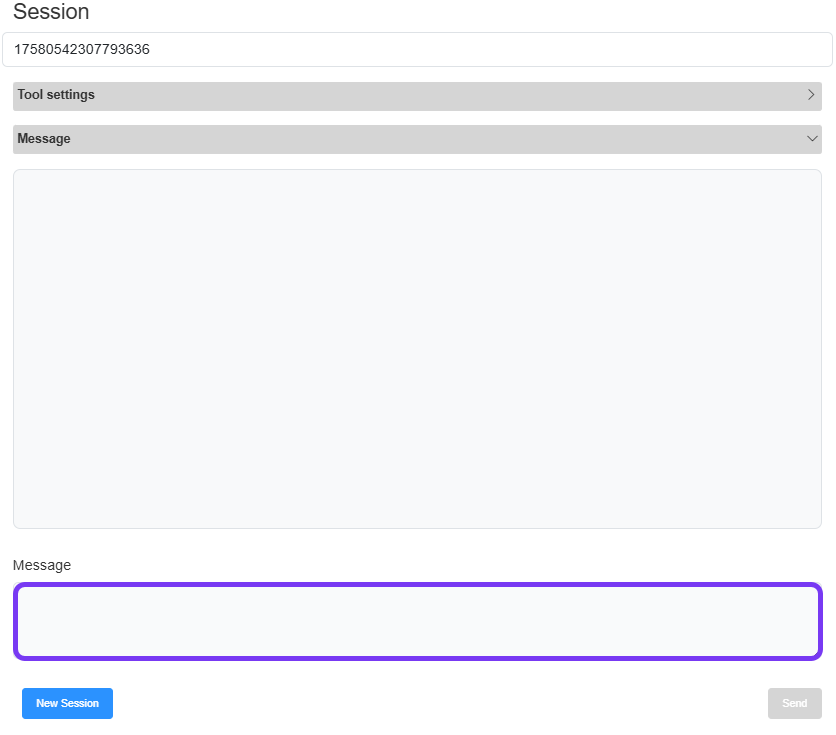
On the right side of the screen, you can expand the Tool settings section toggle on/off Autotrigger Tool and add in Tool Call Content.
Note: If your agent will be integrated with a flow in SmartFlows, you can set this toggle to off.
-
In the Message section, type a message into the text box and click Send to interact with your agent and confirm it’s working as expected.
-
You can always tweak your configurations (on the left side of the screen) as needed. Just remember to Save and Publish your agent again, if you make any updates.
-
Click New Session to start a new conversation.
-
-
Once you’re happy with the performance of your agent you can close the Edit AI Workflow pop-up.
You can now do a full-scale evaluation of your agent using the Tasks page. We recommend performing thorough testing using tasks before integrating your agent with SmartFlows. Once all of the task metrics meet your use case specific thresholds, you can move on to incorporating your agent into a flow.
Tips and Best Practices
-
It's critical to select the correct Embedding Model when configuring your SAM agent.
-
A mismatch between the model you set up for your Knowledge Collection and the agent would lead to retrieval failures.
-
We recommend always using the “intelepeer: text-embedding-ada-002:1536” Embedding Model.
-
-
We recommend always using the Type “content” for your Knowledge Collection.
-
Always use the Model “intelepeer:gpt-4o-mini-intelepeer” for your SAM Agent.
-
When adding documentation to your Knowledge Collection, “chunking” (breaking your document up into pieces) is required.
-
Use dividers format the sections. For example, <<!SECTION>> **Question:** What insurances do you accept? **Answer:** We accept… <<!SECTION>> **Question:** etc.
-
-
You can always update or rechunk your documentation as needed to refine the agent’s performance.
-
When your agent retrieves content from the Knowledge Collection, that data can be used to generate a response back to the user, and also to populate tools.
-
We recommend testing, testing and more testing!
-
Test different versions of user messages in the Knowledge Collection Edit Collection pop-up to confirm the correct, expected document is returned.
-
Test different versions of user messages in the Edit AI Workflow pop-up to confirm it responds with the expected information. This is your evidence that the correct, expected document is retrieved and proves the agent provides grounded information.
-