AI Studio Quick Start Guide
This guide describes how to navigate and build agents within the AI Studio. Learn more about:
Overview
The AI Studio enables you configure Generative AI powered autonomous agents, fully customized to your unique use case. Use the AI Studio to create a workflow, iterate on prompts, evaluate your agent against performance metrics, and observe how real users interact with your build.
Once your AI agent is up and running, you can integrate it with SmartFlows to bring advanced AI capabilities into your flow.
Getting Started
Log in to your account through the IntelePeer Customer Portal (http://customer.intelepeer.com). We recommend using the current or most recent versions of Chrome, Edge, or Safari.
Click the tile to open the AI Studio application.
Click the AI Studio tile. The Interaction Explorer page displays automatically.
Navigating the Landscape
AI Studio Pages
On the left-hand side of the screen, you'll see a menu to navigate between the AI Studio pages.
Check out this page for more information about functionality on the Agents page.
Click the Switch to AI Hub button at the bottom of the menu to navigate to the AI Hub view.
Building an AI Agent
When you're ready to create an agent:
-
Log into your account through the Customer Portal.
-
Click the AI Studio tile to open the app.
-
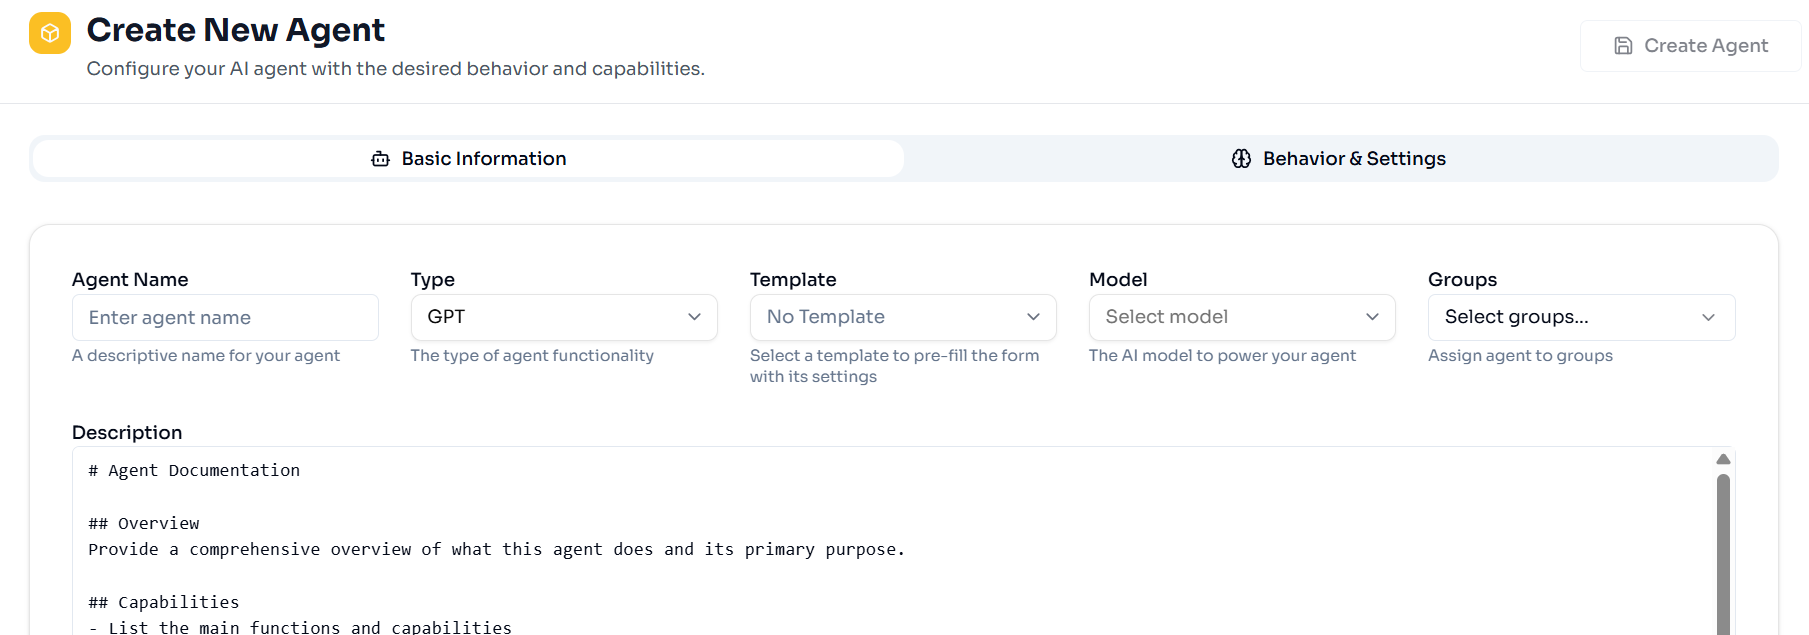
The Agents page opens by default. Click + New Agent, to the right above the table. The Create New Agent page appears.
-
Fill in all of the details about your agent.
-
Agent Name: Give your agent a unique and descriptive name. For example, "Weather Forecast Assistant".
-
Type: Select the sort of agent you want to build from the drop-down list.
-
GPT_AGENT: An agent powered by prompting the LLM.
-
GPT_AGENTS do not have access to knowledge collection documents but can fire functions.
-
-
FAQ_AGENT: An agent that has access to a knowledge collection but does not fire functions.
-
Mode: Select Cache or Cache + RAG from the drop-down list. This determines where the FAQ answers are coming from.
-
Cache: Answers come from a “Question and Answer” .csv reference file.
-
Cache + RAG: Answers come from your knowledge collection and you have the option to include a “Question and Answer” file.
-
-
-
SAM_AGENT: An agent that has access to a knowledge base and can fire functions.
-
BLOCK_AGENT: An agent ideal for complex use cases.
-
Two parallel LLM calls at each turn (one call triggers functions and the other produces an AI response).
-
-
VM_DETECTION_AGENT: An agent to determine if a live person or voicemail answers outbound calls.
-
-
Template: If you have previously created a templates it will appear in the drop-down list, and you can select the appropriate one for your agent. Otherwise, you can leave this field with the default ("No Template").
-
Model: Select the AI model you want to use with your agent from the drop-down list. We recommend using “GPT4o-mini”.
-
Groups: If you have previously defined AI Workflow Groups they will appear in the drop-down list, and you can select the group you want to associate this agent with. Otherwise, you can leave this field blank.
-
Description: Provide a helpful, descriptive blurb about your agent.
-
Click on the Behavior & Settings section to view those fields. Depending on what Type of agent you're building, different fields will appear in this section.
-
Placeholder text is included in the following subsections by default. Depending on your use case, you may not need to update the generic placeholder text (e.g., in most cases, the User Prompt and Parameters subsections are not relevant if you are building a “GPT_AGENT” so you wouldn’t need to update those).
-
System Prompt: Instructions for your agent to guide responses. Include the context what the agent is doing, instructions for the agent, style or personality for responses, etc.
-
User Prompt: The message the agent is responding to.
-
Special Instructions: Instructions that the agent should follow for every response (e.g., you might include things the agent should not respond to or comment on here to prevent nefarious actions).
-
Tools: Include a function to enable your agent to perform a subsequent action based on a user’s response (e.g., if the caller says “pay my bill”, the function fires to collect that intent and directs the agent to the next appropriate step to process a payment).
-
Knowledge: The documentation database the RAG pattern queries (e.g., source material for SAM agents to provide greater context in responses).
-
Parameters: LLM and workflow settings. Additional fields display here depending on which Type of agent you’re building.
-
-
-
Click Create Agent.
We recommend reviewing all of your setting to make sure everything is correctly saved and captured. Any formatting or spelling errors, especially in the Behavior & Settings section, should be updated before you continue. For example, an error in the Tools section could cause your function not to execute as expected or at all.
Test Your Agent
Once your agent is saved, we recommend testing it out to confirm it's working as expected.
-
From the Agents page, find the tile for your agent and click the Test button (you can also click Edit, and when your agent details appear, click Live Test at the top of the page).
-
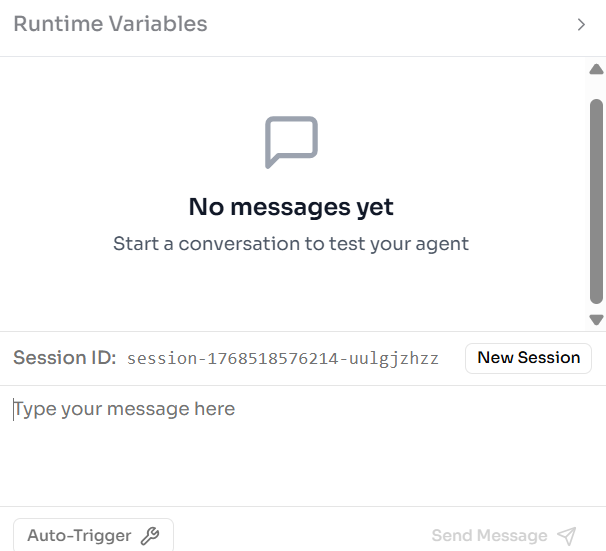
On the right side of the screen, fill in sample Runtime Variables with data relevant to your prompt.
-
Type a message in the text block and click Send Message.
-
Interact with the agent to confirm it's working as expected.
-
You can always tweak your configurations (on the left side of the screen) as needed.
-
Just remember to Save Changes to confirm any updates.
-
-
Click New Session to start a new conversation.
-
-
Once you’re happy with the performance of your agent you can close the agent and Publish it.
You can now do a full-scale evaluation of your agent using the Tasks page. We recommend performing thorough testing using tasks before integrating your agent with SmartFlows. Once all of the task metrics meet your use case specific thresholds, you can move on to incorporating your agent into a flow.
Tips and Best Practices
-
We recommend starting with the “GPT4o-mini” Model when building your agent.
-
Make sure you select the appropriate Type of agent. Remember:
-
The GPT Agent doesn't use knowledge collections.
-
The SAM Agent uses a knowledge collection.
-
The Block Agent uses a graph data structure with standardized prompting for more complicated agents.
-
The VM Detection Agent detects if an outbound phone call reaches a live person, voicemail, etc.
-
The Analysis Agent produces structured outputs of conversation metadata.
-
-
Double check your configurations to ensure there are no spelling or formatting errors that might cause your agent to perform unexpectedly or not function at all.
-
Make sure your System Prompt is clear and specific.
-
Make sure your Special Instructions are streamlined.
Integrating with SmartFlows
SmartFlows allows you to create automated workflows for a wide variety of use cases. By integrating an AI agent into a flow, you can enhance these workflows with advanced AI capabilities.
After your AI agent is configured and thoroughly tested, you can set up a flow to interact with your agent via the GenAI IVA action.
For more information about the AI Studio, check out: