IntelePeer Dynamic 911 Configuration Guide
IntelePeer is your one-stop shop for reliable voice communications, direct routing, and Dynamic 911 capabilities for multiple customer deployment types. Once you have telephone numbers added or ported into your IntelePeer Customer Portal account, you can add Dynamic 911 as a feature to your numbers.
The Dynamic 911 feature does away with the concept of one phone number tied to one location. Once your locations are established--including the use of wi-fi access points--anyone with a cellphone, laptop, or other device roaming anywhere on the corporate network can make a 911 call and have their location displayed to emergency services (PSAP) based on information coming through the call stream.
This document is intended to walk you through the process of adding and porting numbers into the IntelePeer system and adding Dynamic 911 features to your numbers. You can then use our Customer Portal to set up and manage the locations for your Dynamic 911 numbers.
If your implementation uses Microsoft Teams, check out this Direct Routing self-service guide.
For technical information on Dynamic 911, check out IntelePeer Dynamic 911 Location Routing.
Use these procedures to provision Dynamic 911 for emergency calls from your telephone numbers. Included in this topic are the procedures for working with your inventory numbers.
Before you begin the process of adding Dynamic 911 calling:
-
Your equipment must be capable of and configured correctly to send Dynamic 911 SIP headers in the SIP INVITE. Consult your equipment vendor for more information.
-
Define your company locations based on your existing equipment; this information is required so you can complete your configuration within our environment.
-
Make sure you have an IntelePeer customer account.
The provisioning steps in this section assist you in setting up the telephone numbers with Dynamic 911 service using IntelePeer. The location you enter is used for taxation purposes only. Emergency calls associated with the telephone number are routed based on the Dynamic 911 emergency calling information you provide:
-
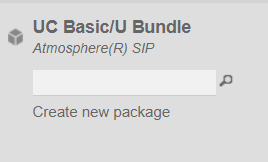
Sign into the IntelePeer Customer Portal. On the Home page, in the left sidebar, click the Unified Communications (UC) tile associated with the usage or user bundle package that you want to work with.
-
From the tile list, either click a package or click the Create New Package link.
-
If you selected Create New Package, the Create Package popup appears. Enter a package name that is significant to you, and click Create Package. The package name now appears in the bundle tile.
-
If you select a current package:
-
The dashboard appears showing current US domestic numbers in your inventory.
-
In the US Domestic Numbers section, click Manage or Add. If there are no numbers currently associated with this package, only the Add button is available.
-
At any time, in the left sidebar, click Inventory to see all the numbers associated with your account.
-
Note: You cannot manage your E911 numbers from your Customer Portal Home page. You must manage the numbers from one of your packages.
Important: If you try to move a number between packages with different 911 routing, a popup appears with Proceed and Cancel buttons explaining that your 911 routing will be removed, and you will have to re-add the service on the new package. Contact IntelePeer Customer Success if this is something you want to do.
-
If you clicked Manage:
-
On this page, select one or more phone numbers you want to work with. Click Select an Action to choose what you want to do with the numbers you selected. For this procedure, you can add or remove numbers from E911 designation.
-
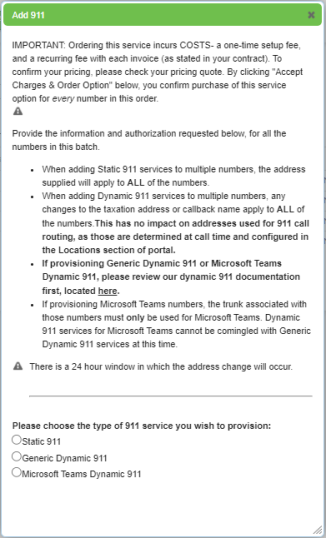
Click E911 Service: Add. The Add E911 popup appears.
-
Note: Carefully read the information on the popup as it may influence your selections.
-
Select one of the option: Static 911, Generic Dynamic 911, or Microsoft Teams Dynamic 911.
-
For the Static 911 option, the popup allows you to enter the emergency dispatch address for the telephone numbers. This address is applied to all telephone numbers you have selected. Also, for Static 911 numbers, the address you enter here is associated with the number for 911 calling / emergency service purposes.
-
For the Generic Dynamic 911 option, make sure the number you've chosen is configured for a non-MS Teams trunk. If it is, the note informs you that you won't be able to configure the number for Generic Dynamic 911. Otherwise, a popup (shown below) appears. If you need help, contact support@intelepeer.com.
-
For the Microsoft Teams Dynamic 911, make sure the numbers are configured for a MS Teams trunk. The popup explains your steps. If you need help, contact support@intelepeer.com.
-
-
If you clicked Add:
-
On the Provide Order Information page, select an order type from the menu: either Get New Numbers or Move/Port Current Numbers. Depending on your choice, fill in the form fields.
-
In the Add Optional Services section, when you select E911 Service, the Add E911 popup appears.
-
Note: Carefully read the information on the popup as it may influence your selections.
Select one of the 911 service options: Static 911, Generic Dynamic 911, or Microsoft Teams Dynamic 911.
Important: Special requirements are involved when selecting the Microsoft Teams Dynamic 911 option. For more information, check out the Microsoft Teams Direct Routing Self-Service Guide and Setting Up Microsoft Teams Dynamic 911 Direct Routing with IntelePeer.
-
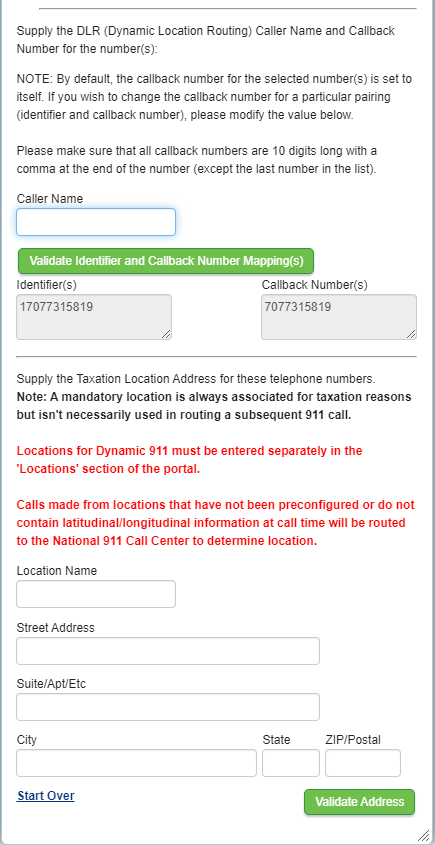
When you select an option, the Add E911 popup expands so you can add a caller name (optional), identifiers (optional), callback numbers (optional), and a taxation location address (required). See the previous image for details.
-
Read through the contents of the popup carefully as if may influence your selections.
-
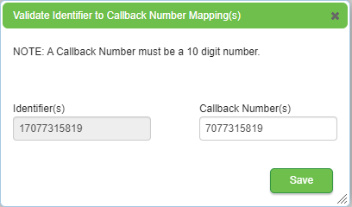
To make changes to a new E911 callback number, click Validate Indentifier and Callback Number Mappings. The Identifiers field is disabled. Make changes to the callback number and click Save.
-
The following is for existing Dynamic 911 telephone numbers types only. If you want to change the caller name, identifier, and callback numbers later, select the appropriate package list, select the number or numbers you want to change, select the 911 Service: Add or 911 Service: Change action, click Yes for Dynamic 911, and make changes in the popup.
-
Note: The address you enter here is not used in routing subsequent 911 calls. It is used for taxation purposes only.
Important: Locations for Dynamic 911 must be entered in the Customer Portal > Locations so that 911 calls can be routed to the locations identified in the call stream data. If no locations are configured, all calls will be routed to the National Emergency Call Center (ECC). For more information, see Setting Up and Managing Locations.
-
Click Validate Address. Select the appropriate address option, Try Again, or Start Over. If you selected an address option, click Confirm Emergency Address.
-
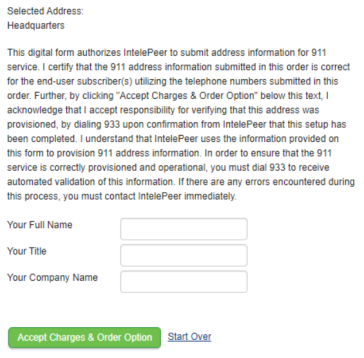
Once you confirm the emergency address, the popup expands so you can enter your full name, title, and company name. When you're done, click Accept Changes & Order Option. You return to the Provide Order Information page.
-
If you have completed editing this page, click Submit Order.
Note: If you have added numbers, they appear in your number inventory.
When you complete the order submission, you receive a digital signature email confirming the selections and changes you've made.
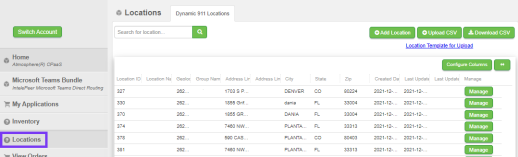
The IntelePeer Customer Portal provides you with the ability to add locations singly or upload a .csv file with all your locations for use in directing emergency services as a result of a Dynamic 911 call. The table provides a variety of information about each location, including Location ID, Geolocation ID, optional Group Name, created and last updated dates, as well as identifying the last person who made updates to the location.
You can also manage your locations to update information and delete locations.
To add Dynamic 911 locations:
-
Once you've logged into the Customer Portal, in the left sidebar, click Locations. The Dynamic 911 Locations tab provides you with a table showing all the locations you have entered.
Note: Required fields include Location Name, Street Address, City, State, and Zip/Postal. Optional fields include Location Name and Suite/Apt/Etc.
-
To enter a single location, click Add Locations, enter the information in the fields, and click Validate Address. If needed, select a correct emergency location from the validated options, and click Confirm Address.
-
To enter locations in bulk, click the Location Template for Upload link. Save the .csv file, and enter information for each of your locations. Save the file, and click Upload CSV to add your locations to the table.
Requirements for the .csv file (otherwise you receive an error message):
-
A header row with one or more rows of data
-
No empty or duplicate headers
-
No white spaces in the headers
Note: You can also click Download CSV to review the file and update your locations.
-
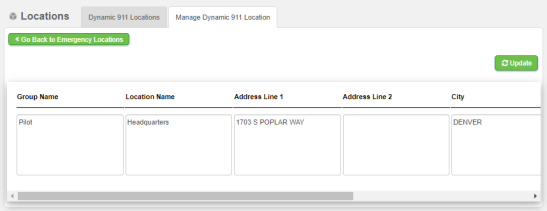
To make changes to any locations in the table, click Manage for the location row. On the Manage Dynamic 911 Locations popup, you can:
Make changes to any of the fields, and click Update.
At the end of the row, click the Delete icon to remove a location from the table.
Note: A location associated with an endpoint (for taxation purposes) can't be deleted unless the endpoint is first updated to remove the associated location.
Once changes have been made, in the table, view the Last Updated column to see the person who made the last edits to the location.
To edit location information:
-
In the Customer Portal, click Locations.
-
On the Dynamic 911 Locations page, search for the location you want to make changes to.
-
At the end of the row for the location, click Manage.
-
On the Manage Dynamic 911 Location page, make your changes in the fields, and click Update.
Note: The Locations page is updated with the changes as well as the name of the person who made the changes.
To delete a location:
-
In the Customer Portal, click Locations.
-
On the Dynamic 911 Locations page, search for the location you want to make changes to.
-
At the end of the row for the location, click Manage.
-
At the end of the row of fields, click the Delete icon. In the Delete Location popup, click Yes, Delete.
Contacting Support
The IntelePeer Customer Success team is available during normal business hours should you run into any issues. Contact us at customersuccess@intelepeer.com.