Solutions Hub Quick Start Guide
This guide describes how to use the Solutions Hub app. Learn more about:
Note: This app is currently only available for select customers. For more information, contact your CSM or Account Manager.
Overview
The Solutions Hub is your centralized location for account analytics and management. Currently only available for accounts using our Dental Service Organization (DSO) product, this app provides insights into important interaction metrics, a view of all your locations, and account user information, all in one place.
Getting Started
Log in to your IntelePeer account through the IntelePeer Customer Portal (https://customer.intelepeer.com).
From the homepage, click the Solutions Hub tile to open the app.

Learning the Landscape
When you open the Solutions Hub, you're automatically brought to the Dashboards page.
On the left-hand side of the screen a menu allows you to navigate between the different Solutions Hub pages.
-
Dashboard: Displays interaction metrics in helpful graphics.
-
Locations: Lists details about locations associated with your account.
-
Admin: Collects information about your account users and an audit trail of their actions.
-
Global Defaults: Set default configurations for your locations.
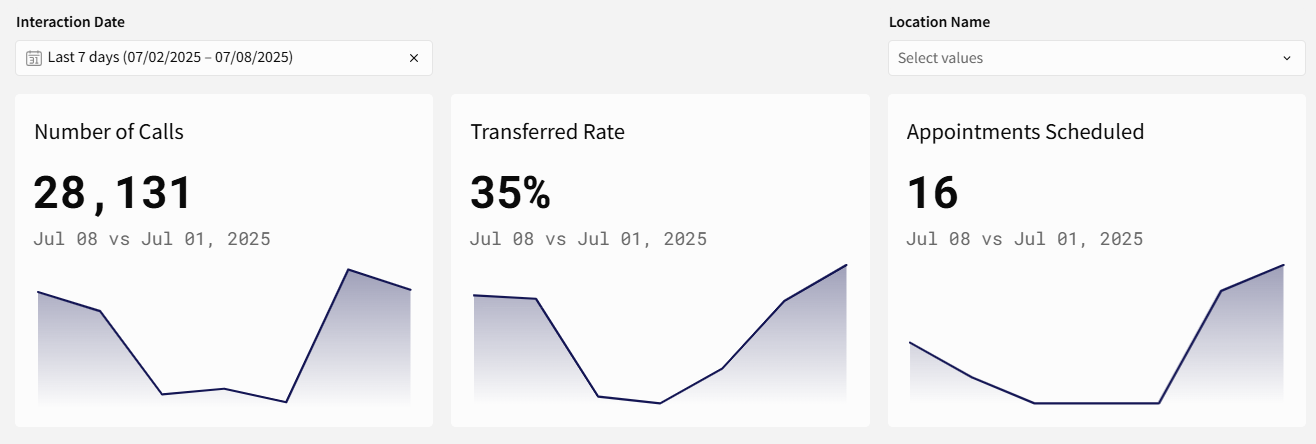
The Dashboard Page
Interaction analytics are displayed on the Solutions Hub Dashboard page.
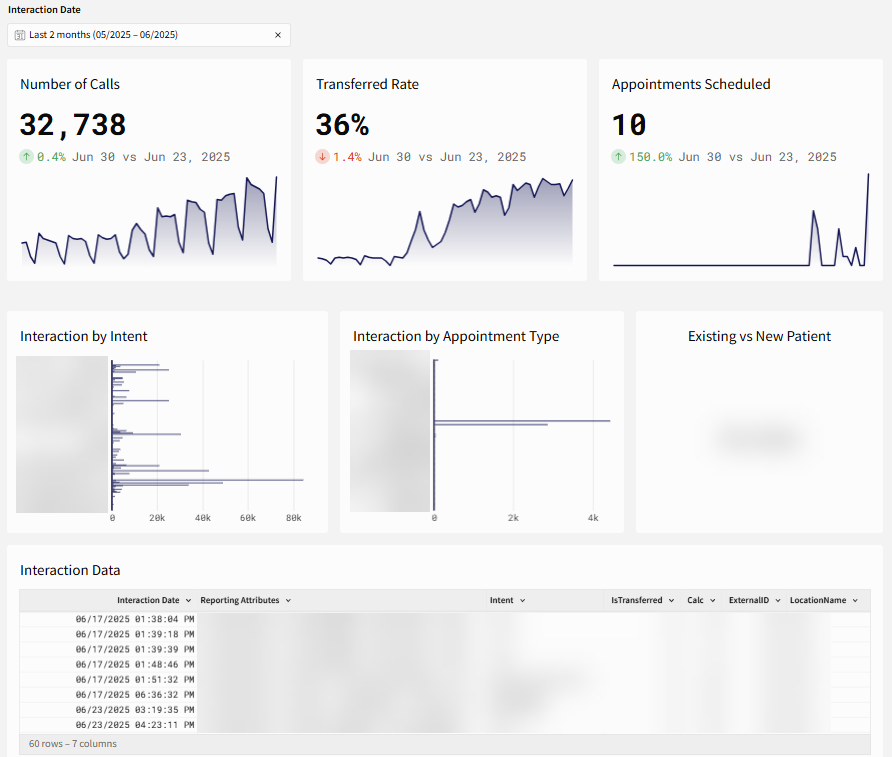
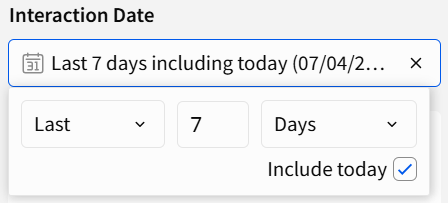
Click on the Interaction Date to update time frame for your metrics.
Hover over an element tile to view the Expand and data options. The Filter icon also appears for some elements, allowing you to further customize the element.
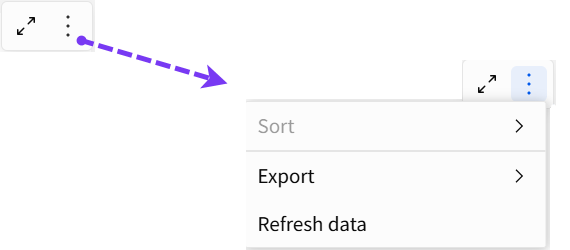
When you expand an element, you can view underlying data points for that metric.

The Locations Page
On the Locations page you can add new locations or edit, view, search for, and add tags to existing locations under your account.

Click on the carrots next to a column heading to sort the table results by ID or Name.
Select one or more locations (via the circle on the far left of the table) to assign Tags to a location.
Click the Filter icon on the far right side of the table to customize the locations by assigned Tags.
Add a New Location
-
Click Add New Location above the table.
-
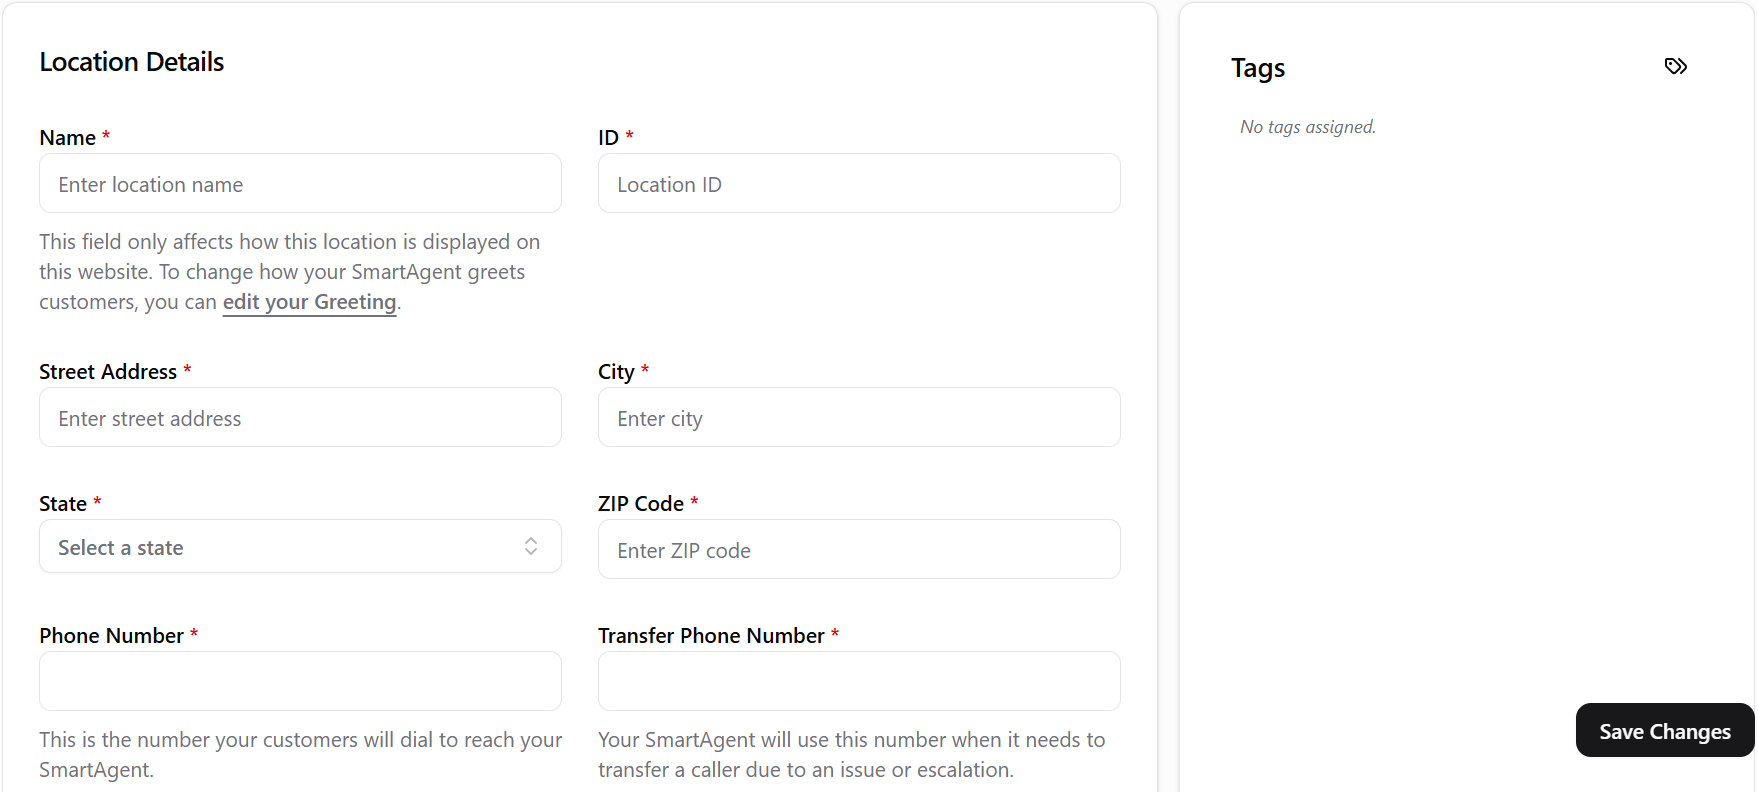
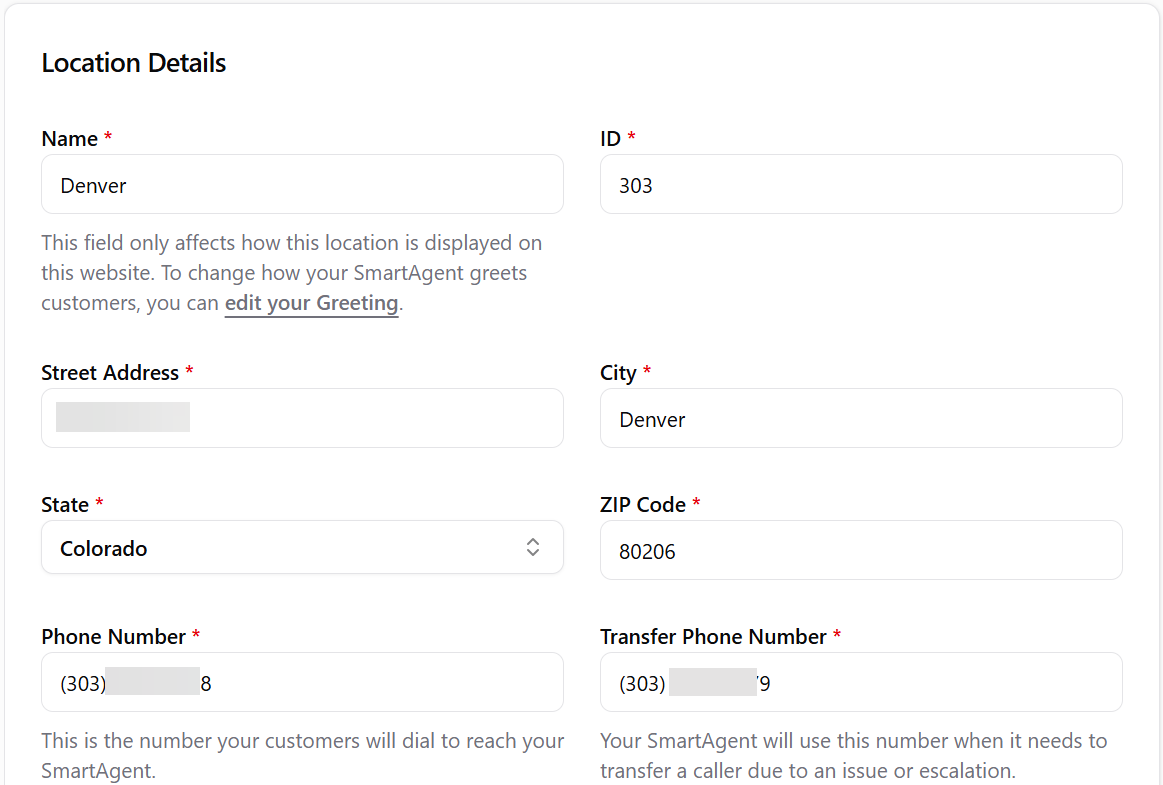
The Location Details page appears.
-
Fill in all of the details about your location.
-
Locations Details: High-level information about your location (Name, Address, Phone Number, Tags, etc.).
-
Basic Settings: Business information like supported languages, agent name, time zone.
-
Appointment Management: Enable or disable agent appointment features (scheduling, confirmations, cancellation window, minimum patient age, appointment types, accepted insurance, etc.).
-
Prompting: Customize your agent's voice and messages (pick a custom voice, create standard greeting and transfer messages, etc.).
-
Knowledge base: Provide information about your location, business, and services to help the agent provide accurate responses (FAQ information could include office hours, how to schedule an emergency appointment, accepted forms of payment, etc.).
-
-
Click Save Changes. Your new location appears in the table.
Note: You can also click on an existing location in the table and then select the Clone Location button at the top of the Location Details page to create a new location based on an existing entry.
Edit a Location
-
Click on an entry in the locations table.
-
The Location Details page appears.
-
May any necessary updates.
-
Click the Save Changes button.
The location configuration is updated.
Delete a Location
-
Click the check box on the far left of a location entry.

-
From the Location Selected drop-down list above the table, click Delete Selected.

-
A confirmation pop-up appears. Click Delete to permanently delete the location (or click Cancel to keep the location).
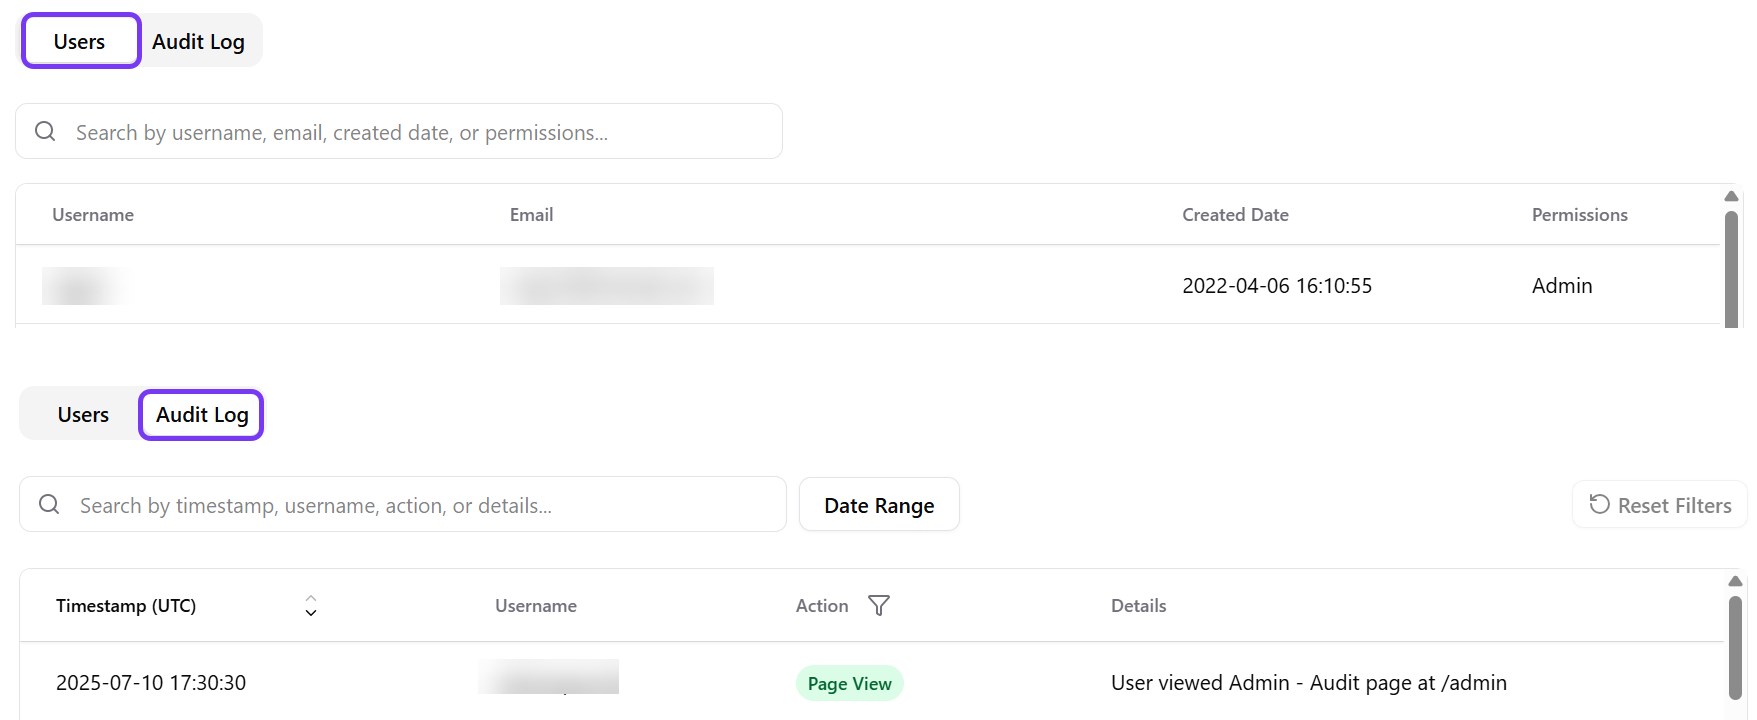
The Admin Page
On the Admin page you can view your Users and Audit Log, switching between the two via the toggle at the top of the page.
The Global Defaults Page
On the Global Defaults page you can create default configurations and push them to your locations.
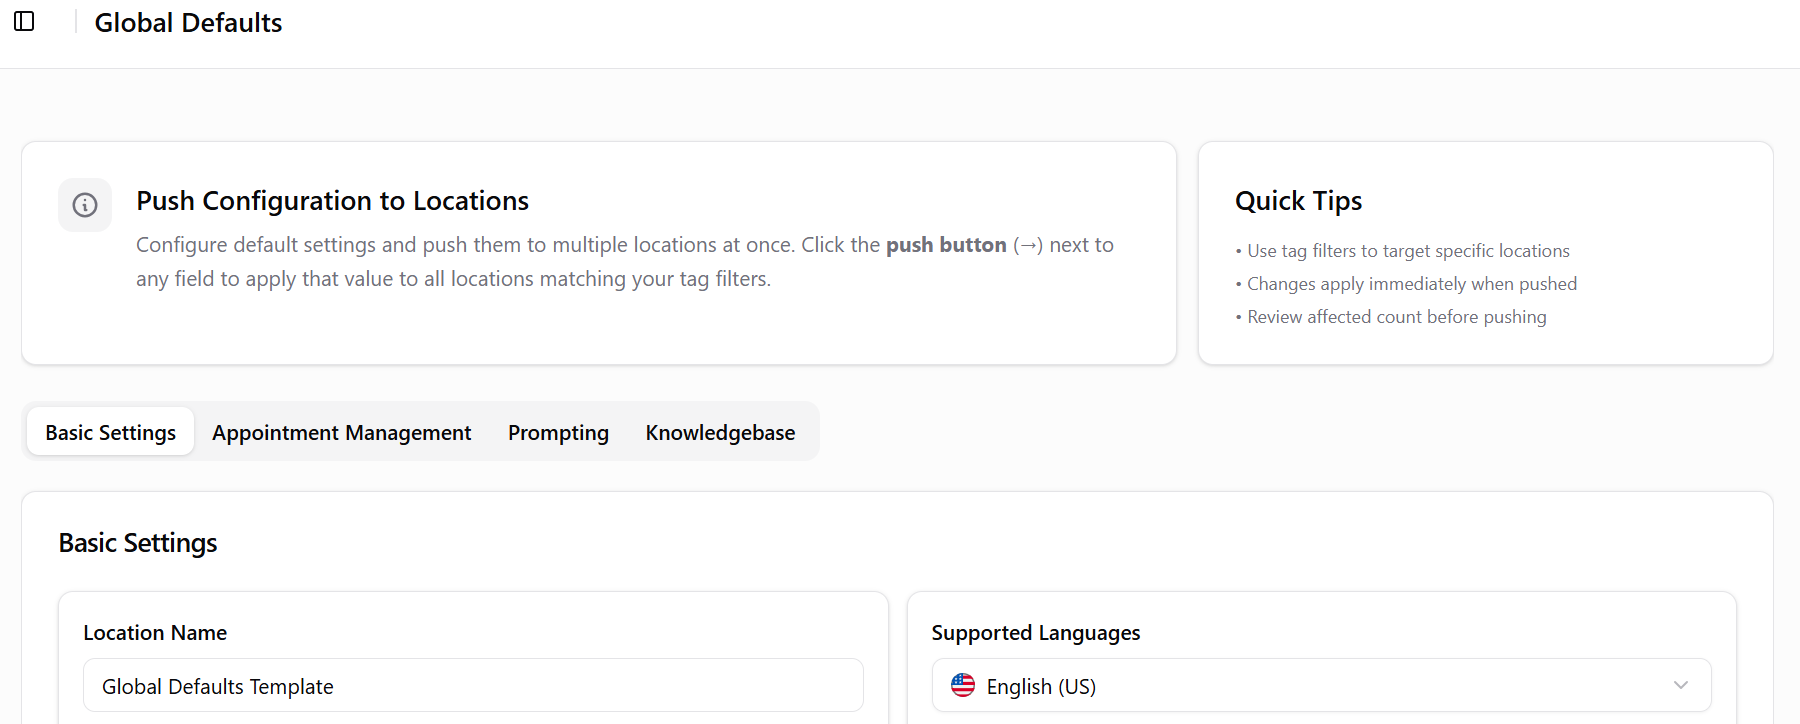
Defaults can be pushed to all or a subsection of locations, and you can always update a default value for a specific location via the Locations page. A green "Customized" label will appear next to any field where the defaults were updated.