Managing and Using Subaccounts
In the Customer Portal, you can choose whether you would like to separate CPaaS resources—like Flows, campaigns, and lists, as well as data resulting from SmartFlows transactions—by subaccount or maintain enterprise-level ownership of all resources.
By default, all CPaaS resources are owned by the parent enterprise account rather than the specific subaccount that they may be created in. The billing account can be assigned to each subaccount to determine how usage is invoiced (on the main billing account or separately by subaccount).
Note: If you are interested in setting up sub-accounts for your enterprise, contact IntelePeer via email: customersuccess@intelepeer.com.
To assign CPaaS resources to a subaccount:
-
Log into the Customer Portal.
-
In the left sidebar, click Enterprise Settings.
-
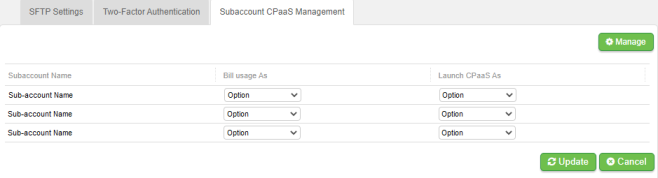
Click the Sub-account CPaaS Management tab. On this tab, you can view the billing and CPaaS launch settings for each subaccount.
-
Click Manage. The Bill Usage As and Launch CPaaS As column change to provide menus to make changes to these subaccount settings. Click the field to open the menu and choose another option.
-
In the Launch CPaaS As column, define whether to launch CPaaS as the main account or subaccount. This governs the ownership of resources and the visibility of those resources (SmartFlows, Lists, Campaigns).
Note: If you choose the resources to launch as the sub-accounts, when you work at the parent level—the enterprise that manages the sub-accounts—you must switch to the individual subaccount to manage its resources.
-
Once you complete your changes, click Update.
Note: Changes in the Launch CPaaS As field doesn’t impact historical ownership, only ownership going forward.
-
To select a subaccount to work with, on the Consumer Portal Home page, in the left sidebar, click Switch Account and select the subaccount from the menu. The page title changes, and the contents show the subaccount data.