Mailjet
Integrating Mailjet with SmartFlows.
Getting Started
You will need:
- Mailjet account with a verified email
- SmartFlow with an external web call that you can test
- Text document for easy copying and pasting
The easiest way to get started is by signing up using the email address that you want to use in your emails from SmartFlows. However, there is a section to add and verify other addresses. You must have access to check those emails so that you can verify your ownership before you can send messages from them.
Account Information and Sender Address
Click on the down arrow next on the top right and select Account Information.
On the left you will see an area to add a sender domain or address. If you want to add an address that is different from the one you used to sign up, this is the section to use. Check to make sure that the email address you want to use is in the Addresses table with a status of Active.
API Keys
You will need your API keys to set up an email in SmartFlows. From the Account Information section, in the REST API box, click Master API Key & Sub API key management.
Grab the API key and the secret key and put them on your text document. You will need them to configure your SmartFlow.
Send API Sample Code
Sample code for the Send API is available. To use it, click the Transactional menu in the top navigation and select Send API from the list of options.
Grab everything starting with the opening curly bracket on line 7 up to the closing curly bracket at the end of the code snippet and put it in your text document. Change the email in the To section to an email address you can check to test receipt of the email.
Note: you can change the email in From to the verified email associated with your account or you can use the default to test (pilot@mailjet.com).
SmartFlows Configuration
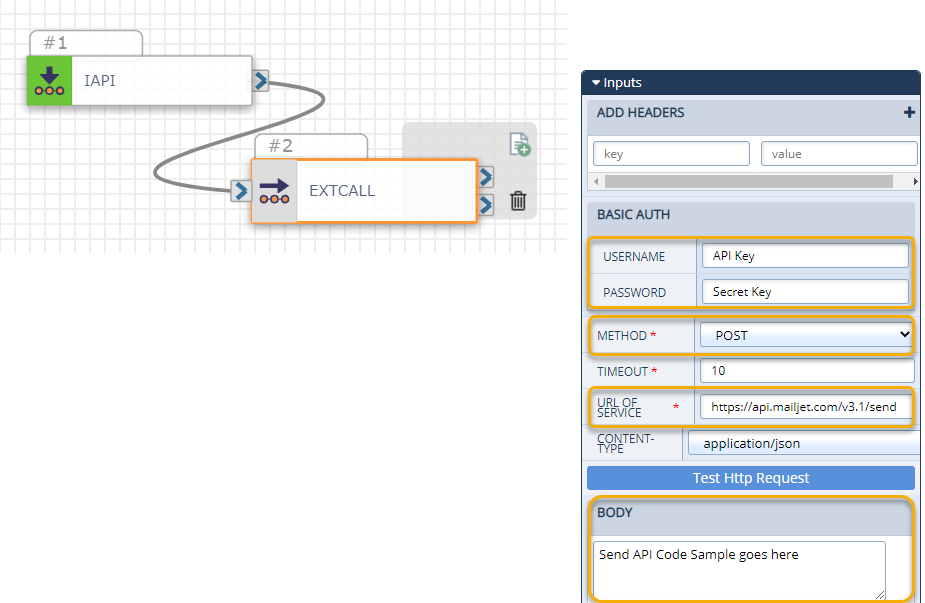
Go to your SmartFlow and open the external web call action. Make the following configurations:
- Add your API Key into the Username field
- Add your Secret key into the Password field
- Add the sample code into the Body
- Set Method to POST
- Set URL of Service to https://api.mailjet.com/v3.1/send
Save and deploy your flow. You should have received an email at the address you used in the To section above. Congrats, you just integrated email into your omnichannel workflow!
Next Steps
Once you see that your flow is working, you can get creative with the message in the request body. Mailjet has a lot more documentation about how you can personalize your messages, like templates you can set up for layout, headers, images, and other design elements specific to your company. You can also go to the Stats menu in the top navigation to see statistics about delivery and open rate.