Sending Mailgun Emails from SmartFlows via AWS
Overview
To send email from SmartFlows using Mailgun, you need the following:
- AWS Identity and Access Management (IAM) permissions for Lambda to execute the API call.
- npm and Node.JS installed on your local machine
- A Mailgun Account.
- A Lambda function with logic for sending email via Mailgun API
Note: The example Lambda function code in Node.js is provided as-is. Adapt the example to your use case or design your own in your preferred programming language.
Configure Mailgun
Follow Mailgun’s Quick Start Guide. Your API Key and Domain are needed in future steps.
Install Mailgun Dependencies Locally
- Download the Mailgun dependency files.
- Create a new Node.js package.
- Install the Mailgun package to your new package.
- Add the following code to the index.js file:
Copy
var aws = require('aws-sdk');
const https = require('https'),
config = require('./config.json'),
mailgun = require('mailgun-js')({apiKey: config.MAILGUN_API_TOKEN, domain: config.MAILGUN_DOMAIN})
exports.handler = (event, context, callback) => {
data = {
from: event.from,
to: event.to,
subject: event.subject,
text: event.text
};
mailgun.messages().send(data, (error, body) => {
console.log(body);- Create a .zip file with your package.
Create an AWS Lambda Function
- Open the AWS Lambda Console.
- Choose Create a function.
- For Function name, enter my-email-function.
- Choose Create function.
- Select Upload a .zip file from Code Entry Type.
- Upload your Mailgun Package.
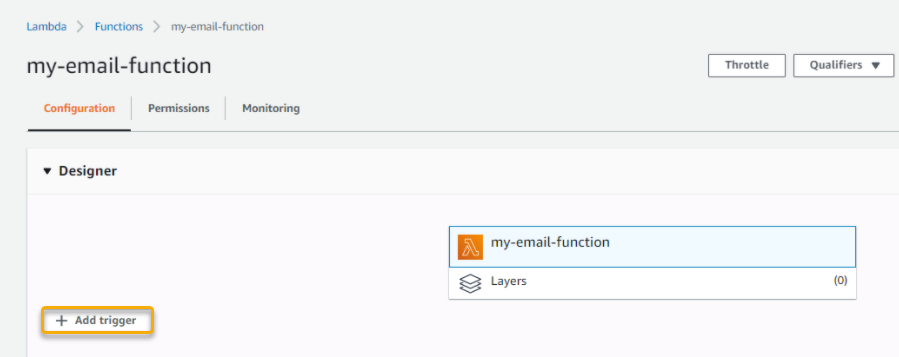
Add an API Trigger
- Select Add Trigger.
- Select API Gateway from the dropdown.
- Select Create a New API from the API Dropdown.
- Select the REST API template.
- Click Add.
Update Your SmartFlow
- Add an External Web Call action to your flow.
- Configure the action as follows:
METHOD: POST
URL OF SERVICE: URL created in API Gateway
CONTENT-TYPE: application/json
BODY
Copy
{
"toEmailAddress": "Enter the email address of the recipient",
"fromEmailAddress": " A verified Amazon SES identity (domain or email address).",
"subject": "My test email subject",
"text": "Hello from SmartFlows"
}- Save and Deploy your flow.
You can now activate your flow and an email should be generated.