How to Integrate KPIs
This guide describes how to use Key Performance Indicators (KPIs) with Block Agents. Learn more about:
Overview
Integrate KPIs into a Block Agent to automatically collect metrics during the course of your agent interactions. By including KPI components within an Edge, you can collect important data each time an Edge is “true”, providing valuable insights into your agent’s performance and customer experience.
Before You Begin
To capture KPIs in your Block Agent, they must already exist in SmartFlows.
Note: If you have KPI components configured in your Block Agent but they haven’t been created in SmartFlows yet, your workflow will proceed as expected but no KPIs will be collected.
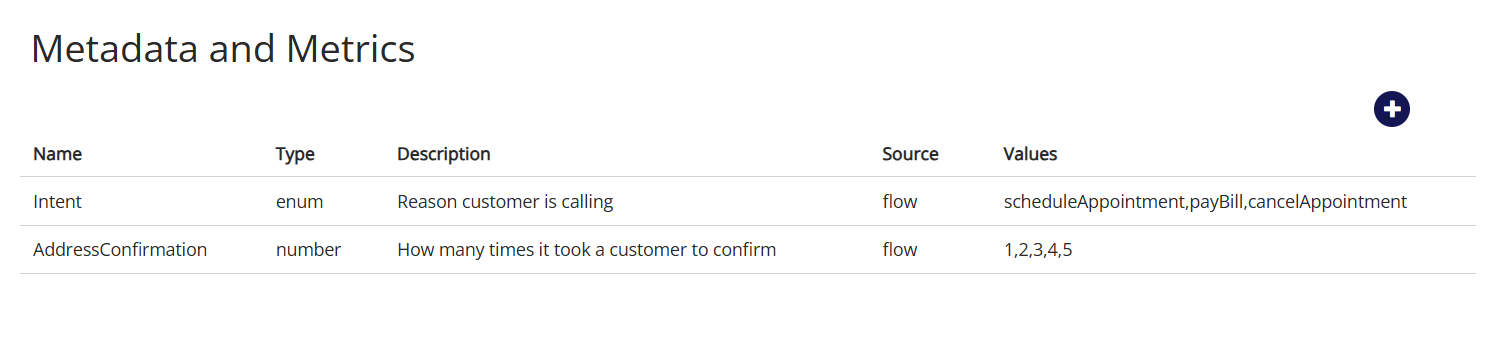
View Existing KPIs
-
From the Customer Portal, open SmartFlows.
-
Select "Report Metadata" from the menu on the left-hand side of the screen.
-
The Metadata and Metrics page appears. Scroll through or search the table to view your existing KPIs.
Create a New KPI
Note: If your use case requires the creation of many new KPIs, you can submit a bulk request to the Data Team.
-
On the Metadata and Metrics page, click the blue plus sign above the table, on the right.
-
The Create KPI Definition pop-up opens.
-
Complete the required fields. We also recommend providing a helpful summary in the optional Description field.
-
Click Save.
For more information about the SmartFlows KPI fields or the Metadata and Metrics page, check out this page.
Gather Your KPI Elements
We recommend taking note of the KPI elements from SmartFlows so they match your Block Agent KPI component elements. The table below list the KPI fields that must be an exact match to link your existing KPI with the Block Agent KPI.
|
SmartFlows KPI Element |
Block Agent KPI Property |
|---|---|
| Name |
kpi_name |
| Type |
kpi_type |
Note: If you edit your KPI Name or Type in SmartFlows later, you will need to update your Block Agent KPI properties to match the new values.
Block Agent KPI Properties
KPIs are defined within an Edge, and metrics are gathered when the Edge is followed. For example, if we follow “edge_id”: “3” when a customer is calling to make an appointment, that Edge might have an associated Intent KPI gathering the metric of a call about appointment scheduling.
KPIs include the following properties:
|
Property |
Description |
|---|---|
|
kpi_name |
The name of your KPI. |
|
kpi_id |
A unique identifier for your KPI. |
|
value |
The content/value of the KPI. |
|
kpi_type |
The format of the KPI. |
|
soure_id |
The origin of the value. |
|
default |
Defines the value used when the source is missing or empty. |
|
data |
Depends on the KPI source. If your source is tools, you can provide the specific parameter name defined in the tool, or, use tool.{tool_name} to send the entire object captured by the tool. |
Sample KPI
kpis:
	- kpi_name: Interaction:Intent
	  kpi_id: 1105626-global-Interaction:Intent
	  value:
		default: Schedule
		source: static
	  kpi_type: string
	  metadata: ''
	  source_id: global
	- kpi_name: Interaction:IntentUtterance
	  kpi_id: 1105626-global-Interaction:IntentUtterance
	  value:
		default: ''
		source: tools
		data: intent_utterance
	  kpi_type: string
In this example, the first KPI captures the detected intent as a static value ("Schedule"). The second captures the actual user utterance from the tool call, enabling analysis of how users express specific intents.
Tips
-
Make sure your agent and the KPIs you want to include are all created under the same account.
-
Always make sure your “default” value matches your KPI datatype (“kpi_type”). For example, with the intent KPI example a default of “true” wouldn’t make sense.
-
We recommend using descriptive, upper camel case in KPI names (e.g., “InteractionIntent”).
-
If you include a KPI within a loop Edge, each time the loop Edge evaluates to true, the KPI will be evaluated.